11 KiB

Progcrypto 2023: TLSNotary Workshop
This workshop will help you get started with TLSNotary, both in native Rust and in the browser.
- Most Basic Example: Proving and Verifying Public Data (Rust)
- Proving and Verifying a Private Discord DM (Rust)
- Proving and Verifying ownership of a Twitter account (Browser)
Objectives of this workshop:
- Gain a better understanding of what you can do with TLSNotary
- Learn the basics of how to prove and verify data using TLSNotary
Setup
Clone Workshop Repository
Clone this repository:
git clone https://github.com/tlsnotary/progcrypto_workshop.git
Next open the progcrypto_workshop folder in your favorite IDE.
Install Rust
If you don't have Rust installed yet, you can install it using rustup:
curl --proto '=https' --tlsv1.2 -sSf https://sh.rustup.rs | sh
To configure your current shell, run:
source "$HOME/.cargo/env"
Simple Example: Notarizing Public Data from example.com (Rust)
We will start with the simplest possible use case for TLSNotary:
- Fetch https://example.com/ and create a proof of its content.
- Verify the proof.
Next, we will redact the content and verify it again:
- Redact the
USER_AGENTand titles. - Verify the redacted proof.
1. Notarize https://example.com/
Run a simple prover:
cargo run --release --example simple_prover
Note: You can also run the simple_prover by clicking the ▶️ Run button in VS Code. However, this will run without the --release flag by default, and the execution will be significantly slower.

If the notarization was successful, you should see this output in the console:
Listening on: 127.0.0.1:8080
Connected to the Notary
Accepted connection from: 127.0.0.1:64072
Starting an MPC TLS connection with the server
Got a response from the server
Notarization completed successfully!
The proof has been written to `simple_proof.json`
2. Verify the Proof
When you open simple_proof.json in an editor, you will see a JSON file with lots of non-human-readable byte arrays. You can decode this file by running:
cargo run --release --example simple_verifier
This will output the TLS-transaction in clear text:
Successfully verified that the bytes below came from a session with Dns("example.com") at 2023-11-03 08:48:20 UTC.
Note that the bytes which the Prover chose not to disclose are shown as X.

Bytes sent:
...
3. Redact Information
Open simple/src/examples/simple_prover.rs and locate the line with:
let redact = false;
and change it to:
let redact = true;
Next, if you run the simple_prover and simple_verifier again, you'll notice redacted X's in the output:
cargo run --release --example simple_prover
cargo run --release --example simple_verifier
<!doctype html>
<html>
<head>
    <title>XXXXXXXXXXXXXX</title>
...
You can also use https://tlsnotary.github.io/proof_viz/ to inspect your proofs. Open https://tlsnotary.github.io/proof_viz/ and drag and drop simple_proof.json from your file explorer into the drop zone.

Redacted bytes are marked with red █ characters.
(Optional) Extra Experiments
If the above steps were easy for you and you are waiting for others, feel free to try these extra challenges:
- Modify the
server_name(or any other data) insimple_proof.jsonand verify that the proof is no longer valid. - Modify the
build_proof_with_redactionsfunction insimple_prover.rsto redact more or different data.
Notarizing Private Information: Discord Message (Rust)
Next, we will use TLSNotary to generate a proof of private information: a private Discord DM.
We will also use an explicit (locally hosted) notary server this time.
1. Start a Local Notary Server
The notary server used in this example is more functional compared to the (implicit) simple notary service used in the example above. The simple notary version is easier to integrate from a prover's perspective, whereas this notary server provides additional features like TLS connection with the prover, WebSocket endpoint, API endpoints for further customization, etc.
cd notary
cargo run --release
The notary server will now be running in the background waiting for connections.
Keep it running and open a new terminal.
2. Get Authorization Token and Channel ID
In the main folder, copy a .env.example file and name it .env.
In this .env, we will input the USER_AGENT, AUTHORIZATION token, and CHANNEL_ID.
| Name | Example | Location |
|---|---|---|
| USER_AGENT | "Mozilla/5.0 (X11; Ubuntu; Linux x86_64; rv:109.0) Gecko/20100101 Firefox/116.0" |
Look for User-Agent in request headers |
| AUTHORIZATION | "MTE1NDe1Otg4N6NxNjczOTM2OA.GYbUBf.aDtcMUKDOmg6C2kxxFtlFSN1pgdMMBtpHgBBEs" |
Look for Authorization in request headers |
| CHANNEL_ID | "1154750485639745567" |
URL |
You can obtain these parameters by opening Discord in your browser and accessing the message history you want to notarize.
NOTE: ⚠️ Please note that notarizing only works for short transcripts at the moment, so choose a contact with a short history.
Next, open the Developer Tools, go to the Network tab, and refresh the page. Then, click on Search and type /api to filter results to Discord API requests. From there, you can copy the needed information into your .env as indicated above.
You can find the CHANNEL_ID directly in the URL:
https://discord.com/channels/@me/{CHANNEL_ID)

3. Create Proof
Next, run the discord_dm example to generate a proof:
RUST_LOG=debug,yamux=info cargo run --release --example discord_dm
If everything goes well, you should see this output:
...
2023-11-03T15:53:51.147732Z DEBUG discord_dm: Notarization complete!
The Notary server should log:
2023-11-03T15:53:46.540247Z DEBUG                 main ThreadId(01) run_server: notary_server::server: Received a prover's TCP connection prover_address=127.0.0.1:56631
...
2023-11-03T15:53:46.542261Z DEBUG tokio-runtime-worker ThreadId(10) notary_server::service: Starting notarization... session_id="006b3293-8fba-44ac-8692-41daa47e4a9a"
...
2023-11-03T15:53:51.147074Z  INFO tokio-runtime-worker ThreadId(10) notary_server::service::tcp: Successful notarization using tcp! session_id="006b3293-8fba-44ac-8692-41daa47e4a9a"
If the transcript was too long, you may encounter the following error. This occurs because there is a default limit of notarization size to 16kB:
thread 'tokio-runtime-worker' panicked at 'called `Result::unwrap()` on an `Err` value: IOError(Custom { kind: InvalidData, error: BackendError(DecryptionError("Other: KOSReceiverActor is not setup")) })', /Users/heeckhau/tlsnotary/tlsn/tlsn/tlsn-prover/src/lib.rs:173:50
The Discord example code redacts the auth_token, but feel free to change the redacted regions.
The proof is written to discord_dm_proof.json.
Verify
Verify the proof by dropping the JSON file into https://tlsnotary.github.io/proof_viz/ or by running:
cargo run --release --example discord_dm_verifier
Great job! You have successfully used TLSNotary in Rust.
NOTE: ℹ️ Leave the local notary server running for the next part of this workshop: testing the Browser extension. The MPC between the prover and the notary requires a lot of bandwidth, certainly too much for all of us to use a publicly hosted notary server at the same time.
(Optional) Notarize More Private Data
If the examples above were too easy for you, try to notarize data from other websites such as:
- Amazon purchase
- Twitter DM
- LinkedIn skill
- Steam accomplishment
- Garmin Connect achievement
- AirBnB score
- Tesla ownership
TLSNotary Browser Extension
TODO: Proof ownership of a Twitter account with TLSNotary's browser extension
Install Browser Extension (Chrome/Brave)
- Download the browser extension from https://github.com/tlsnotary/tlsn-extension/releases/download/0.0.1/tlsn-extension-0.0.1.zip
- unzip
⚠️ This is a flat zip file, so be careful if you unzip from the command line, this zip file contains many file at the top level - Open Manage Extensions: chrome://extensions/
- Enable
Developer mode - Click the Load unpacked button
- Select the unzipped folder

(Optional:) Pin the extension, so that it is easier to find in the next steps:

Run a Local Proxy
TODO: why we need a local proxy
git clone https://github.com/novnc/websockify && cd websockify
./docker/build.sh
docker run -it --rm -p 55688:80 novnc/websockify 80 api.twitter.com:443
We have to jump through one more hoop: Because the local notary server is using a self-generated certificate, we have manually allow the certificate in our browser:
- Visit https://127.0.0.1:7047 or https://localhost:7047 in a new browser tab
- click Advanced and next **Proceed to 127.0.0.1 (unsafe)
This will manually override the ssl check on the local notary server and allow the extension to interact with it.


Note that the page will show "This site can’t be reached" or "127.0.0.1 refused to connect". This is OK, we only need your browser to accept the local certificate.
Notarize Twitter Account Access
-
Open Twitter https://twitter.com and login if you haven't yet.
-
open the extension, you should see a box titled "Twitter Profile"
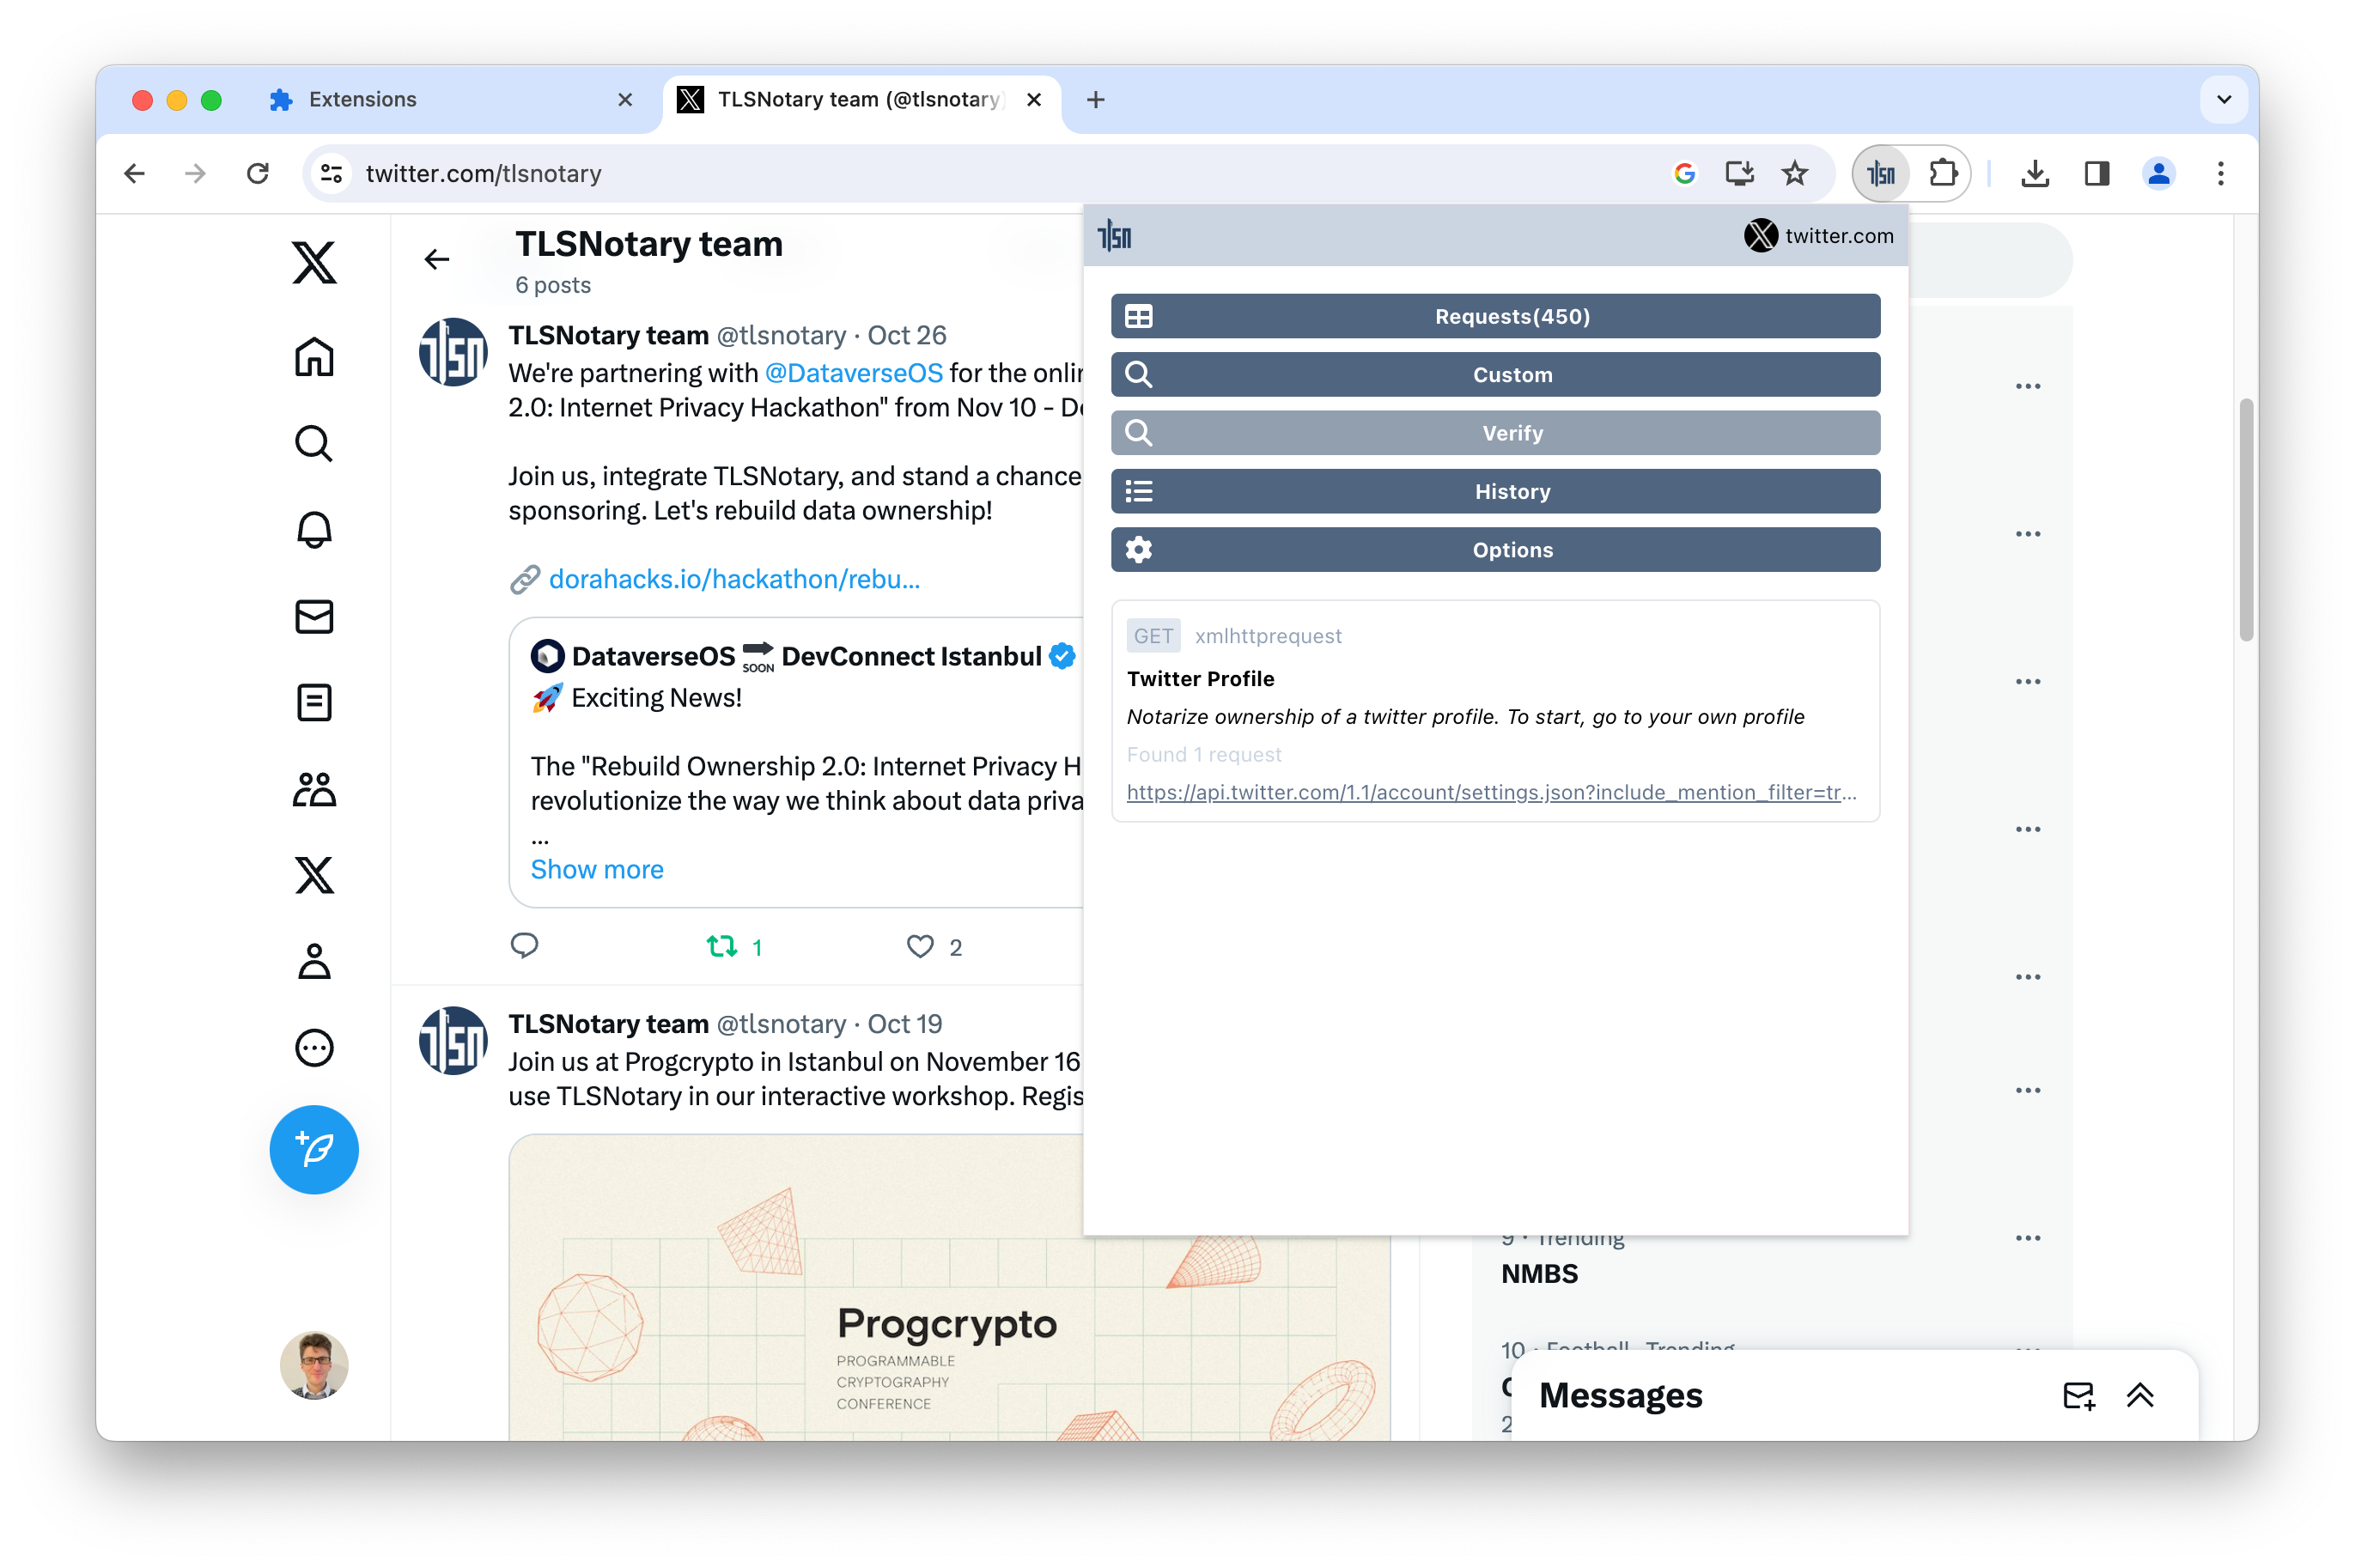
-
click Notarize
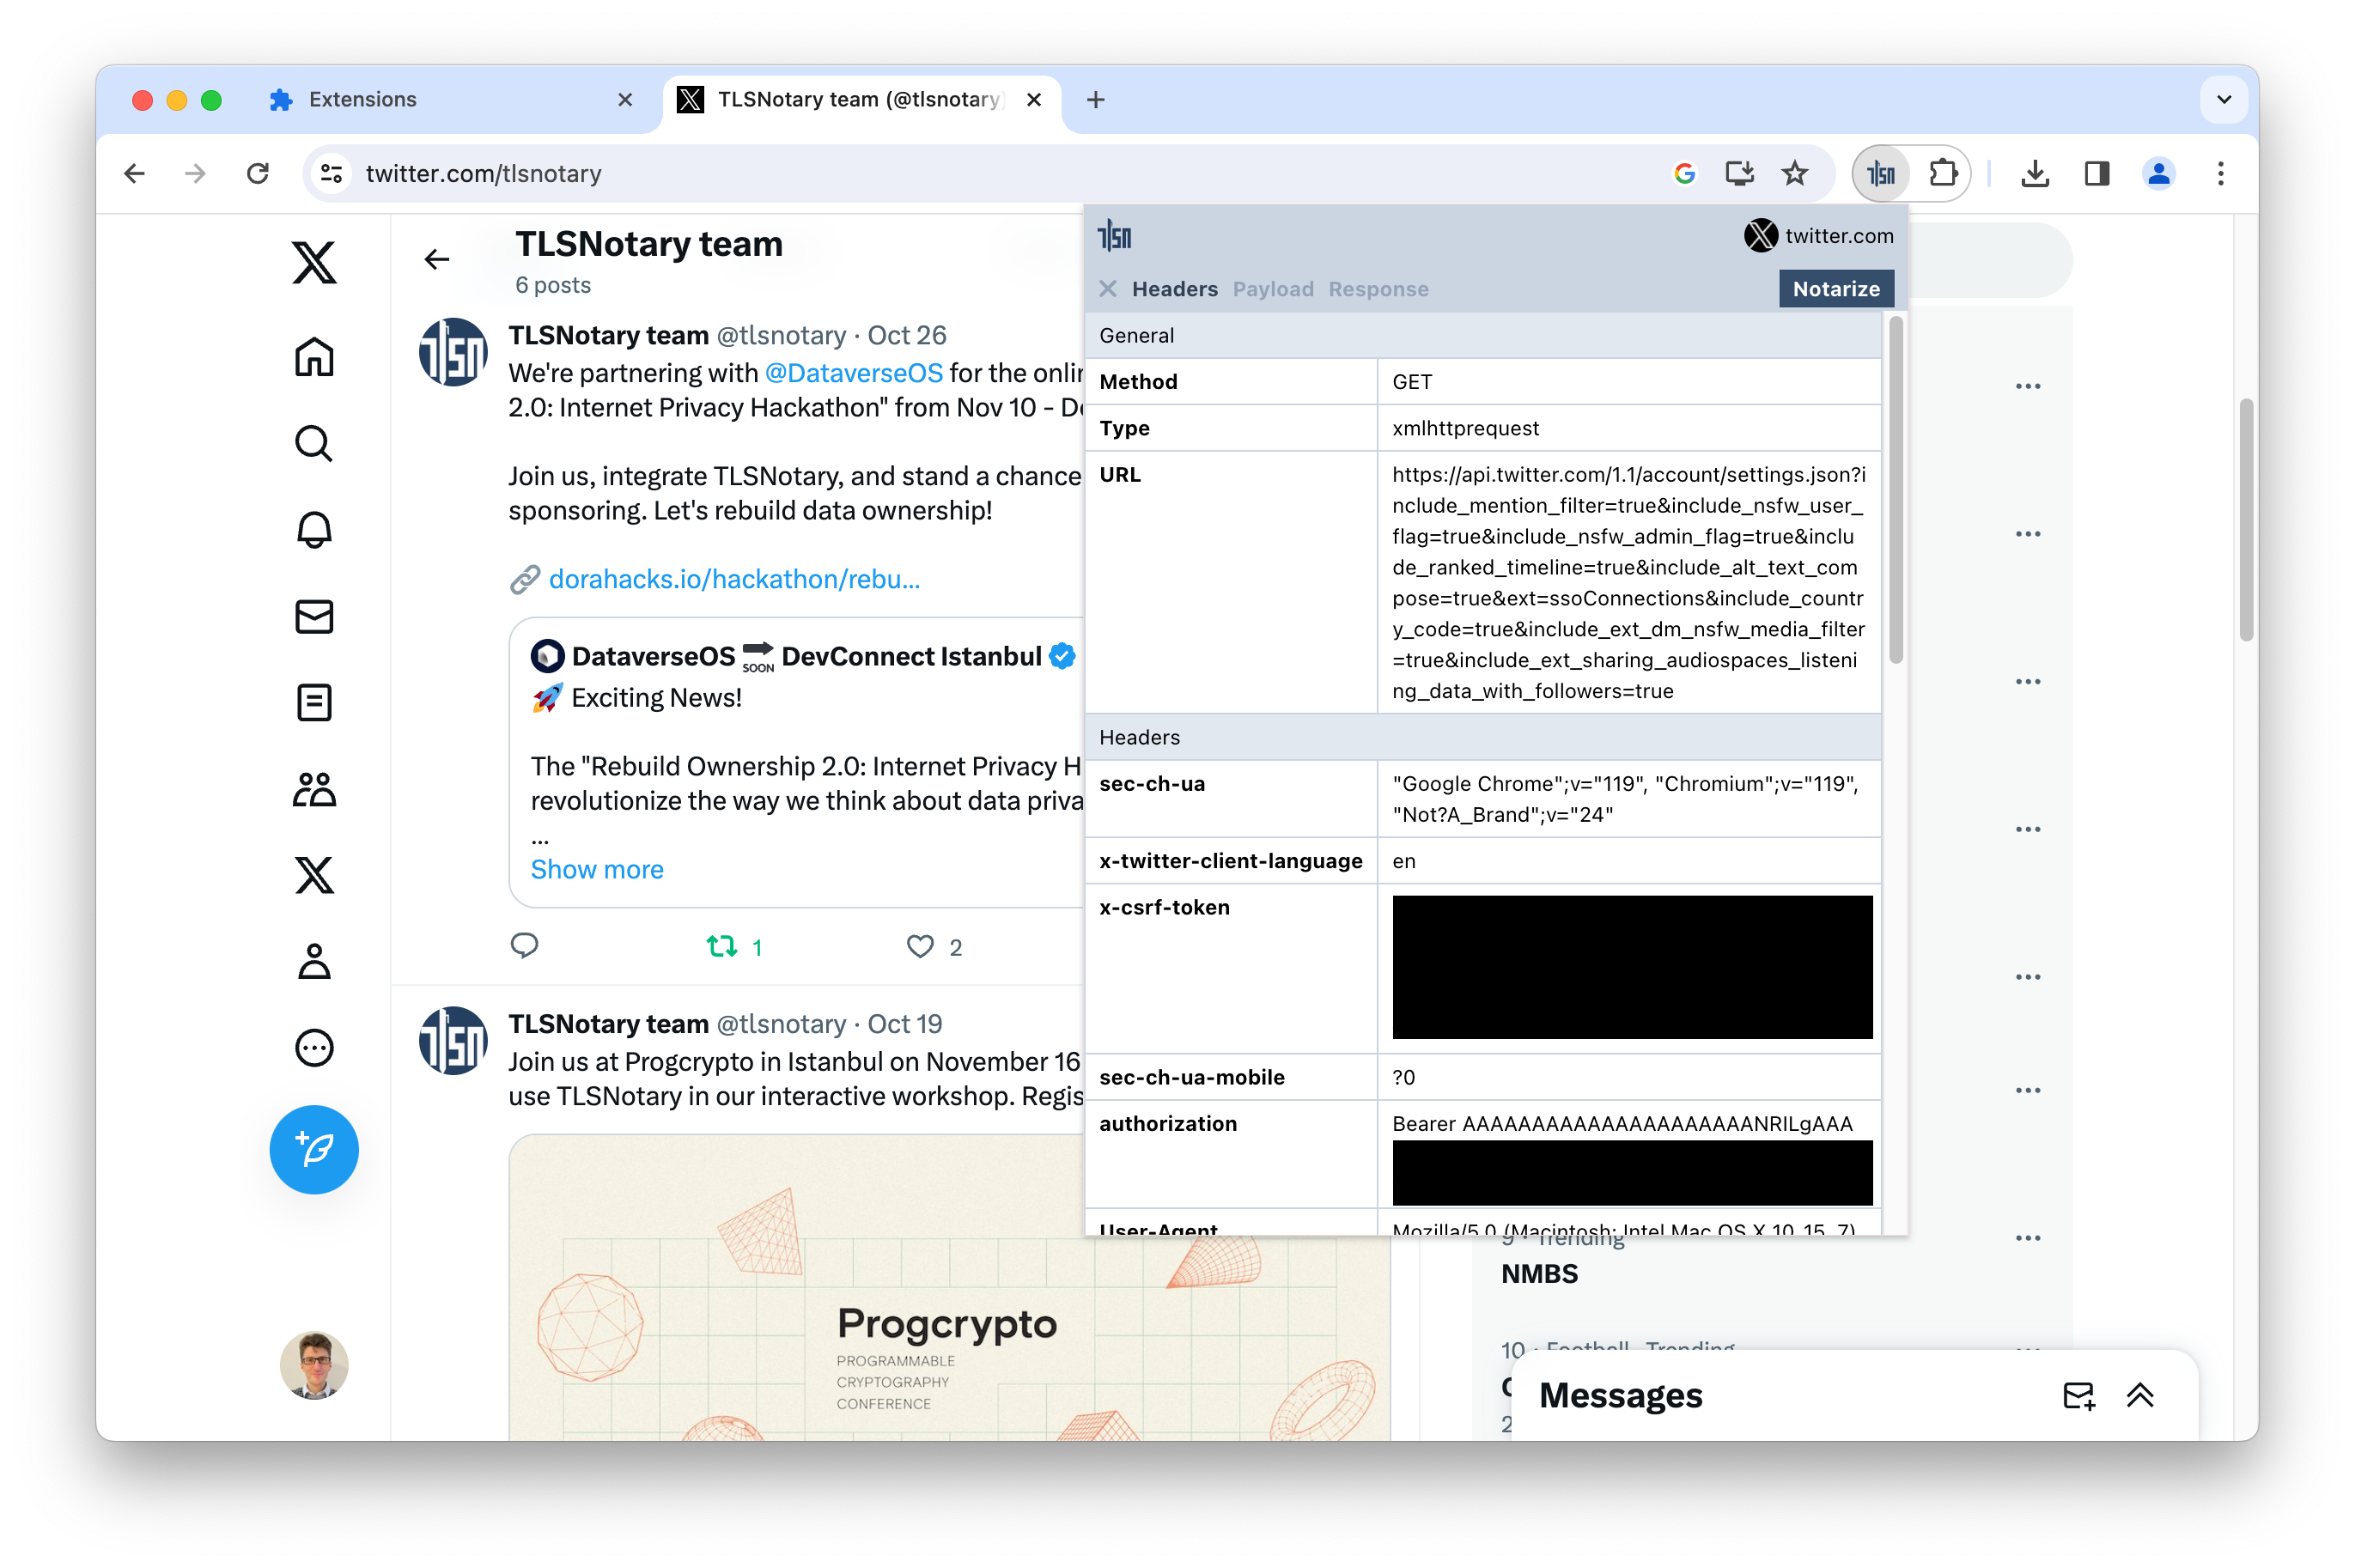
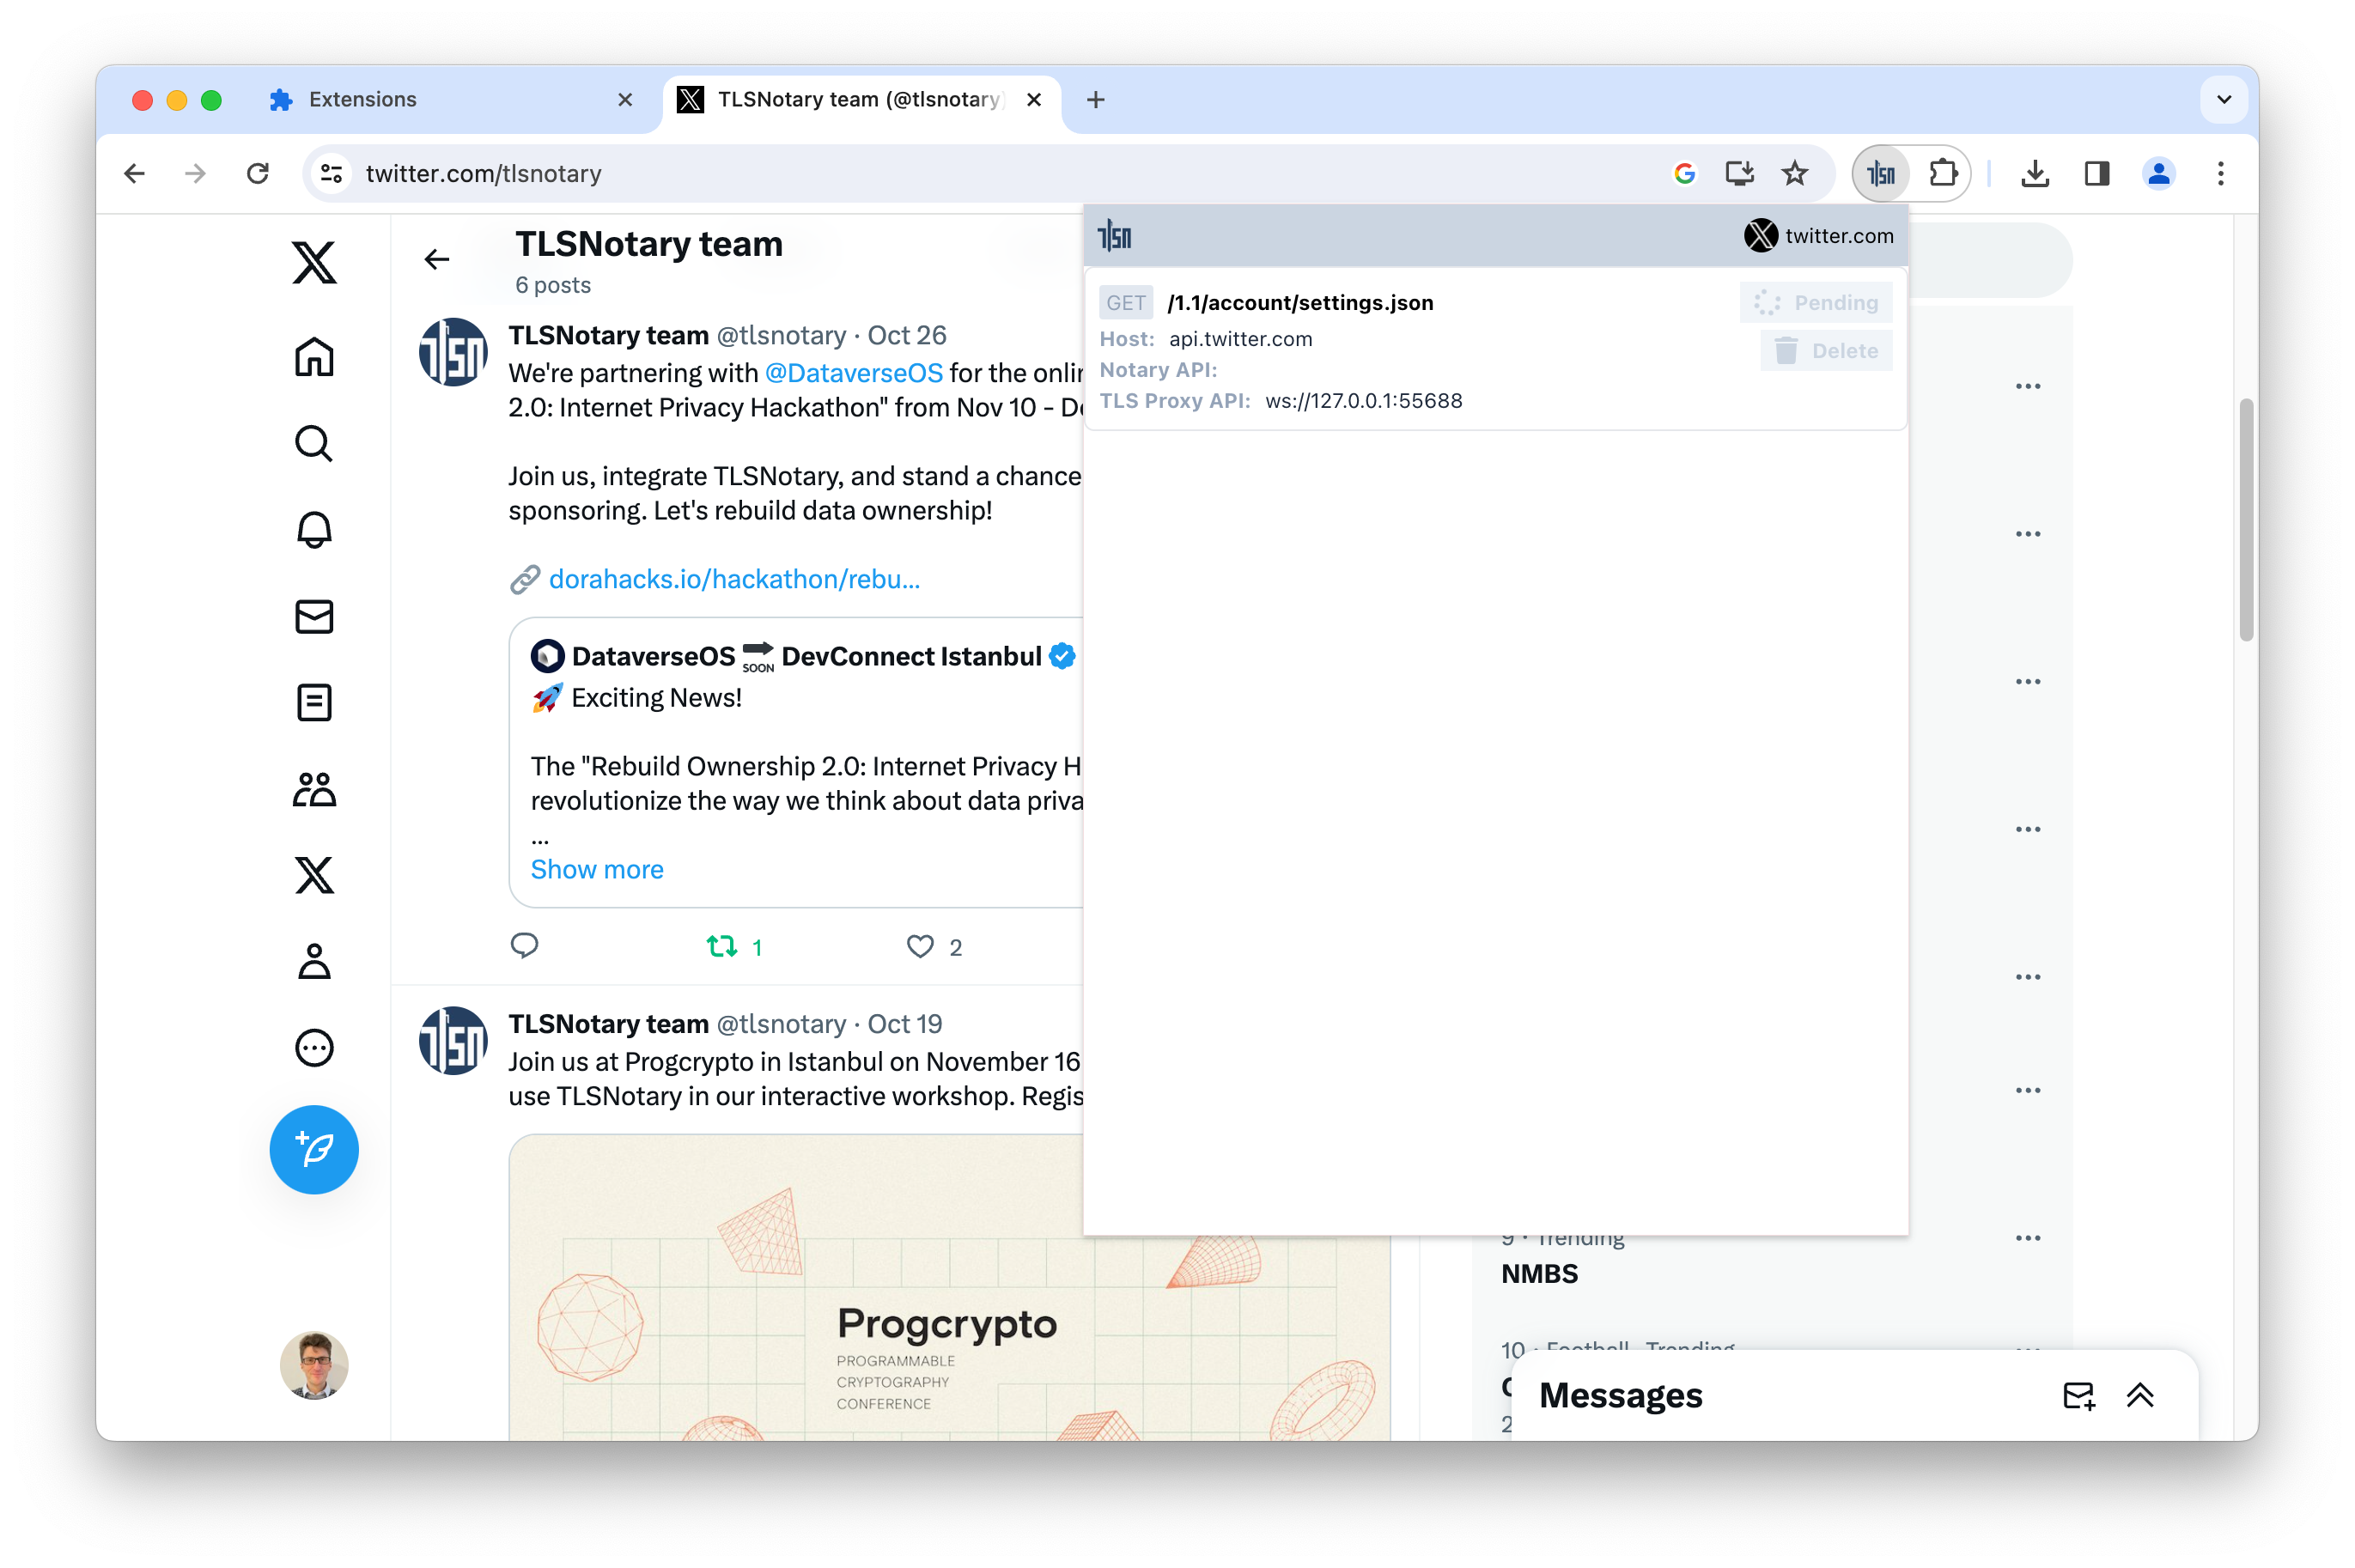


now you should see that the request is being made.
You can open the offscreen console and observe the browser extension logs by going to chrome://extensions -> TLSN Extension -> Details -> offscreen.html
Verify
When the notarization is ready, you can click View Proof.
If you did close the UI, you can find the proof by clicking History and View Proof.

You also have the option to download the proof. You can view this proof later by using the Verify button or via https://tlsnotary.github.io/proof_viz/.
Troubleshooting
- Did you allow the locally generated notary certificate? link
- Requests(0): no requests in the Browser extension => restart the TLSN browser extension in chrome://extensions/ and reload the Twitter page.
- Is the notary server still running? It should, check the console log.