* .gitignored package-lock.json that was created in the docs subfolder

* added cloud section structure

* set initial article outlines

* drafter accts-teams and shifted cloud docs in navbar

* added overview and projects draft

* added tiers and billing outline and basics

* added image to drafts and polished text. needs one more pass. added css for dngr on icons

* Added photos to overview

* minor tweak on images

* imrpoved copy and expanded CSS for inline icons

* expnaded CSS and, added images and finished copy on  acct-n-team

* more copy touchups

* Add divider between cloud and regular docs

* Fix capitalization of Github -> GitHub

* fixed overview images and tweaked copy

* recructured pages. Added writing tasks on appropriate pages

* added accts, options, and teams pages

* Overview intro (re)written)

* overview initial copy

* Overview first draft complete, links not added, media not added

* accounts initial draft complete, no media

* teams redrafted, projects and options partial refactoring

* projects redrafted

* finalized 5th page as glossay and reformatted

* refactored glossary structure

* glossary terms p1

* glossary copy 80% complete

* more glossary copy

* cloud glossary basic copy probably 100% done

* checked hyperlinks

* initial proofread on overview

* initial accounts proofread

* re-edited billing sections

* re-editec projects section and glossary

* re-edited teams

* small edits

* edited accounts, teams, projects

* re-edited glossary

* added screenshot-based media, still need graphic illustrations

* small, tiny edits

* fixed GitHub capitalization and other small type error

* applied ben's edit suggestions on overview, accounts, and 1/2 of projects

* applied the rest of Ben's edits

* added missing screenshots

* proof-read

* Fixed Team proejcts title

* tweaked copy after my ~10 questions to ben

* reworked 'projects > create a project' sections and 'glossary > data-processing' section

* final copy touchup, link check, still missing Rijk's review

Co-authored-by: rijkvanzanten <rijkvanzanten@me.com>
Co-authored-by: Eron Powell <eronpowell@Erons-MBP-2.local>
Co-authored-by: Eron Powell <eronpowell@Erons-MBP-2.hitronhub.home>
11 KiB
Cloud Projects
Cloud Projects are individual instances of Directus, managed within a Team. Community, Standard, and Enterprise tier Projects are available, with each offering different options for infrastructure, configuration, and professional services.
A Cloud Project is a Directus Instance, the Infrastructure it runs on, as well as all its data and file assets. All Cloud Projects come quota-free and include all Cloud Exclusives. See Support Options to find out how to get help on your Project.
There are 3 different Project tiers on Directus Cloud: Community, Standard, and Enterprise. A side-by-side comparison of what is included in each tier can be found on the Pricing Page.
See the Overview to learn how Accounts, Teams and Projects interrelate.
View a Team's Projects

All of a Team's Projects are listed on the Projects Page. For each Project, the following information and shortcuts are provided. On Project creation, the provisioning progress will be displayed until fully complete. The icon on the far left indicates whether it is online, offline or paused. Next to this, the Project Name and Project Slug are given. On the right, the Project tier is displayed, followed by shortcuts which allow you to edit edit and launch access the Project. To view a Team's Projects, follow the steps below.
- Open the Team Menu in the Dashboard Header and select the desired Team.
- Click "Projects".
Create a Community Project

The Community tier offers a completely free Directus Project, perfect to spin-up hobby projects, demo Directus Cloud, test a proof of concept or any other non-production activity. Community Projects come with the following configurations.
- Project Name — Custom. This can be changed at any time with no impact on the Project.
- Project URL — Random URL:
aa3i82.directus.app. This cannot be changed. - Datacenter Region —
United States, East. - Node Type — Community Node.
- Load Balancing — One Active Node.
- Auto-Scaling — Not Available.
- Starting Template — Create an Empty Project or a Demo Project with dummy data.
To create a Community Project, follow the steps below.
- Open the Team Menu in the Dashboard Header and select the desired Team.
- Click "Projects".
- Click "Create Project".
- Set the Project Name.
- Select the Community tier.
- Scroll to the bottom of the screen and choose a Starting Template.
- Click "Create Project".
:::tip Project Name
The Project Name displays within Directus Cloud. This can be changed at any time and is purely for organizational purposes, it has no impact on the Project itself.
:::
:::tip Standard Tier
Need a production-ready Project that can scale as needed?
Create a Standard Project.
:::
Create a Standard Project

The Standard tier is perfect for most production-ready use cases. These Projects come with custom URLs, daily backups, and better Nodes that can be scaled up and down as needed.
Standard Projects come with the following configuration options.
- Project Name — Custom. This can be changed at any time with no impact on the Project.
- Project URL — Custom URL:
your-custom-url.directus.app. This cannot be changed. - Datacenter Region —
United States, EastorEurope, Frankfurt. - Node Type — General Purpose or Performance Tier Nodes.
- Load Balancing — 1-6 Active Nodes.
- Auto-Scaling — 0-5 Standby Nodes.
To create a Standard Project, follow the steps below.
- Open the Team Menu in the Dashboard Header and select the desired Team.
- Click "Projects".
- Click the Team you wish to create a Project under.
- Click "Create Project".
- Set the Project Name as desired.
- Select the Standard tier.
- Set the configuration options as desired.
- Click "Proceed to Checkout". You will be taken to a checkout page.
- Enter payment information and hit "Subscribe".
:::tip Enterprise Tier
Need even more power, scale, customization and support?
Upgrade to an Enterprise Project.
:::
Create an Enterprise Project
Enterprise tier offers power and scale to meet any Project's needs, 19 Datacenter regions, upgraded support options, and much more.
:::tip Ready to to go Enterprise?
:::
Access a Project
At some point, you will want to login and access the actual managed Project. You can go the Project's URL directly. There also are two ways to access a Project from within the Cloud Dashboard. To access a Project from the Cloud Dashboard, follow the steps below.
- Open the Team Menu in the Dashboard Header and click the desired Team.
- Click "Projects" to enter the Projects Page.
From here, there are two ways to access a Project:
From the Projects Page
- Click launch on the desired Project. Your Project login page will open in a new tab.
From Project Monitor Page
- Click a Project to enter its Project Monitor Page.
- Click "Open Project". Your Project login page will open in a new tab.
Monitor a Project
Graphs on the Project Monitor Page display daily Project information over the last month. The four graphs on this page may help inform Node configuration decisions.
- Combined Node Usage
Total load placed on all Nodes. If CPU or memory are overloaded, the Node could crash! High usage is a sign it is time to scale up. - Horizontal Scaling
Number of Standby Nodes activated. If one or more Standy Nodes are frequently activated, it may be time to add more Active Nodes. - API Requests
Number of API requests. This provides basic insight into traffic cycles, including overall volatility. If there are huge spikes in traffic, it may be wise to configure more Standby Nodes. - API Bandwidth
The read/write bandwidth. If bandwidth is high, it may be beneficial to vertically-scale with Performance Tier or Enterprise Nodes in order to better handle the larger volume of data.
To access the Project Monitor Page, follow the steps below.
- Open the Team Menu in the Dashboard Header and click the desired Team.
- Click "Projects" to enter the Projects Page.
- Click the Project to enter the Project Monitor Page.
Manage a Community Project

On Community Projects, the only option available is to change the Project's Name. To manage a Community Project, follow the steps below.
- Open the Team Menu in the Dashboard Header and click the desired Team.
- Click "Projects" to enter the Projects Page.
- Click the Project to enter the Project Monitor Page.
- Click "Edit" to enter the Project Details Page.
- Change Project Name as desired.
- Click "Update Project".
Manage a Standard Project

On Standard Projects, it is possible to change the Project Name as well as reconfigure the Node Type, number of Active Nodes and number of Standby Nodes.
- Open the Team Menu in the Dashboard Header and click the desired Team.
- Click "Projects" to enter the Projects Page.
- Click the Project to enter the Project Monitor Page.
- Click "Edit" to enter the Project Details Page.
- Make changes as desired.
- Click "Update Project".
Manage an Enterprise Project
Each Enterprise Project is customized, and as such, cannot be managed from the Cloud Dashboard. The Project will be managed in tandem with the Directus Core Team.
:::tip Ready to to go Enterprise?
:::
Resume a Community Project
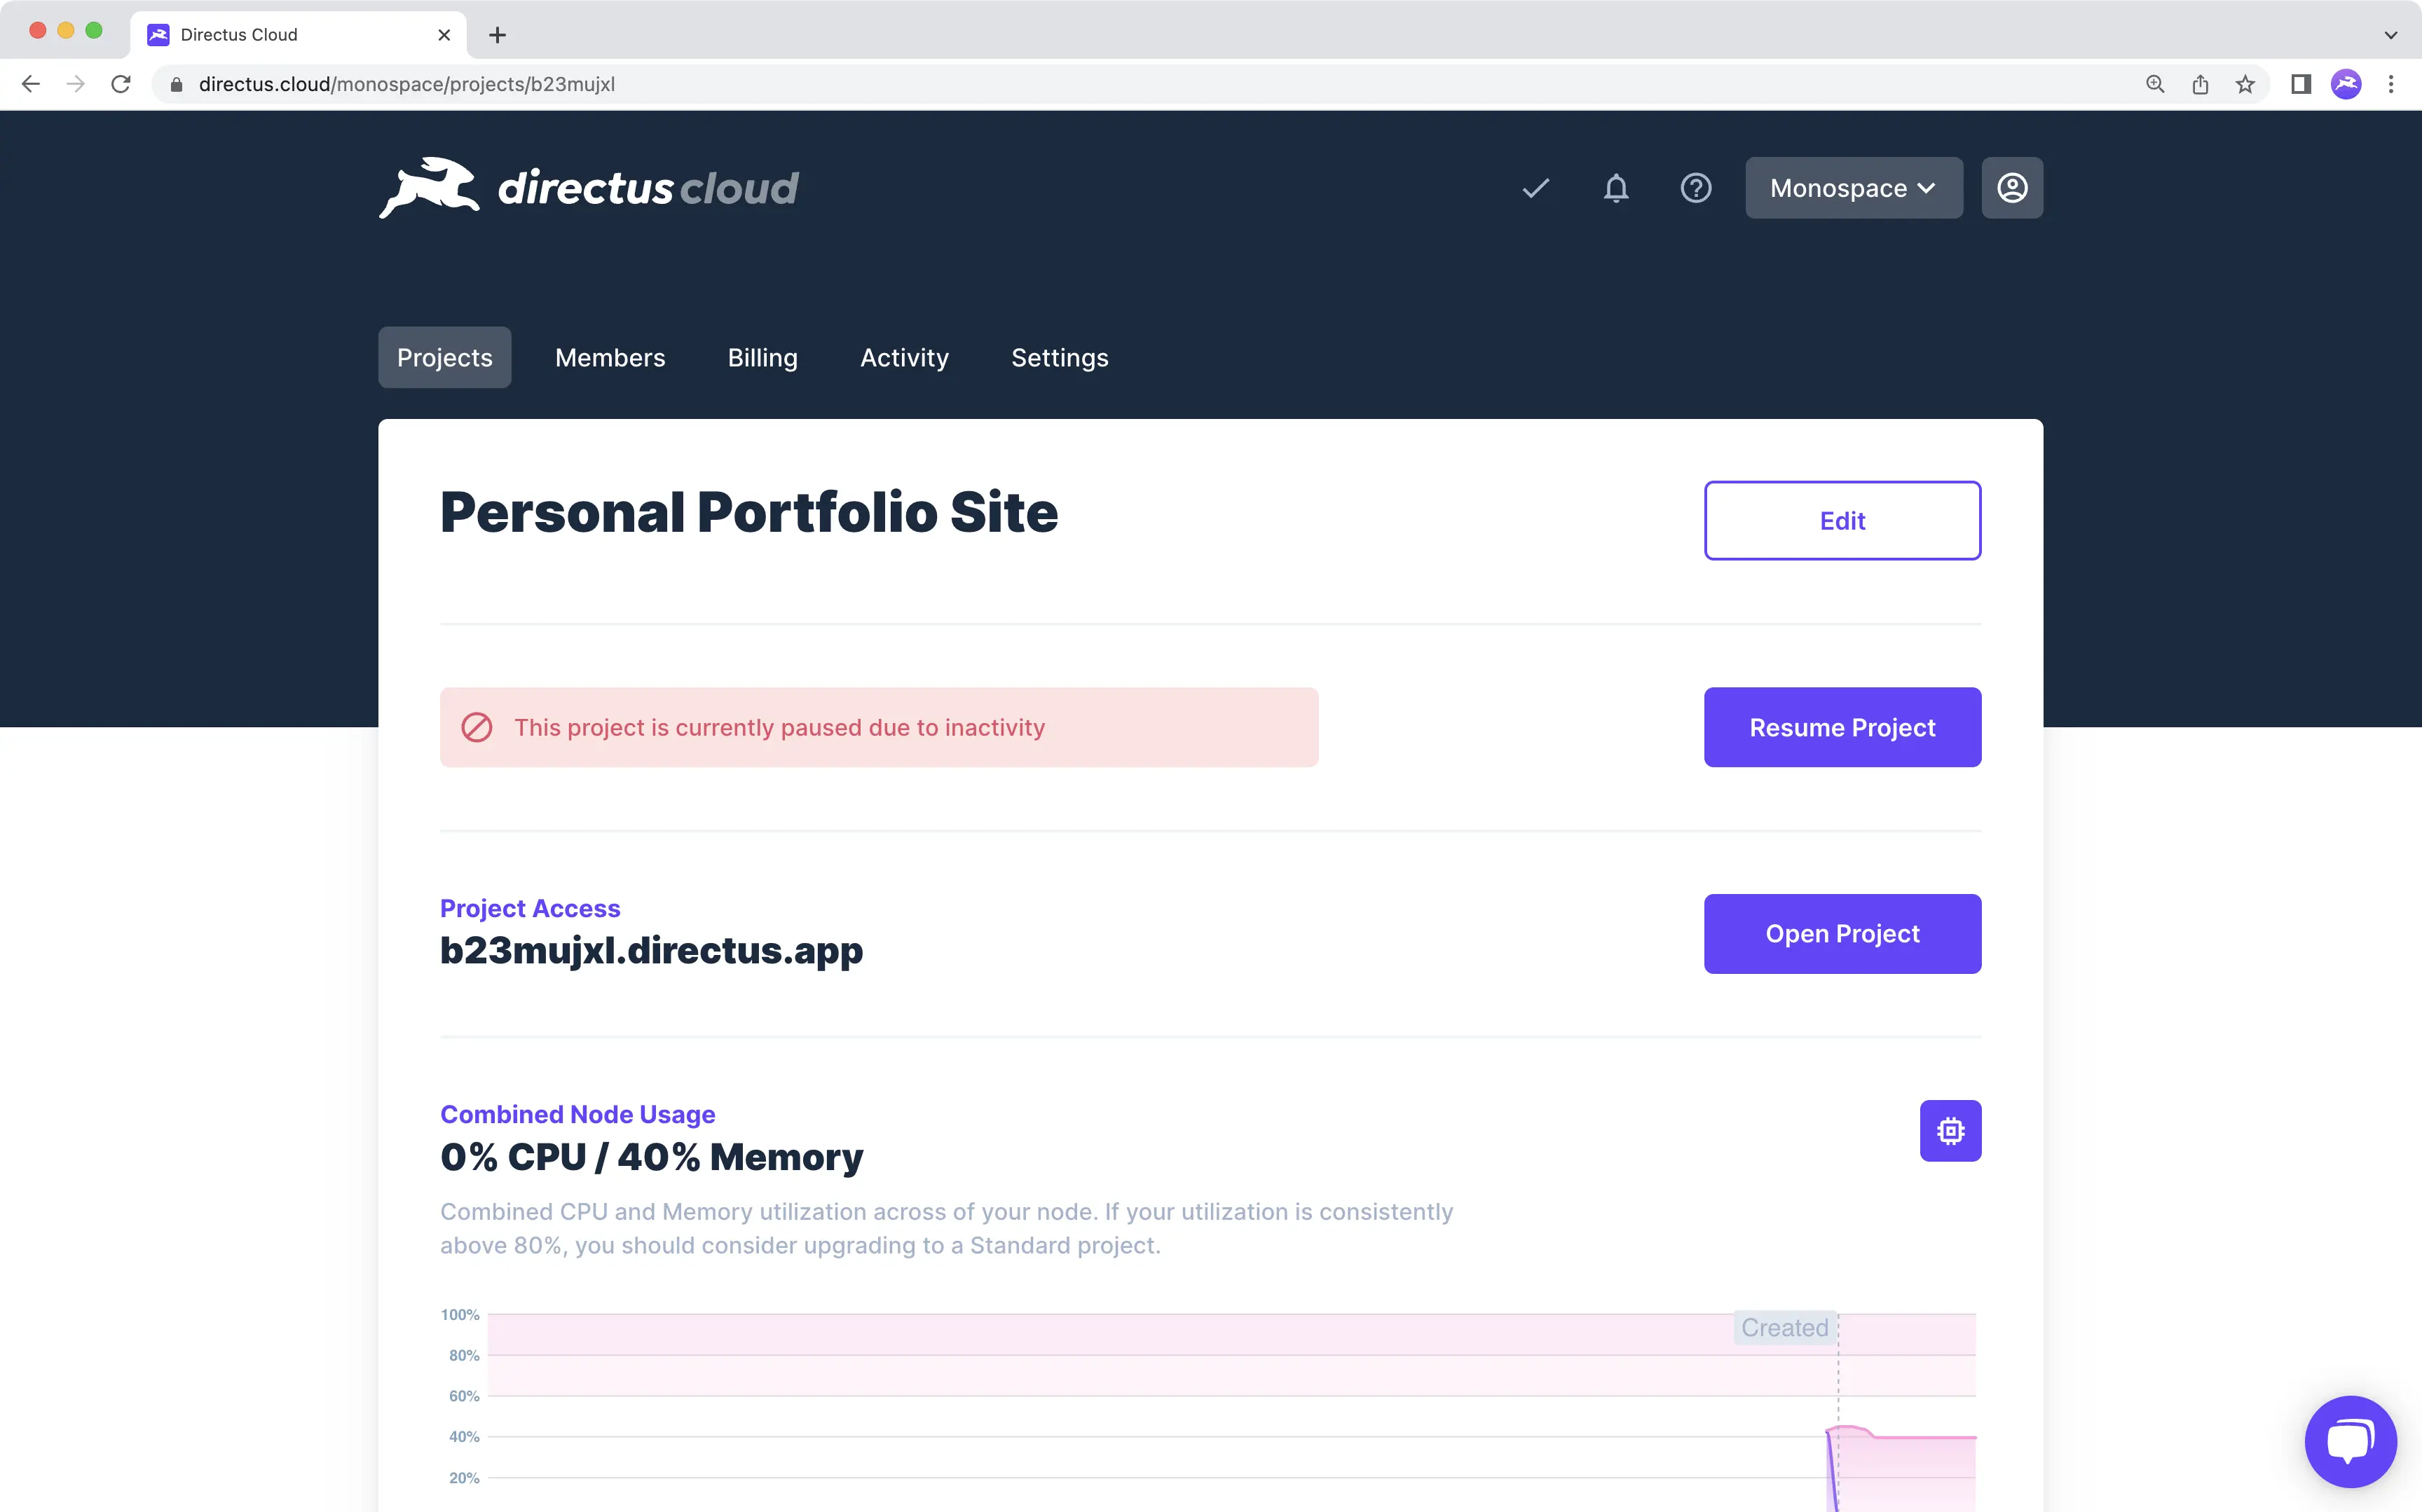
If there is no app activity for 3 days on a Community Project, the Infrastructure gets paused. Projects which remain paused for a certain duration will be automatically deleted, see details in Cloud Policies. To avoid deletion, you must manually resume the Project within the Cloud Dashboard. Once paused, requests to the app will not resume the Project. To resume a paused Community Project, follow the steps below.
- Open the Team Menu in the Dashboard Header and click the desired Team.
- Click "Projects" to enter the Projects Page.
- Click the paused Project to enter the Project Monitor Page.
- Click "Resume Project".
Destroy a Project

Destroying a Directus Cloud Project completely removes all its data, assets, settings, and Users from our platform. To destroy a Directus Cloud Project, follow these steps:
- Open the Team Menu in the Dashboard Header and click the desired Team.
- Click "Projects" to enter the Projects Page.
- Click the Project you wish to delete.
- Scroll to the bottom of the page and toggle local_fire_department.
- Type in the Project Name.
- Click "Destroy Project".
::: danger
This action will break any external apps connecting to the Project's API or linking to Project files. This action is permanent and irreversible. Directus Cloud is not responsible for data or files lost due to this action!
:::