mirror of
https://github.com/invoke-ai/InvokeAI.git
synced 2026-01-23 03:27:56 -05:00
Compare commits
157 Commits
| Author | SHA1 | Date | |
|---|---|---|---|
|
|
efc5a98488 | ||
|
|
1417c87928 | ||
|
|
2dd6fc2b93 | ||
|
|
22213612a0 | ||
|
|
71ee44a827 | ||
|
|
b17ca0a5e7 | ||
|
|
71bbfe4a1a | ||
|
|
5702271991 | ||
|
|
10781e7dc4 | ||
|
|
099d1157c5 | ||
|
|
ab825bf7ee | ||
|
|
10cfeb5ada | ||
|
|
e97515d045 | ||
|
|
0f04bc5789 | ||
|
|
3f74aabecd | ||
|
|
b1a99a51b7 | ||
|
|
8004f8a6d9 | ||
|
|
ff8ff2212a | ||
|
|
8e5363cd83 | ||
|
|
1450779146 | ||
|
|
8cd5d95b8a | ||
|
|
abd6407394 | ||
|
|
734dacfbe9 | ||
|
|
636620b1d5 | ||
|
|
1fe41146f0 | ||
|
|
2ad6ef355a | ||
|
|
865502ee4f | ||
|
|
c7984f3299 | ||
|
|
7f150ed833 | ||
|
|
badf4e256c | ||
|
|
e64c60bbb3 | ||
|
|
1780618543 | ||
|
|
f91fd27624 | ||
|
|
09e41e8f76 | ||
|
|
6eeb2107b3 | ||
|
|
17053ad8b7 | ||
|
|
fefb4dc1f8 | ||
|
|
d05b1b3544 | ||
|
|
82d4904c07 | ||
|
|
1cdcf33cfa | ||
|
|
6616fa835a | ||
|
|
7b9a4564b1 | ||
|
|
fcdefa0620 | ||
|
|
ef8b3ce639 | ||
|
|
36870a8f53 | ||
|
|
b70420951d | ||
|
|
1f0c5b4cf1 | ||
|
|
8648da8111 | ||
|
|
45b4593563 | ||
|
|
41b04316cf | ||
|
|
e97c6db2a3 | ||
|
|
896820a349 | ||
|
|
06c8f468bf | ||
|
|
61920e2701 | ||
|
|
f34ba7ca70 | ||
|
|
c30ef0895d | ||
|
|
aa3a774f73 | ||
|
|
2c30555b84 | ||
|
|
743f605773 | ||
|
|
519c661abb | ||
|
|
22c956c75f | ||
|
|
13696adc3a | ||
|
|
0196571a12 | ||
|
|
9666f466ab | ||
|
|
240e5486c8 | ||
|
|
8164b6b9cf | ||
|
|
4fc82d554f | ||
|
|
96b34c0f85 | ||
|
|
dd5a88dcee | ||
|
|
95ed56bf82 | ||
|
|
1ae80f5ab9 | ||
|
|
1f0bd3ca6c | ||
|
|
a1971f6830 | ||
|
|
c6118e8898 | ||
|
|
7ba958cf7f | ||
|
|
383905d5d2 | ||
|
|
6173e3e9ca | ||
|
|
3feb7d8922 | ||
|
|
1d9edbd0dd | ||
|
|
d439abdb89 | ||
|
|
ee47ea0c89 | ||
|
|
300bb2e627 | ||
|
|
ccf8593501 | ||
|
|
0fda612f3f | ||
|
|
5afff65b71 | ||
|
|
7e55bdefce | ||
|
|
620cf84d3d | ||
|
|
cfe567c62a | ||
|
|
cefe12f1df | ||
|
|
1e51c39928 | ||
|
|
42a02bbb80 | ||
|
|
f1ae6dae4c | ||
|
|
6195579910 | ||
|
|
16c8b23b34 | ||
|
|
07ae626b22 | ||
|
|
8d171bb044 | ||
|
|
6e33ca7e9e | ||
|
|
db46e12f2b | ||
|
|
868e4b2db8 | ||
|
|
2e562742c1 | ||
|
|
68e6958009 | ||
|
|
ea6e3a7949 | ||
|
|
b2879ca99f | ||
|
|
4e911566c3 | ||
|
|
9bafda6a15 | ||
|
|
871a8a5375 | ||
|
|
0eef74bc00 | ||
|
|
423ae32097 | ||
|
|
8282e5d045 | ||
|
|
19305cdbdf | ||
|
|
eb9028ab30 | ||
|
|
21483f5d07 | ||
|
|
82dcbac28f | ||
|
|
d43bd4625d | ||
|
|
ea891324a2 | ||
|
|
8fd9ea2193 | ||
|
|
fb02666856 | ||
|
|
f6f5c2731b | ||
|
|
b4e3f771e0 | ||
|
|
99bb9491ac | ||
|
|
0453f21127 | ||
|
|
9fc09aa4bd | ||
|
|
5e87062cf8 | ||
|
|
3e7a459990 | ||
|
|
bbf4c03e50 | ||
|
|
611a3a9753 | ||
|
|
1611f0d181 | ||
|
|
08835115e4 | ||
|
|
2d84e28d32 | ||
|
|
ef17aae8ab | ||
|
|
0cc39f01a3 | ||
|
|
688d7258f1 | ||
|
|
4513320bf1 | ||
|
|
533fd04ef0 | ||
|
|
dff5681cf0 | ||
|
|
5a2790a69b | ||
|
|
7c5305ccba | ||
|
|
4013e8ad6f | ||
|
|
d1dfd257f9 | ||
|
|
5322d735ee | ||
|
|
cdb107dcda | ||
|
|
be1393a41c | ||
|
|
e554c2607f | ||
|
|
6215592b12 | ||
|
|
349cc25433 | ||
|
|
214d276379 | ||
|
|
ef24d76adc | ||
|
|
ab2b5a691d | ||
|
|
c7de2b2801 | ||
|
|
e8075658ac | ||
|
|
4202dabee1 | ||
|
|
d67db2bcf1 | ||
|
|
7159ec885f | ||
|
|
b5cf734ba9 | ||
|
|
f7dc8eafee | ||
|
|
762ca60a30 | ||
|
|
e7fb9f342c |
1
.github/CODEOWNERS
vendored
1
.github/CODEOWNERS
vendored
@@ -2,4 +2,3 @@ ldm/invoke/pngwriter.py @CapableWeb
|
||||
ldm/invoke/server_legacy.py @CapableWeb
|
||||
scripts/legacy_api.py @CapableWeb
|
||||
tests/legacy_tests.sh @CapableWeb
|
||||
installer/ @tildebyte
|
||||
|
||||
4
.github/workflows/build-container.yml
vendored
4
.github/workflows/build-container.yml
vendored
@@ -17,9 +17,9 @@ jobs:
|
||||
- aarch64
|
||||
include:
|
||||
- arch: x86_64
|
||||
conda-env-file: environment-lin-cuda.yml
|
||||
conda-env-file: environment.yml
|
||||
- arch: aarch64
|
||||
conda-env-file: environment-lin-aarch64.yml
|
||||
conda-env-file: environment-linux-aarch64.yml
|
||||
runs-on: ubuntu-latest
|
||||
name: ${{ matrix.arch }}
|
||||
steps:
|
||||
|
||||
7
.github/workflows/test-invoke-conda.yml
vendored
7
.github/workflows/test-invoke-conda.yml
vendored
@@ -23,7 +23,7 @@ jobs:
|
||||
- macOS-12
|
||||
include:
|
||||
- os: ubuntu-latest
|
||||
environment-file: environment-lin-cuda.yml
|
||||
environment-file: environment.yml
|
||||
default-shell: bash -l {0}
|
||||
- os: macOS-12
|
||||
environment-file: environment-mac.yml
|
||||
@@ -49,9 +49,6 @@ jobs:
|
||||
- name: create models.yaml from example
|
||||
run: cp configs/models.yaml.example configs/models.yaml
|
||||
|
||||
- name: create environment.yml
|
||||
run: cp environments-and-requirements/${{ matrix.environment-file }} environment.yml
|
||||
|
||||
- name: Use cached conda packages
|
||||
id: use-cached-conda-packages
|
||||
uses: actions/cache@v3
|
||||
@@ -64,7 +61,7 @@ jobs:
|
||||
uses: conda-incubator/setup-miniconda@v2
|
||||
with:
|
||||
activate-environment: ${{ env.CONDA_ENV_NAME }}
|
||||
environment-file: environment.yml
|
||||
environment-file: ${{ matrix.environment-file }}
|
||||
miniconda-version: latest
|
||||
|
||||
- name: set test prompt to main branch validation
|
||||
|
||||
8
.gitignore
vendored
8
.gitignore
vendored
@@ -225,13 +225,5 @@ invokeai.init
|
||||
environment.yml
|
||||
requirements.txt
|
||||
|
||||
# source installer files
|
||||
source_installer/*zip
|
||||
source_installer/invokeAI
|
||||
install.bat
|
||||
install.sh
|
||||
update.bat
|
||||
update.sh
|
||||
|
||||
# this may be present if the user created a venv
|
||||
invokeai
|
||||
|
||||
@@ -8,16 +8,15 @@ mkdir -p invokeAI
|
||||
cp install.sh invokeAI
|
||||
cp readme.txt invokeAI
|
||||
|
||||
zip -r invokeAI-src-installer-linux.zip invokeAI
|
||||
zip -r invokeAI-src-installer-mac.zip invokeAI
|
||||
zip -r invokeAI-linux.zip invokeAI
|
||||
zip -r invokeAI-mac.zip invokeAI
|
||||
|
||||
# make the installer zip for windows
|
||||
rm -rf invokeAI
|
||||
mkdir -p invokeAI
|
||||
cp install.bat invokeAI
|
||||
cp readme.txt invokeAI
|
||||
cp WinLongPathsEnabled.reg invokeAI
|
||||
|
||||
zip -r invokeAI-src-installer-windows.zip invokeAI
|
||||
zip -r invokeAI-windows.zip invokeAI
|
||||
|
||||
echo "The installer zips are ready to be distributed.."
|
||||
@@ -72,7 +72,8 @@ if not exist ".git" (
|
||||
call git config --local init.defaultBranch main
|
||||
call git remote add origin %REPO_URL%
|
||||
call git fetch
|
||||
call git checkout origin/main -ft
|
||||
# call git checkout origin/main -ft
|
||||
call git checkout origin/release-candidate-2-1-3 -ft
|
||||
)
|
||||
|
||||
@rem activate the base env
|
||||
@@ -80,7 +81,7 @@ call conda activate
|
||||
|
||||
@rem create the environment
|
||||
call conda env remove -n invokeai
|
||||
copy environments-and-requirements\environment-win-cuda.yml environment.yml
|
||||
mklink environment.yml environments-and-requirements\environment-win-cuda.yml
|
||||
call conda env create
|
||||
if "%ERRORLEVEL%" NEQ "0" (
|
||||
echo ""
|
||||
@@ -92,9 +93,6 @@ if "%ERRORLEVEL%" NEQ "0" (
|
||||
exit /b
|
||||
)
|
||||
|
||||
copy source_installer\invoke.bat invoke.bat
|
||||
copy source_installer\update.bat update.bat
|
||||
|
||||
call conda activate invokeai
|
||||
@rem preload the models
|
||||
call python scripts\preload_models.py
|
||||
@@ -86,7 +86,7 @@ if [ ! -e ".git" ]; then
|
||||
git config --local init.defaultBranch main
|
||||
git remote add origin "$REPO_URL"
|
||||
git fetch
|
||||
git checkout origin/main -ft
|
||||
git checkout origin/release-candidate-2-1-3 -ft
|
||||
fi
|
||||
|
||||
# create the environment
|
||||
@@ -116,9 +116,6 @@ then
|
||||
echo "Please visit https://invoke-ai.github.io/InvokeAI/#installation for alternative"
|
||||
echo "installation methods"
|
||||
else
|
||||
ln -sf ./source_installer/invoke.sh .
|
||||
ln -sf ./source_installer/update.sh .
|
||||
|
||||
conda activate invokeai
|
||||
# preload the models
|
||||
echo "Calling the preload_models.py script"
|
||||
11
1-click-installer/readme.txt
Normal file
11
1-click-installer/readme.txt
Normal file
@@ -0,0 +1,11 @@
|
||||
InvokeAI
|
||||
|
||||
Project homepage: https://github.com/invoke-ai/InvokeAI
|
||||
|
||||
Installation on Windows:
|
||||
Please double-click the 'install.bat' file (while keeping it inside the invokeAI folder).
|
||||
|
||||
Installation on Linux and Mac:
|
||||
Please open the terminal, and run './install.sh' (while keeping it inside the invokeAI folder).
|
||||
|
||||
After installation, please run the 'invoke.bat' file (on Windows) or 'invoke.sh' file (on Linux/Mac) to start InvokeAI.
|
||||
@@ -43,42 +43,33 @@ RUN apt-get update \
|
||||
ARG invokeai_git=invoke-ai/InvokeAI
|
||||
ARG invokeai_branch=main
|
||||
ARG project_name=invokeai
|
||||
ARG conda_env_file=environment-lin-cuda.yml
|
||||
RUN git clone -b ${invokeai_branch} https://github.com/${invokeai_git}.git "/${project_name}" \
|
||||
&& cp \
|
||||
"/${project_name}/configs/models.yaml.example" \
|
||||
"/${project_name}/configs/models.yaml" \
|
||||
&& ln -sf \
|
||||
"/${project_name}/environments-and-requirements/${conda_env_file}" \
|
||||
"/${project_name}/environment.yml" \
|
||||
&& ln -sf \
|
||||
/data/models/v1-5-pruned-emaonly.ckpt \
|
||||
"/${project_name}/models/ldm/stable-diffusion-v1/v1-5-pruned-emaonly.ckpt" \
|
||||
&& ln -sf \
|
||||
/data/outputs/ \
|
||||
"/${project_name}/outputs"
|
||||
RUN git clone -b ${invokeai_branch} https://github.com/${invokeai_git}.git /${project_name} \
|
||||
&& cp /${project_name}/configs/models.yaml.example /${project_name}/configs/models.yaml \
|
||||
&& ln -s /data/models/v1-5-pruned-emaonly.ckpt /${project_name}/models/ldm/stable-diffusion-v1/v1-5-pruned-emaonly.ckpt \
|
||||
&& ln -s /data/outputs/ /${project_name}/outputs
|
||||
|
||||
# set workdir
|
||||
WORKDIR "/${project_name}"
|
||||
WORKDIR /${project_name}
|
||||
|
||||
# install conda env and preload models
|
||||
ARG conda_prefix=/opt/conda
|
||||
COPY --from=get_miniconda "${conda_prefix}" "${conda_prefix}"
|
||||
RUN source "${conda_prefix}/etc/profile.d/conda.sh" \
|
||||
ARG conda_env_file=environment.yml
|
||||
COPY --from=get_miniconda ${conda_prefix} ${conda_prefix}
|
||||
RUN source ${conda_prefix}/etc/profile.d/conda.sh \
|
||||
&& conda init bash \
|
||||
&& source ~/.bashrc \
|
||||
&& conda env create \
|
||||
--name "${project_name}" \
|
||||
--name ${project_name} \
|
||||
--file ${conda_env_file} \
|
||||
&& rm -Rf ~/.cache \
|
||||
&& conda clean -afy \
|
||||
&& echo "conda activate ${project_name}" >> ~/.bashrc
|
||||
|
||||
RUN source ~/.bashrc \
|
||||
&& echo "conda activate ${project_name}" >> ~/.bashrc \
|
||||
&& conda activate ${project_name} \
|
||||
&& python scripts/preload_models.py \
|
||||
--no-interactive
|
||||
|
||||
# Copy entrypoint and set env
|
||||
ENV CONDA_PREFIX="${conda_prefix}"
|
||||
ENV PROJECT_NAME="${project_name}"
|
||||
ENV CONDA_PREFIX=${conda_prefix}
|
||||
ENV PROJECT_NAME=${project_name}
|
||||
COPY docker-build/entrypoint.sh /
|
||||
ENTRYPOINT [ "/entrypoint.sh" ]
|
||||
|
||||
@@ -8,7 +8,7 @@ source ./docker-build/env.sh || echo "please run from repository root" || exit 1
|
||||
|
||||
invokeai_conda_version=${INVOKEAI_CONDA_VERSION:-py39_4.12.0-${platform/\//-}}
|
||||
invokeai_conda_prefix=${INVOKEAI_CONDA_PREFIX:-\/opt\/conda}
|
||||
invokeai_conda_env_file=${INVOKEAI_CONDA_ENV_FILE:-environment-lin-cuda.yml}
|
||||
invokeai_conda_env_file=${INVOKEAI_CONDA_ENV_FILE:-environment.yml}
|
||||
invokeai_git=${INVOKEAI_GIT:-invoke-ai/InvokeAI}
|
||||
invokeai_branch=${INVOKEAI_BRANCH:-main}
|
||||
huggingface_token=${HUGGINGFACE_TOKEN?}
|
||||
|
||||
@@ -99,7 +99,8 @@ overridden on a per-prompt basis (see
|
||||
| `--sampler <sampler>` | `-A<sampler>` | `k_lms` | Sampler to use. Use `-h` to get list of available samplers. |
|
||||
| `--seamless` | | `False` | Create interesting effects by tiling elements of the image. |
|
||||
| `--embedding_path <path>` | | `None` | Path to pre-trained embedding manager checkpoints, for custom models |
|
||||
| `--gfpgan_model_path` | | `experiments/pretrained_models/GFPGANv1.4.pth` | Path to GFPGAN model file. |
|
||||
| `--gfpgan_dir` | | `src/gfpgan` | Path to where GFPGAN is installed. |
|
||||
| `--gfpgan_model_path` | | `experiments/pretrained_models/GFPGANv1.4.pth` | Path to GFPGAN model file, relative to `--gfpgan_dir`. |
|
||||
| `--free_gpu_mem` | | `False` | Free GPU memory after sampling, to allow image decoding and saving in low VRAM conditions |
|
||||
| `--precision` | | `auto` | Set model precision, default is selected by device. Options: auto, float32, float16, autocast |
|
||||
|
||||
|
||||
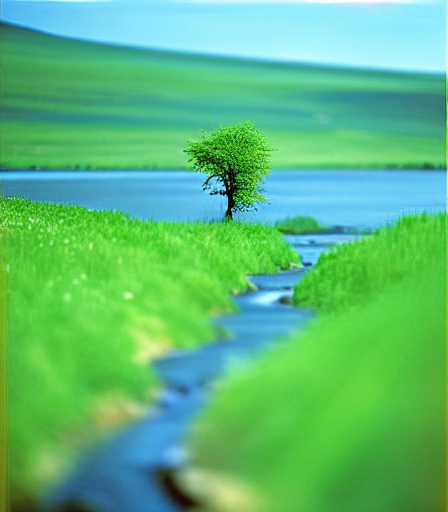
@@ -19,13 +19,13 @@ tree on a hill with a river, nature photograph, national geographic -I./test-pic
|
||||
This will take the original image shown here:
|
||||
|
||||
<figure markdown>
|
||||
{ width=320 }
|
||||

|
||||
</figure>
|
||||
|
||||
and generate a new image based on it as shown here:
|
||||
|
||||
<figure markdown>
|
||||
{ width=320 }
|
||||

|
||||
</figure>
|
||||
|
||||
The `--init_img` (`-I`) option gives the path to the seed picture. `--strength`
|
||||
@@ -45,16 +45,15 @@ Note that the prompt makes a big difference. For example, this slight variation
|
||||
on the prompt produces a very different image:
|
||||
|
||||
<figure markdown>
|
||||
{ width=320 }
|
||||

|
||||
<caption markdown>photograph of a tree on a hill with a river</caption>
|
||||
</figure>
|
||||
|
||||
!!! tip
|
||||
|
||||
When designing prompts, think about how the images scraped from the internet were
|
||||
captioned. Very few photographs will be labeled "photograph" or "photorealistic."
|
||||
They will, however, be captioned with the publication, photographer, camera model,
|
||||
or film settings.
|
||||
When designing prompts, think about how the images scraped from the internet were captioned. Very few photographs will
|
||||
be labeled "photograph" or "photorealistic." They will, however, be captioned with the publication, photographer, camera
|
||||
model, or film settings.
|
||||
|
||||
If the initial image contains transparent regions, then Stable Diffusion will
|
||||
only draw within the transparent regions, a process called
|
||||
@@ -62,17 +61,17 @@ only draw within the transparent regions, a process called
|
||||
However, for this to work correctly, the color information underneath the
|
||||
transparent needs to be preserved, not erased.
|
||||
|
||||
!!! warning "**IMPORTANT ISSUE** "
|
||||
!!! warning
|
||||
|
||||
`img2img` does not work properly on initial images smaller
|
||||
than 512x512. Please scale your image to at least 512x512 before using it.
|
||||
Larger images are not a problem, but may run out of VRAM on your GPU card. To
|
||||
fix this, use the --fit option, which downscales the initial image to fit within
|
||||
the box specified by width x height:
|
||||
**IMPORTANT ISSUE** `img2img` does not work properly on initial images smaller
|
||||
than 512x512. Please scale your image to at least 512x512 before using it.
|
||||
Larger images are not a problem, but may run out of VRAM on your GPU card. To
|
||||
fix this, use the --fit option, which downscales the initial image to fit within
|
||||
the box specified by width x height:
|
||||
|
||||
```
|
||||
tree on a hill with a river, national geographic -I./test-pictures/big-sketch.png -H512 -W512 --fit
|
||||
```
|
||||
```
|
||||
tree on a hill with a river, national geographic -I./test-pictures/big-sketch.png -H512 -W512 --fit
|
||||
```
|
||||
|
||||
## How does it actually work, though?
|
||||
|
||||
@@ -88,7 +87,7 @@ from a prompt. If the step count is 10, then the "latent space" (Stable
|
||||
Diffusion's internal representation of the image) for the prompt "fire" with
|
||||
seed `1592514025` develops something like this:
|
||||
|
||||
```bash
|
||||
```commandline
|
||||
invoke> "fire" -s10 -W384 -H384 -S1592514025
|
||||
```
|
||||
|
||||
@@ -134,9 +133,9 @@ Notice how much more fuzzy the starting image is for strength `0.7` compared to
|
||||
|
||||
| | strength = 0.7 | strength = 0.4 |
|
||||
| --------------------------- | ------------------------------------------------------------- | ------------------------------------------------------------- |
|
||||
| initial image that SD sees |  |  |
|
||||
| initial image that SD sees |  |  |
|
||||
| steps argument to `invoke>` | `-S10` | `-S10` |
|
||||
| steps actually taken | `7` | `4` |
|
||||
| steps actually taken | 7 | 4 |
|
||||
| latent space at each step |  |  |
|
||||
| output |  |  |
|
||||
|
||||
@@ -151,7 +150,7 @@ If you want to try this out yourself, all of these are using a seed of
|
||||
`1592514025` with a width/height of `384`, step count `10`, the default sampler
|
||||
(`k_lms`), and the single-word prompt `"fire"`:
|
||||
|
||||
```bash
|
||||
```commandline
|
||||
invoke> "fire" -s10 -W384 -H384 -S1592514025 -I /tmp/fire-drawing.png --strength 0.7
|
||||
```
|
||||
|
||||
@@ -171,7 +170,7 @@ give each generation 20 steps.
|
||||
Here's strength `0.4` (note step count `50`, which is `20 ÷ 0.4` to make sure SD
|
||||
does `20` steps from my image):
|
||||
|
||||
```bash
|
||||
```commandline
|
||||
invoke> "fire" -s50 -W384 -H384 -S1592514025 -I /tmp/fire-drawing.png -f 0.4
|
||||
```
|
||||
|
||||
|
||||
@@ -92,21 +92,6 @@ The new image is larger than the original (576x704) because 64 pixels were added
|
||||
to the top and right sides. You will need enough VRAM to process an image of
|
||||
this size.
|
||||
|
||||
#### Outcropping non-InvokeAI images
|
||||
|
||||
You can outcrop an arbitrary image that was not generated by InvokeAI,
|
||||
but your results will vary. The `inpainting-1.5` model is highly
|
||||
recommended, but if not feasible, then you may be able to improve the
|
||||
output by conditioning the outcropping with a text prompt that
|
||||
describes the scene using the `--new_prompt` argument:
|
||||
|
||||
```bash
|
||||
invoke> !fix images/vacation.png --outcrop top 128 --new_prompt "family vacation"
|
||||
```
|
||||
|
||||
You may also provide a different seed for outcropping to use by passing
|
||||
`-S<seed>`. A negative seed will generate a new random seed.
|
||||
|
||||
A number of caveats:
|
||||
|
||||
1. Although you can specify any pixel values, they will be rounded up to the
|
||||
|
||||
@@ -6,39 +6,49 @@ title: Postprocessing
|
||||
|
||||
## Intro
|
||||
|
||||
This extension provides the ability to restore faces and upscale images.
|
||||
This extension provides the ability to restore faces and upscale
|
||||
images.
|
||||
|
||||
Face restoration and upscaling can be applied at the time you generate the
|
||||
images, or at any later time against a previously-generated PNG file, using the
|
||||
[!fix](#fixing-previously-generated-images) command.
|
||||
[Outpainting and outcropping](OUTPAINTING.md) can only be applied after the
|
||||
fact.
|
||||
Face restoration and upscaling can be applied at the time you generate
|
||||
the images, or at any later time against a previously-generated PNG
|
||||
file, using the [!fix](#fixing-previously-generated-images)
|
||||
command. [Outpainting and outcropping](OUTPAINTING.md) can only be
|
||||
applied after the fact.
|
||||
|
||||
## Face Fixing
|
||||
|
||||
The default face restoration module is GFPGAN. The default upscale is
|
||||
Real-ESRGAN. For an alternative face restoration module, see
|
||||
[CodeFormer Support](#codeformer-support) below.
|
||||
Real-ESRGAN. For an alternative face restoration module, see [CodeFormer
|
||||
Support](#codeformer-support) below.
|
||||
|
||||
As of version 1.14, environment.yaml will install the Real-ESRGAN package into
|
||||
the standard install location for python packages, and will put GFPGAN into a
|
||||
subdirectory of "src" in the InvokeAI directory. Upscaling with Real-ESRGAN
|
||||
should "just work" without further intervention. Simply pass the `--upscale`
|
||||
(`-U`) option on the `invoke>` command line, or indicate the desired scale on
|
||||
the popup in the Web GUI.
|
||||
As of version 1.14, environment.yaml will install the Real-ESRGAN
|
||||
package into the standard install location for python packages, and
|
||||
will put GFPGAN into a subdirectory of "src" in the InvokeAI
|
||||
directory. Upscaling with Real-ESRGAN should "just work" without
|
||||
further intervention. Simply pass the `--upscale` (`-U`) option on the
|
||||
`invoke>` command line, or indicate the desired scale on the popup in
|
||||
the Web GUI.
|
||||
|
||||
**GFPGAN** requires a series of downloadable model files to work. These are
|
||||
loaded when you run `scripts/preload_models.py`. If GFPAN is failing with an
|
||||
error, please run the following from the InvokeAI directory:
|
||||
**GFPGAN** requires a series of downloadable model files to
|
||||
work. These are loaded when you run `scripts/preload_models.py`. If
|
||||
GFPAN is failing with an error, please run the following from the
|
||||
InvokeAI directory:
|
||||
|
||||
```bash
|
||||
python scripts/preload_models.py
|
||||
```
|
||||
|
||||
If you do not run this script in advance, the GFPGAN module will attempt to
|
||||
download the models files the first time you try to perform facial
|
||||
If you do not run this script in advance, the GFPGAN module will attempt
|
||||
to download the models files the first time you try to perform facial
|
||||
reconstruction.
|
||||
|
||||
Alternatively, if you have GFPGAN installed elsewhere, or if you are
|
||||
using an earlier version of this package which asked you to install
|
||||
GFPGAN in a sibling directory, you may use the `--gfpgan_dir` argument
|
||||
with `invoke.py` to set a custom path to your GFPGAN directory. _There
|
||||
are other GFPGAN related boot arguments if you wish to customize
|
||||
further._
|
||||
|
||||
## Usage
|
||||
|
||||
You will now have access to two new prompt arguments.
|
||||
@@ -109,15 +119,15 @@ actions.
|
||||
This repo also allows you to perform face restoration using
|
||||
[CodeFormer](https://github.com/sczhou/CodeFormer).
|
||||
|
||||
In order to setup CodeFormer to work, you need to download the models like with
|
||||
GFPGAN. You can do this either by running `preload_models.py` or by manually
|
||||
downloading the
|
||||
[model file](https://github.com/sczhou/CodeFormer/releases/download/v0.1.0/codeformer.pth)
|
||||
In order to setup CodeFormer to work, you need to download the models
|
||||
like with GFPGAN. You can do this either by running
|
||||
`preload_models.py` or by manually downloading the [model
|
||||
file](https://github.com/sczhou/CodeFormer/releases/download/v0.1.0/codeformer.pth)
|
||||
and saving it to `ldm/invoke/restoration/codeformer/weights` folder.
|
||||
|
||||
You can use `-ft` prompt argument to swap between CodeFormer and the default
|
||||
GFPGAN. The above mentioned `-G` prompt argument will allow you to control the
|
||||
strength of the restoration effect.
|
||||
You can use `-ft` prompt argument to swap between CodeFormer and the
|
||||
default GFPGAN. The above mentioned `-G` prompt argument will allow
|
||||
you to control the strength of the restoration effect.
|
||||
|
||||
### Usage
|
||||
|
||||
@@ -147,9 +157,9 @@ situations when there is very little facial data to work with.
|
||||
## Fixing Previously-Generated Images
|
||||
|
||||
It is easy to apply face restoration and/or upscaling to any
|
||||
previously-generated file. Just use the syntax
|
||||
`!fix path/to/file.png <options>`. For example, to apply GFPGAN at strength 0.8
|
||||
and upscale 2X for a file named `./outputs/img-samples/000044.2945021133.png`,
|
||||
previously-generated file. Just use the syntax `!fix path/to/file.png
|
||||
<options>`. For example, to apply GFPGAN at strength 0.8 and upscale
|
||||
2X for a file named `./outputs/img-samples/000044.2945021133.png`,
|
||||
just run:
|
||||
|
||||
```bash
|
||||
|
||||
@@ -2,7 +2,7 @@
|
||||
title: WebUI Hotkey List
|
||||
---
|
||||
|
||||
# :material-keyboard: **WebUI Hotkey List**
|
||||
# **WebUI Hotkey List**
|
||||
|
||||
## General
|
||||
|
||||
@@ -19,7 +19,7 @@ title: WebUI Hotkey List
|
||||
| ++ctrl+enter++ | Start processing |
|
||||
| ++shift+x++ | cancel Processing |
|
||||
| ++shift+d++ | Toggle Dark Mode |
|
||||
| ++"`"++ | Toggle console |
|
||||
| ` | Toggle console |
|
||||
|
||||
## Tabs
|
||||
|
||||
@@ -48,10 +48,10 @@ title: WebUI Hotkey List
|
||||
|
||||
| Setting | Hotkey |
|
||||
| ---------------------------- | --------------------- |
|
||||
| ++"["++ | Decrease brush size |
|
||||
| ++"]"++ | Increase brush size |
|
||||
| ++alt+"["++ | Decrease mask opacity |
|
||||
| ++alt+"]"++ | Increase mask opacity |
|
||||
| [ | Decrease brush size |
|
||||
| ] | Increase brush size |
|
||||
| alt + [ | Decrease mask opacity |
|
||||
| alt + ] | Increase mask opacity |
|
||||
| ++b++ | Select brush |
|
||||
| ++e++ | Select eraser |
|
||||
| ++ctrl+z++ | Undo brush stroke |
|
||||
|
||||
58
docs/installation/INSTALL.md
Normal file
58
docs/installation/INSTALL.md
Normal file
@@ -0,0 +1,58 @@
|
||||
---
|
||||
title: Installation Overview
|
||||
---
|
||||
|
||||
## Installation
|
||||
|
||||
We offer several ways to install InvokeAI, each one suited to your
|
||||
experience and preferences.
|
||||
|
||||
1. [1-click installer](INSTALL_1CLICK.md)
|
||||
|
||||
This is an automated shell script that will handle installation of
|
||||
all dependencies for you, and is recommended for those who have
|
||||
limited or no experience with the Python programming language, are
|
||||
not currently interested in contributing to the project, and just want
|
||||
the thing to install and run. In this version, you interact with the
|
||||
web server and command-line clients through a shell script named
|
||||
`invoke.sh` (Linux/Mac) or `invoke.bat` (Windows), and perform
|
||||
updates using `update.sh` and `update.bat`.
|
||||
|
||||
2. [Pre-compiled PIP installer](INSTALL_PCP.md)
|
||||
|
||||
This is a series of installer files for which all the requirements
|
||||
for InvokeAI have been precompiled, thereby preventing the conflicts
|
||||
that sometimes occur when an external library is changed unexpectedly.
|
||||
It will leave you with an environment in which you interact directly
|
||||
with the scripts for running the web and command line clients, and
|
||||
you will update to new versions using standard developer commands.
|
||||
|
||||
This method is recommended for users with a bit of experience using
|
||||
the `git` and `pip` tools.
|
||||
|
||||
3. [Manual Installation](MANUAL_INSTALL.md)
|
||||
|
||||
In this method you will manually run the commands needed to install
|
||||
InvokeAI and its dependencies. We offer two recipes: one suited to
|
||||
those who prefer the `conda` tool, and one suited to those who prefer
|
||||
`pip` and Python virtual environments.
|
||||
|
||||
This method is recommended for users who have previously used `conda`
|
||||
or `pip` in the past, developers, and anyone who wishes to remain on
|
||||
the cutting edge of future InvokeAI development and is willing to put
|
||||
up with occasional glitches and breakage.
|
||||
|
||||
4. [Docker Installation](INSTALL_DOCKER.md)
|
||||
|
||||
We also offer a method for creating Docker containers containing
|
||||
InvokeAI and its dependencies. This method is recommended for
|
||||
individuals with experience with Docker containers and understand
|
||||
the pluses and minuses of a container-based install.
|
||||
|
||||
5. [Jupyter Notebooks Installation](INSTALL_JUPYTER.md)
|
||||
|
||||
This method is suitable for running InvokeAI on a Google Colab
|
||||
account. It is recommended for individuals who have previously
|
||||
worked on the Colab and are comfortable with the Jupyter notebook
|
||||
environment.
|
||||
|
||||
@@ -1,33 +1,29 @@
|
||||
---
|
||||
title: Docker
|
||||
Title: Docker
|
||||
---
|
||||
|
||||
# :fontawesome-brands-docker: Docker
|
||||
|
||||
!!! warning "For end users"
|
||||
## Before you begin
|
||||
|
||||
We highly recommend to Install InvokeAI locally using [these instructions](index.md)"
|
||||
|
||||
!!! tip "For developers"
|
||||
|
||||
For container-related development tasks or for enabling easy
|
||||
deployment to other environments (on-premises or cloud), follow these
|
||||
instructions.
|
||||
|
||||
For general use, install locally to leverage your machine's GPU.
|
||||
- For end users: Install InvokeAI locally using the instructions for
|
||||
your OS.
|
||||
- For developers: For container-related development tasks or for enabling easy
|
||||
deployment to other environments (on-premises or cloud), follow these
|
||||
instructions. For general use, install locally to leverage your machine's GPU.
|
||||
|
||||
## Why containers?
|
||||
|
||||
They provide a flexible, reliable way to build and deploy InvokeAI. You'll also
|
||||
use a Docker volume to store the largest model files and image outputs as a
|
||||
first step in decoupling storage and compute. Future enhancements can do this
|
||||
for other assets. See [Processes](https://12factor.net/processes) under the
|
||||
Twelve-Factor App methodology for details on why running applications in such a
|
||||
stateless fashion is important.
|
||||
They provide a flexible, reliable way to build and deploy InvokeAI.
|
||||
You'll also use a Docker volume to store the largest model files and image
|
||||
outputs as a first step in decoupling storage and compute. Future enhancements
|
||||
can do this for other assets. See [Processes](https://12factor.net/processes)
|
||||
under the Twelve-Factor App methodology for details on why running applications
|
||||
in such a stateless fashion is important.
|
||||
|
||||
You can specify the target platform when building the image and running the
|
||||
container. You'll also need to specify the InvokeAI requirements file that
|
||||
matches the container's OS and the architecture it will run on.
|
||||
container. You'll also need to specify the InvokeAI requirements file
|
||||
that matches the container's OS and the architecture it will run on.
|
||||
|
||||
Developers on Apple silicon (M1/M2): You
|
||||
[can't access your GPU cores from Docker containers](https://github.com/pytorch/pytorch/issues/81224)
|
||||
@@ -42,19 +38,16 @@ another environment with NVIDIA GPUs on-premises or in the cloud.
|
||||
|
||||
#### Install [Docker](https://github.com/santisbon/guides#docker)
|
||||
|
||||
On the [Docker Desktop app](https://docs.docker.com/get-docker/), go to
|
||||
Preferences, Resources, Advanced. Increase the CPUs and Memory to avoid this
|
||||
On the Docker Desktop app, go to Preferences, Resources, Advanced. Increase the
|
||||
CPUs and Memory to avoid this
|
||||
[Issue](https://github.com/invoke-ai/InvokeAI/issues/342). You may need to
|
||||
increase Swap and Disk image size too.
|
||||
|
||||
#### Get a Huggingface-Token
|
||||
|
||||
Besides the Docker Agent you will need an Account on
|
||||
[huggingface.co](https://huggingface.co/join).
|
||||
|
||||
After you succesfully registered your account, go to
|
||||
[huggingface.co/settings/tokens](https://huggingface.co/settings/tokens), create
|
||||
a token and copy it, since you will need in for the next step.
|
||||
Go to [Hugging Face](https://huggingface.co/settings/tokens), create a token and
|
||||
temporary place it somewhere like a open texteditor window (but dont save it!,
|
||||
only keep it open, we need it in the next step)
|
||||
|
||||
### Setup
|
||||
|
||||
@@ -72,14 +65,13 @@ created in the last step.
|
||||
|
||||
Some Suggestions of variables you may want to change besides the Token:
|
||||
|
||||
| Environment-Variable | Default value | Description |
|
||||
| ------------------------- | ----------------------------- | ---------------------------------------------------------------------------- |
|
||||
| `HUGGINGFACE_TOKEN` | No default, but **required**! | This is the only **required** variable, without you can't get the checkpoint |
|
||||
| `ARCH` | x86_64 | if you are using a ARM based CPU |
|
||||
| `INVOKEAI_TAG` | invokeai-x86_64 | the Container Repository / Tag which will be used |
|
||||
| `INVOKEAI_CONDA_ENV_FILE` | environment-lin-cuda.yml | since environment.yml wouldn't work with aarch |
|
||||
| `INVOKEAI_GIT` | invoke-ai/InvokeAI | the repository to use |
|
||||
| `INVOKEAI_BRANCH` | main | the branch to checkout |
|
||||
| Environment-Variable | Description |
|
||||
| ------------------------------------------------------------------- | ------------------------------------------------------------------------ |
|
||||
| `HUGGINGFACE_TOKEN="hg_aewirhghlawrgkjbarug2"` | This is the only required variable, without you can't get the checkpoint |
|
||||
| `ARCH=aarch64` | if you are using a ARM based CPU |
|
||||
| `INVOKEAI_TAG=yourname/invokeai:latest` | the Container Repository / Tag which will be used |
|
||||
| `INVOKEAI_CONDA_ENV_FILE=environment-linux-aarch64.yml` | since environment.yml wouldn't work with aarch |
|
||||
| `INVOKEAI_GIT="-b branchname https://github.com/username/reponame"` | if you want to use your own fork |
|
||||
|
||||
#### Build the Image
|
||||
|
||||
@@ -87,41 +79,25 @@ I provided a build script, which is located in `docker-build/build.sh` but still
|
||||
needs to be executed from the Repository root.
|
||||
|
||||
```bash
|
||||
./docker-build/build.sh
|
||||
docker-build/build.sh
|
||||
```
|
||||
|
||||
The build Script not only builds the container, but also creates the docker
|
||||
volume if not existing yet, or if empty it will just download the models.
|
||||
|
||||
#### Run the Container
|
||||
|
||||
After the build process is done, you can run the container via the provided
|
||||
`docker-build/run.sh` script
|
||||
volume if not existing yet, or if empty it will just download the models. When
|
||||
it is done you can run the container via the run script
|
||||
|
||||
```bash
|
||||
./docker-build/run.sh
|
||||
docker-build/run.sh
|
||||
```
|
||||
|
||||
When used without arguments, the container will start the webserver and provide
|
||||
When used without arguments, the container will start the website and provide
|
||||
you the link to open it. But if you want to use some other parameters you can
|
||||
also do so.
|
||||
|
||||
!!! example ""
|
||||
|
||||
```bash
|
||||
./docker-build/run.sh --from_file tests/validate_pr_prompt.txt
|
||||
```
|
||||
|
||||
The output folder is located on the volume which is also used to store the model.
|
||||
|
||||
Find out more about available CLI-Parameters at [features/CLI.md](../features/CLI.md/#arguments)
|
||||
|
||||
---
|
||||
|
||||
!!! warning "Deprecated"
|
||||
|
||||
From here on you will find the the previous Docker-Docs, which will still
|
||||
provide some usefull informations.
|
||||
From here on it is the rest of the previous Docker-Docs, which will still
|
||||
provide usefull informations for one or the other.
|
||||
|
||||
## Usage (time to have fun)
|
||||
|
||||
|
||||
@@ -1,64 +0,0 @@
|
||||
---
|
||||
title: InvokeAI Installer
|
||||
---
|
||||
|
||||
The InvokeAI installer is a shell script that will install InvokeAI onto a stock
|
||||
computer running recent versions of Linux, MacOSX or Windows. It will leave you
|
||||
with a version that runs a stable version of InvokeAI. When a new version of
|
||||
InvokeAI is released, you will download and reinstall the new version.
|
||||
|
||||
If you wish to tinker with unreleased versions of InvokeAI that introduce
|
||||
potentially unstable new features, you should consider using the
|
||||
[source installer](INSTALL_SOURCE.md) or one of the
|
||||
[manual install](INSTALL_MANUAL.md) methods.
|
||||
|
||||
**Important Caveats**
|
||||
- This script does not support AMD GPUs. For Linux AMD support,
|
||||
please use the manual or source code installer methods.
|
||||
|
||||
- This script has difficulty on some Macintosh machines
|
||||
that have previously been used for Python development due to
|
||||
conflicting development tools versions. Mac developers may wish
|
||||
to try the source code installer or one of the manual methods instead.
|
||||
|
||||
!!! todo
|
||||
|
||||
Before you begin, make sure that you meet
|
||||
the[hardware requirements](/#hardware-requirements) and has the
|
||||
appropriate GPU drivers installed. In particular, if you are a Linux user with
|
||||
an AMD GPU installed, you may need to install the
|
||||
[ROCm-driver](https://rocmdocs.amd.com/en/latest/Installation_Guide/Installation-Guide.html).
|
||||
|
||||
Installation requires roughly 18G of free disk space to load the libraries and
|
||||
recommended model weights files.
|
||||
|
||||
## Steps to Install
|
||||
|
||||
1. Download the
|
||||
[latest release](https://github.com/invoke-ai/InvokeAI/releases/latest) of
|
||||
InvokeAI's installer for your platform
|
||||
|
||||
2. Place the downloaded package someplace where you have plenty of HDD space,
|
||||
and have full permissions (i.e. `~/` on Lin/Mac; your home folder on Windows)
|
||||
|
||||
3. Extract the 'InvokeAI' folder from the downloaded package
|
||||
|
||||
4. Open the extracted 'InvokeAI' folder
|
||||
|
||||
5. Double-click 'install.bat' (Windows), or 'install.sh' (Lin/Mac) (or run from
|
||||
a terminal)
|
||||
|
||||
6. Follow the prompts
|
||||
|
||||
7. After installation, please run the 'invoke.bat' file (on Windows) or
|
||||
'invoke.sh' file (on Linux/Mac) to start InvokeAI.
|
||||
|
||||
## Troubleshooting
|
||||
|
||||
If you run into problems during or after installation, the InvokeAI team is
|
||||
available to help you. Either create an
|
||||
[Issue](https://github.com/invoke-ai/InvokeAI/issues) at our GitHub site, or
|
||||
make a request for help on the "bugs-and-support" channel of our
|
||||
[Discord server](https://discord.gg/ZmtBAhwWhy). We are a 100% volunteer
|
||||
organization, but typically somebody will be available to help you within 24
|
||||
hours, and often much sooner.
|
||||
@@ -1,27 +0,0 @@
|
||||
---
|
||||
title: Running InvokeAI on Google Colab using a Jupyter Notebook
|
||||
---
|
||||
|
||||
# THIS NEEDS TO BE FLESHED OUT
|
||||
|
||||
## Introduction
|
||||
|
||||
We have a [Jupyter
|
||||
notebook](https://github.com/invoke-ai/InvokeAI/blob/main/notebooks/Stable-Diffusion-local-Windows.ipynb)
|
||||
with cell-by-cell installation steps. It will download the code in
|
||||
this repo as one of the steps, so instead of cloning this repo, simply
|
||||
download the notebook from the link above and load it up in VSCode
|
||||
(with the appropriate extensions installed)/Jupyter/JupyterLab and
|
||||
start running the cells one-by-one.
|
||||
|
||||
!!! Note "you will need NVIDIA drivers, Python 3.10, and Git installed beforehand"
|
||||
|
||||
## Walkthrough
|
||||
|
||||
## Updating to newer versions
|
||||
|
||||
### Updating the stable version
|
||||
|
||||
### Updating to the development version
|
||||
|
||||
## Troubleshooting
|
||||
@@ -1,416 +0,0 @@
|
||||
---
|
||||
title: Manual Installation
|
||||
---
|
||||
|
||||
<figure markdown>
|
||||
# :fontawesome-brands-linux: Linux | :fontawesome-brands-apple: macOS | :fontawesome-brands-windows: Windows
|
||||
</figure>
|
||||
|
||||
!!! warning "This is for advanced Users"
|
||||
|
||||
who are already expirienced with using conda or pip
|
||||
|
||||
## Introduction
|
||||
|
||||
You have two choices for manual installation, the [first one](#Conda_method)
|
||||
based on the Anaconda3 package manager (`conda`), and
|
||||
[a second one](#PIP_method) which uses basic Python virtual environment (`venv`)
|
||||
commands and the PIP package manager. Both methods require you to enter commands
|
||||
on the terminal, also known as the "console".
|
||||
|
||||
On Windows systems you are encouraged to install and use the
|
||||
[Powershell](https://learn.microsoft.com/en-us/powershell/scripting/install/installing-powershell-on-windows?view=powershell-7.3),
|
||||
which provides compatibility with Linux and Mac shells and nice features such as
|
||||
command-line completion.
|
||||
|
||||
### Conda method
|
||||
|
||||
1. Check that your system meets the
|
||||
[hardware requirements](index.md#Hardware_Requirements) and has the
|
||||
appropriate GPU drivers installed. In particular, if you are a Linux user
|
||||
with an AMD GPU installed, you may need to install the
|
||||
[ROCm driver](https://rocmdocs.amd.com/en/latest/Installation_Guide/Installation-Guide.html).
|
||||
|
||||
InvokeAI does not yet support Windows machines with AMD GPUs due to the lack
|
||||
of ROCm driver support on this platform.
|
||||
|
||||
To confirm that the appropriate drivers are installed, run `nvidia-smi` on
|
||||
NVIDIA/CUDA systems, and `rocm-smi` on AMD systems. These should return
|
||||
information about the installed video card.
|
||||
|
||||
Macintosh users with MPS acceleration, or anybody with a CPU-only system,
|
||||
can skip this step.
|
||||
|
||||
2. You will need to install Anaconda3 and Git if they are not already
|
||||
available. Use your operating system's preferred package manager, or
|
||||
download the installers manually. You can find them here:
|
||||
|
||||
- [Anaconda3](https://www.anaconda.com/)
|
||||
- [git](https://git-scm.com/downloads)
|
||||
|
||||
3. Clone the [InvokeAI](https://github.com/invoke-ai/InvokeAI) source code from
|
||||
GitHub:
|
||||
|
||||
```bash
|
||||
git clone https://github.com/invoke-ai/InvokeAI.git
|
||||
```
|
||||
|
||||
This will create InvokeAI folder where you will follow the rest of the
|
||||
steps.
|
||||
|
||||
4. Enter the newly-created InvokeAI folder:
|
||||
|
||||
```bash
|
||||
cd InvokeAI
|
||||
```
|
||||
|
||||
From this step forward make sure that you are working in the InvokeAI
|
||||
directory!
|
||||
|
||||
5. Select the appropriate environment file:
|
||||
|
||||
We have created a series of environment files suited for different operating
|
||||
systems and GPU hardware. They are located in the
|
||||
`environments-and-requirements` directory:
|
||||
|
||||
<figure markdown>
|
||||
|
||||
| filename | OS |
|
||||
| :----------------------: | :----------------------------: |
|
||||
| environment-lin-amd.yml | Linux with an AMD (ROCm) GPU |
|
||||
| environment-lin-cuda.yml | Linux with an NVIDIA CUDA GPU |
|
||||
| environment-mac.yml | Macintosh |
|
||||
| environment-win-cuda.yml | Windows with an NVIDA CUDA GPU |
|
||||
|
||||
</figure>
|
||||
|
||||
Choose the appropriate environment file for your system and link or copy it
|
||||
to `environment.yml` in InvokeAI's top-level directory. To do so, run
|
||||
following command from the repository-root:
|
||||
|
||||
!!! Example ""
|
||||
|
||||
=== "Macintosh and Linux"
|
||||
|
||||
!!! todo "Replace `xxx` and `yyy` with the appropriate OS and GPU codes as seen in the table above"
|
||||
|
||||
```bash
|
||||
ln -sf environments-and-requirements/environment-xxx-yyy.yml environment.yml
|
||||
```
|
||||
|
||||
When this is done, confirm that a file `environment.yml` has been linked in
|
||||
the InvokeAI root directory and that it points to the correct file in the
|
||||
`environments-and-requirements`.
|
||||
|
||||
```bash
|
||||
ls -la
|
||||
```
|
||||
|
||||
=== "Windows"
|
||||
|
||||
!!! todo " Since it requires admin privileges to create links, we will use the copy command to create your `environment.yml`"
|
||||
|
||||
```cmd
|
||||
copy environments-and-requirements\environment-win-cuda.yml environment.yml
|
||||
```
|
||||
|
||||
Afterwards verify that the file `environment.yml` has been created, either via the
|
||||
explorer or by using the command `dir` from the terminal
|
||||
|
||||
```cmd
|
||||
dir
|
||||
```
|
||||
|
||||
!!! warning "Do not try to run conda on directly on the subdirectory environments file. This won't work. Instead, copy or link it to the top-level directory as shown."
|
||||
|
||||
6. Create the conda environment:
|
||||
|
||||
```bash
|
||||
conda env update
|
||||
```
|
||||
|
||||
This will create a new environment named `invokeai` and install all InvokeAI
|
||||
dependencies into it. If something goes wrong you should take a look at
|
||||
[troubleshooting](#troubleshooting).
|
||||
|
||||
7. Activate the `invokeai` environment:
|
||||
|
||||
In order to use the newly created environment you will first need to
|
||||
activate it
|
||||
|
||||
```bash
|
||||
conda activate invokeai
|
||||
```
|
||||
|
||||
Your command-line prompt should change to indicate that `invokeai` is active
|
||||
by prepending `(invokeai)`.
|
||||
|
||||
8. Pre-Load the model weights files:
|
||||
|
||||
!!! tip
|
||||
|
||||
If you have already downloaded the weights file(s) for another Stable
|
||||
Diffusion distribution, you may skip this step (by selecting "skip" when
|
||||
prompted) and configure InvokeAI to use the previously-downloaded files. The
|
||||
process for this is described in [here](INSTALLING_MODELS.md).
|
||||
|
||||
```bash
|
||||
python scripts/preload_models.py
|
||||
```
|
||||
|
||||
The script `preload_models.py` will interactively guide you through the
|
||||
process of downloading and installing the weights files needed for InvokeAI.
|
||||
Note that the main Stable Diffusion weights file is protected by a license
|
||||
agreement that you have to agree to. The script will list the steps you need
|
||||
to take to create an account on the site that hosts the weights files,
|
||||
accept the agreement, and provide an access token that allows InvokeAI to
|
||||
legally download and install the weights files.
|
||||
|
||||
If you get an error message about a module not being installed, check that
|
||||
the `invokeai` environment is active and if not, repeat step 5.
|
||||
|
||||
9. Run the command-line- or the web- interface:
|
||||
|
||||
!!! example ""
|
||||
|
||||
!!! warning "Make sure that the conda environment is activated, which should create `(invokeai)` in front of your prompt!"
|
||||
|
||||
=== "CLI"
|
||||
|
||||
```bash
|
||||
python scripts/invoke.py
|
||||
```
|
||||
|
||||
=== "local Webserver"
|
||||
|
||||
```bash
|
||||
python scripts/invoke.py --web
|
||||
```
|
||||
|
||||
=== "Public Webserver"
|
||||
|
||||
```bash
|
||||
python scripts/invoke.py --web --host 0.0.0.0
|
||||
```
|
||||
|
||||
If you choose the run the web interface, point your browser at
|
||||
http://localhost:9090 in order to load the GUI.
|
||||
|
||||
10. Render away!
|
||||
|
||||
Browse the [features](../features/CLI.md) section to learn about all the things you
|
||||
can do with InvokeAI.
|
||||
|
||||
Note that some GPUs are slow to warm up. In particular, when using an AMD
|
||||
card with the ROCm driver, you may have to wait for over a minute the first
|
||||
time you try to generate an image. Fortunately, after the warm up period
|
||||
rendering will be fast.
|
||||
|
||||
11. Subsequently, to relaunch the script, be sure to run "conda activate
|
||||
invokeai", enter the `InvokeAI` directory, and then launch the invoke
|
||||
script. If you forget to activate the 'invokeai' environment, the script
|
||||
will fail with multiple `ModuleNotFound` errors.
|
||||
|
||||
## Updating to newer versions of the script
|
||||
|
||||
This distribution is changing rapidly. If you used the `git clone` method
|
||||
(step 5) to download the InvokeAI directory, then to update to the latest and
|
||||
greatest version, launch the Anaconda window, enter `InvokeAI` and type:
|
||||
|
||||
```bash
|
||||
git pull
|
||||
conda env update
|
||||
python scripts/preload_models.py --no-interactive #optional
|
||||
```
|
||||
|
||||
This will bring your local copy into sync with the remote one. The last step may
|
||||
be needed to take advantage of new features or released models. The
|
||||
`--no-interactive` flag will prevent the script from prompting you to download
|
||||
the big Stable Diffusion weights files.
|
||||
|
||||
## pip Install
|
||||
|
||||
To install InvokeAI with only the PIP package manager, please follow these
|
||||
steps:
|
||||
|
||||
1. Make sure you are using Python 3.9 or higher. The rest of the install
|
||||
procedure depends on this:
|
||||
|
||||
```bash
|
||||
python -V
|
||||
```
|
||||
|
||||
2. Install the `virtualenv` tool if you don't have it already:
|
||||
|
||||
```bash
|
||||
pip install virtualenv
|
||||
```
|
||||
|
||||
3. From within the InvokeAI top-level directory, create and activate a virtual
|
||||
environment named `invokeai`:
|
||||
|
||||
```bash
|
||||
virtualenv invokeai
|
||||
source invokeai/bin/activate
|
||||
```
|
||||
|
||||
4. Pick the correct `requirements*.txt` file for your hardware and operating
|
||||
system.
|
||||
|
||||
We have created a series of environment files suited for different operating
|
||||
systems and GPU hardware. They are located in the
|
||||
`environments-and-requirements` directory:
|
||||
|
||||
<figure markdown>
|
||||
|
||||
| filename | OS |
|
||||
| :---------------------------------: | :-------------------------------------------------------------: |
|
||||
| requirements-lin-amd.txt | Linux with an AMD (ROCm) GPU |
|
||||
| requirements-lin-arm64.txt | Linux running on arm64 systems |
|
||||
| requirements-lin-cuda.txt | Linux with an NVIDIA (CUDA) GPU |
|
||||
| requirements-mac-mps-cpu.txt | Macintoshes with MPS acceleration |
|
||||
| requirements-lin-win-colab-cuda.txt | Windows with an NVIDA (CUDA) GPU<br>(supports Google Colab too) |
|
||||
|
||||
</figure>
|
||||
|
||||
Select the appropriate requirements file, and make a link to it from
|
||||
`requirements.txt` in the top-level InvokeAI directory. The command to do
|
||||
this from the top-level directory is:
|
||||
|
||||
!!! example ""
|
||||
|
||||
=== "Macintosh and Linux"
|
||||
|
||||
!!! info "Replace `xxx` and `yyy` with the appropriate OS and GPU codes."
|
||||
|
||||
```bash
|
||||
ln -sf environments-and-requirements/requirements-xxx-yyy.txt requirements.txt
|
||||
```
|
||||
|
||||
=== "Windows"
|
||||
|
||||
!!! info "on Windows, admin privileges are required to make links, so we use the copy command instead"
|
||||
|
||||
```cmd
|
||||
copy environments-and-requirements\requirements-lin-win-colab-cuda.txt requirements.txt
|
||||
```
|
||||
|
||||
!!! warning
|
||||
|
||||
Please do not link or copy `environments-and-requirements/requirements-base.txt`.
|
||||
This is a base requirements file that does not have the platform-specific
|
||||
libraries. Also, be sure to link or copy the platform-specific file to
|
||||
a top-level file named `requirements.txt` as shown here. Running pip on
|
||||
a requirements file in a subdirectory will not work as expected.
|
||||
|
||||
When this is done, confirm that a file named `requirements.txt` has been
|
||||
created in the InvokeAI root directory and that it points to the correct
|
||||
file in `environments-and-requirements`.
|
||||
|
||||
5. Run PIP
|
||||
|
||||
Be sure that the `invokeai` environment is active before doing this:
|
||||
|
||||
```bash
|
||||
pip install --prefer-binary -r requirements.txt
|
||||
```
|
||||
|
||||
---
|
||||
|
||||
## Troubleshooting
|
||||
|
||||
Here are some common issues and their suggested solutions.
|
||||
|
||||
### Conda
|
||||
|
||||
#### Conda fails before completing `conda update`
|
||||
|
||||
The usual source of these errors is a package incompatibility. While we have
|
||||
tried to minimize these, over time packages get updated and sometimes introduce
|
||||
incompatibilities.
|
||||
|
||||
We suggest that you search
|
||||
[Issues](https://github.com/invoke-ai/InvokeAI/issues) or the "bugs-and-support"
|
||||
channel of the [InvokeAI Discord](https://discord.gg/ZmtBAhwWhy).
|
||||
|
||||
You may also try to install the broken packages manually using PIP. To do this,
|
||||
activate the `invokeai` environment, and run `pip install` with the name and
|
||||
version of the package that is causing the incompatibility. For example:
|
||||
|
||||
```bash
|
||||
pip install test-tube==0.7.5
|
||||
```
|
||||
|
||||
You can keep doing this until all requirements are satisfied and the `invoke.py`
|
||||
script runs without errors. Please report to
|
||||
[Issues](https://github.com/invoke-ai/InvokeAI/issues) what you were able to do
|
||||
to work around the problem so that others can benefit from your investigation.
|
||||
|
||||
#### `preload_models.py` or `invoke.py` crashes at an early stage
|
||||
|
||||
This is usually due to an incomplete or corrupted Conda install. Make sure you
|
||||
have linked to the correct environment file and run `conda update` again.
|
||||
|
||||
If the problem persists, a more extreme measure is to clear Conda's caches and
|
||||
remove the `invokeai` environment:
|
||||
|
||||
```bash
|
||||
conda deactivate
|
||||
conda env remove -n invokeai
|
||||
conda clean -a
|
||||
conda update
|
||||
```
|
||||
|
||||
This removes all cached library files, including ones that may have been
|
||||
corrupted somehow. (This is not supposed to happen, but does anyway).
|
||||
|
||||
#### `invoke.py` crashes at a later stage
|
||||
|
||||
If the CLI or web site had been working ok, but something unexpected happens
|
||||
later on during the session, you've encountered a code bug that is probably
|
||||
unrelated to an install issue. Please search
|
||||
[Issues](https://github.com/invoke-ai/InvokeAI/issues), file a bug report, or
|
||||
ask for help on [Discord](https://discord.gg/ZmtBAhwWhy)
|
||||
|
||||
#### My renders are running very slowly
|
||||
|
||||
You may have installed the wrong torch (machine learning) package, and the
|
||||
system is running on CPU rather than the GPU. To check, look at the log messages
|
||||
that appear when `invoke.py` is first starting up. One of the earlier lines
|
||||
should say `Using device type cuda`. On AMD systems, it will also say "cuda",
|
||||
and on Macintoshes, it should say "mps". If instead the message says it is
|
||||
running on "cpu", then you may need to install the correct torch library.
|
||||
|
||||
You may be able to fix this by installing a different torch library. Here are
|
||||
the magic incantations for Conda and PIP.
|
||||
|
||||
!!! todo "For CUDA systems"
|
||||
|
||||
- conda
|
||||
|
||||
```bash
|
||||
conda install pytorch torchvision torchaudio pytorch-cuda=11.6 -c pytorch -c nvidia
|
||||
```
|
||||
|
||||
- pip
|
||||
|
||||
```bash
|
||||
pip3 install torch torchvision torchaudio --extra-index-url https://download.pytorch.org/whl/cu116
|
||||
```
|
||||
|
||||
!!! todo "For AMD systems"
|
||||
|
||||
- conda
|
||||
|
||||
```bash
|
||||
conda activate invokeai
|
||||
pip3 install torch torchvision torchaudio --extra-index-url https://download.pytorch.org/whl/rocm5.2/
|
||||
```
|
||||
|
||||
- pip
|
||||
|
||||
```bash
|
||||
pip3 install torch torchvision torchaudio --extra-index-url https://download.pytorch.org/whl/rocm5.2/
|
||||
```
|
||||
|
||||
More information and troubleshooting tips can be found at https://pytorch.org.
|
||||
@@ -1,17 +0,0 @@
|
||||
---
|
||||
title: Installing InvokeAI with the Pre-Compiled PIP Installer
|
||||
---
|
||||
|
||||
# THIS NEEDS TO BE FLESHED OUT
|
||||
|
||||
## Introduction
|
||||
|
||||
## Walkthrough
|
||||
|
||||
## Updating to newer versions
|
||||
|
||||
### Updating the stable version
|
||||
|
||||
### Updating to the development version
|
||||
|
||||
## Troubleshooting
|
||||
@@ -1,156 +0,0 @@
|
||||
---
|
||||
title: Source Installer
|
||||
---
|
||||
|
||||
# The InvokeAI Source Installer
|
||||
|
||||
## Introduction
|
||||
|
||||
The source installer is a shell script that attempts to automate every step
|
||||
needed to install and run InvokeAI on a stock computer running recent versions
|
||||
of Linux, MacOS or Windows. It will leave you with a version that runs a stable
|
||||
version of InvokeAI with the option to upgrade to experimental versions later.
|
||||
It is not as foolproof as the [InvokeAI installer](INSTALL_INVOKE.md)
|
||||
|
||||
Before you begin, make sure that you meet the
|
||||
[hardware requirements](index.md#Hardware_Requirements) and has the appropriate
|
||||
GPU drivers installed. In particular, if you are a Linux user with an AMD GPU
|
||||
installed, you may need to install the
|
||||
[ROCm driver](https://rocmdocs.amd.com/en/latest/Installation_Guide/Installation-Guide.html).
|
||||
|
||||
Installation requires roughly 18G of free disk space to load the libraries and
|
||||
recommended model weights files.
|
||||
|
||||
## Walk through
|
||||
|
||||
Though there are multiple steps, there really is only one click involved to kick
|
||||
off the process.
|
||||
|
||||
1. The source installer is distributed in ZIP files. Go to the
|
||||
[latest release](https://github.com/invoke-ai/InvokeAI/releases/latest), and
|
||||
look for a series of files named:
|
||||
|
||||
- invokeAI-src-installer-mac.zip
|
||||
- invokeAI-src-installer-windows.zip
|
||||
- invokeAI-src-installer-linux.zip
|
||||
|
||||
Download the one that is appropriate for your operating system.
|
||||
|
||||
2. Unpack the zip file into a directory that has at least 18G of free space. Do
|
||||
_not_ unpack into a directory that has an earlier version of InvokeAI.
|
||||
|
||||
This will create a new directory named "InvokeAI". This example shows how
|
||||
this would look using the `unzip` command-line tool, but you may use any
|
||||
graphical or command-line Zip extractor:
|
||||
|
||||
```cmd
|
||||
C:\Documents\Linco> unzip invokeAI-windows.zip
|
||||
Archive: C: \Linco\Downloads\invokeAI-linux.zip
|
||||
creating: invokeAI\
|
||||
inflating: invokeAI\install.bat
|
||||
inflating: invokeAI\readme.txt
|
||||
```
|
||||
|
||||
3. If you are using a desktop GUI, double-click the installer file. It will be
|
||||
named `install.bat` on Windows systems and `install.sh` on Linux and
|
||||
Macintosh systems.
|
||||
|
||||
4. Alternatively, form the command line, run the shell script or .bat file:
|
||||
|
||||
```cmd
|
||||
C:\Documents\Linco> cd invokeAI
|
||||
C:\Documents\Linco\invokeAI> install.bat
|
||||
```
|
||||
|
||||
5. Sit back and let the install script work. It will install various binary
|
||||
requirements including Conda, Git and Python, then download the current
|
||||
InvokeAI code and install it along with its dependencies.
|
||||
|
||||
6. After installation completes, the installer will launch a script called
|
||||
`preload_models.py`, which will guide you through the first-time process of
|
||||
selecting one or more Stable Diffusion model weights files, downloading and
|
||||
configuring them.
|
||||
|
||||
Note that the main Stable Diffusion weights file is protected by a license
|
||||
agreement that you must agree to in order to use. The script will list the
|
||||
steps you need to take to create an account on the official site that hosts
|
||||
the weights files, accept the agreement, and provide an access token that
|
||||
allows InvokeAI to legally download and install the weights files.
|
||||
|
||||
If you have already downloaded the weights file(s) for another Stable
|
||||
Diffusion distribution, you may skip this step (by selecting "skip" when
|
||||
prompted) and configure InvokeAI to use the previously-downloaded files. The
|
||||
process for this is described in [Installing Models](INSTALLING_MODELS.md).
|
||||
|
||||
7. The script will now exit and you'll be ready to generate some images. The
|
||||
invokeAI directory will contain numerous files. Look for a shell script
|
||||
named `invoke.sh` (Linux/Mac) or `invoke.bat` (Windows). Launch the script
|
||||
by double-clicking it or typing its name at the command-line:
|
||||
|
||||
```cmd
|
||||
C:\Documents\Linco> cd invokeAI
|
||||
C:\Documents\Linco\invokeAI> invoke.bat
|
||||
```
|
||||
|
||||
The `invoke.bat` (`invoke.sh`) script will give you the choice of starting (1)
|
||||
the command-line interface, or (2) the web GUI. If you start the latter, you can
|
||||
load the user interface by pointing your browser at http://localhost:9090.
|
||||
|
||||
The `invoke` script also offers you a third option labeled "open the developer
|
||||
console". If you choose this option, you will be dropped into a command-line
|
||||
interface in which you can run python commands directly, access developer tools,
|
||||
and launch InvokeAI with customized options. To do the latter, you would launch
|
||||
the script `scripts/invoke.py` as shown in this example:
|
||||
|
||||
```cmd
|
||||
python scripts/invoke.py --web --max_load_models=3 \
|
||||
--model=waifu-1.3 --steps=30 --outdir=C:/Documents/AIPhotos
|
||||
```
|
||||
|
||||
These options are described in detail in the
|
||||
[Command-Line Interface](../features/CLI.md) documentation.
|
||||
|
||||
## Updating to newer versions
|
||||
|
||||
This section describes how to update InvokeAI to new versions of the software.
|
||||
|
||||
### Updating the stable version
|
||||
|
||||
This distribution is changing rapidly, and we add new features on a daily basis.
|
||||
To update to the latest released version (recommended), run the `update.sh`
|
||||
(Linux/Mac) or `update.bat` (Windows) scripts. This will fetch the latest
|
||||
release and re-run the `preload_models` script to download any updated models
|
||||
files that may be needed. You can also use this to add additional models that
|
||||
you did not select at installation time.
|
||||
|
||||
### Updating to the development version
|
||||
|
||||
There may be times that there is a feature in the `development` branch of
|
||||
InvokeAI that you'd like to take advantage of. Or perhaps there is a branch that
|
||||
corrects an annoying bug. To do this, you will use the developer's console.
|
||||
|
||||
From within the invokeAI directory, run the command `invoke.sh` (Linux/Mac) or
|
||||
`invoke.bat` (Windows) and selection option (3) to open the developers console.
|
||||
Then run the following command to get the `development branch`:
|
||||
|
||||
```bash
|
||||
git checkout development
|
||||
git pull
|
||||
conda env update
|
||||
```
|
||||
|
||||
You can now close the developer console and run `invoke` as before. If you get
|
||||
complaints about missing models, then you may need to do the additional step of
|
||||
running `preload_models.py`. This happens relatively infrequently. To do this,
|
||||
simply open up the developer's console again and type
|
||||
`python scripts/preload_models.py`.
|
||||
|
||||
## Troubleshooting
|
||||
|
||||
If you run into problems during or after installation, the InvokeAI team is
|
||||
available to help you. Either create an
|
||||
[Issue](https://github.com/invoke-ai/InvokeAI/issues) at our GitHub site, or
|
||||
make a request for help on the "bugs-and-support" channel of our
|
||||
[Discord server](https://discord.gg/ZmtBAhwWhy). We are a 100% volunteer
|
||||
organization, but typically somebody will be available to help you within 24
|
||||
hours, and often much sooner.
|
||||
363
docs/installation/MANUAL_INSTALL.md
Normal file
363
docs/installation/MANUAL_INSTALL.md
Normal file
@@ -0,0 +1,363 @@
|
||||
---
|
||||
title: Manual Installation
|
||||
---
|
||||
|
||||
# :fontawesome-brands-linux: Linux
|
||||
# :fontawesome-brands-apple: macOS
|
||||
# :fontawesome-brands-windows: Windows
|
||||
|
||||
## Introduction
|
||||
|
||||
You have two choices for manual installation, the [first
|
||||
one](#Conda_method) based on the Anaconda3 package manager (`conda`),
|
||||
and [a second one](#PIP_method) which uses basic Python virtual
|
||||
environment (`venv`) commands and the PIP package manager. Both
|
||||
methods require you to enter commands on the command-line shell, also
|
||||
known as the "console".
|
||||
|
||||
On Windows systems you are encouraged to install and use the
|
||||
[Powershell](https://learn.microsoft.com/en-us/powershell/scripting/install/installing-powershell-on-windows?view=powershell-7.3),
|
||||
which provides compatibility with Linux and Mac shells and nice
|
||||
features such as command-line completion.
|
||||
|
||||
### Conda method
|
||||
|
||||
1. Check that your system meets the [hardware
|
||||
requirements](index.md#Hardware_Requirements) and has the appropriate
|
||||
GPU drivers installed. In particular, if you are a Linux user with an
|
||||
AMD GPU installed, you may need to install the [ROCm
|
||||
driver](https://rocmdocs.amd.com/en/latest/Installation_Guide/Installation-Guide.html).
|
||||
|
||||
InvokeAI does not yet support Windows machines with AMD GPUs due to
|
||||
the lack of ROCm driver support on this platform.
|
||||
|
||||
To confirm that the appropriate drivers are installed, run
|
||||
`nvidia-smi` on NVIDIA/CUDA systems, and `rocm-smi` on AMD
|
||||
systems. These should return information about the installed video
|
||||
card.
|
||||
|
||||
Macintosh users with MPS acceleration, or anybody with a CPU-only
|
||||
system, can skip this step.
|
||||
|
||||
2. You will need to install Anaconda3 and Git if they are not already
|
||||
available. Use your operating system's preferred installer, or
|
||||
download installers from the following URLs
|
||||
|
||||
- Anaconda3 (https://www.anaconda.com/)
|
||||
- git (https://git-scm.com/downloads)
|
||||
|
||||
3. Copy the InvokeAI source code from GitHub using `git`:
|
||||
|
||||
```bash
|
||||
git clone https://github.com/invoke-ai/InvokeAI.git
|
||||
```
|
||||
|
||||
This will create InvokeAI folder where you will follow the rest of the
|
||||
steps.
|
||||
|
||||
3. Enter the newly-created InvokeAI folder. From this step forward make sure
|
||||
that you are working in the InvokeAI directory!
|
||||
|
||||
```bash
|
||||
cd InvokeAI
|
||||
```
|
||||
4. Select the appropriate environment file:
|
||||
|
||||
We have created a series of environment files suited for different
|
||||
operating systems and GPU hardware. They are located in the
|
||||
`environments-and-requirements` directory:
|
||||
|
||||
```bash
|
||||
environment-lin-amd.yml # Linux with an AMD (ROCm) GPU
|
||||
environment-lin-cuda.yml # Linux with an NVIDIA CUDA GPU
|
||||
environment-mac.yml # Macintoshes with MPS acceleration
|
||||
environment-win-cuda.yml # Windows with an NVIDA CUDA GPU
|
||||
```
|
||||
|
||||
Select the appropriate environment file, and make a link to it
|
||||
from `environment.yml` in the top-level InvokeAI directory. The
|
||||
command to do this from the top-level directory is:
|
||||
|
||||
!!! todo "Macintosh and Linux"
|
||||
|
||||
```bash
|
||||
ln -sf environments-and-requirements/environment-xxx-yyy.yml environment.yml
|
||||
```
|
||||
|
||||
Replace `xxx` and `yyy` with the appropriate OS and GPU codes.
|
||||
|
||||
!!! todo "Windows"
|
||||
|
||||
```bash
|
||||
mklink environment.yml environments-and-requirements\environment-win-cuda.yml
|
||||
```
|
||||
|
||||
Note that the order of arguments is reversed between the Linux/Mac and Windows
|
||||
commands!
|
||||
|
||||
When this is done, confirm that a file `environment.yml` has been created in
|
||||
the InvokeAI root directory and that it points to the correct file in the
|
||||
`environments-and-requirements`.
|
||||
|
||||
4. Run conda:
|
||||
|
||||
```bash
|
||||
conda env update
|
||||
```
|
||||
|
||||
This will create a new environment named `invokeai` and install all
|
||||
InvokeAI dependencies into it.
|
||||
|
||||
If something goes wrong at this point, see
|
||||
[troubleshooting](#Troubleshooting).
|
||||
|
||||
5. Activate the `invokeai` environment:
|
||||
|
||||
```bash
|
||||
conda activate invokeai
|
||||
```
|
||||
|
||||
Your command-line prompt should change to indicate that `invokeai` is active.
|
||||
|
||||
6. Load the model weights files:
|
||||
|
||||
```bash
|
||||
python scripts/preload_models.py
|
||||
```
|
||||
|
||||
(Windows users should use the backslash instead of the slash)
|
||||
|
||||
The script `preload_models.py` will interactively guide you through
|
||||
downloading and installing the weights files needed for
|
||||
InvokeAI. Note that the main Stable Diffusion weights file is
|
||||
protected by a license agreement that you have to agree to. The
|
||||
script will list the steps you need to take to create an account on
|
||||
the site that hosts the weights files, accept the agreement, and
|
||||
provide an access token that allows InvokeAI to legally download
|
||||
and install the weights files.
|
||||
|
||||
If you get an error message about a module not being installed,
|
||||
check that the `invokeai` environment is active and if not, repeat
|
||||
step 5.
|
||||
|
||||
7. Run the command-line interface or the web interface:
|
||||
|
||||
```bash
|
||||
python scripts/invoke.py # command line
|
||||
python scripts/invoke.py --web # web interface
|
||||
```
|
||||
|
||||
(Windows users replace backslash with forward slash)
|
||||
|
||||
If you choose the run the web interface, point your browser at
|
||||
http://localhost:9090 in order to load the GUI.
|
||||
|
||||
8. Render away!
|
||||
|
||||
Browse the features listed in the [Stable Diffusion Toolkit
|
||||
Docs](https://invoke-ai.git) to learn about all the things you can
|
||||
do with InvokeAI.
|
||||
|
||||
Note that some GPUs are slow to warm up. In particular, when using
|
||||
an AMD card with the ROCm driver, you may have to wait for over a
|
||||
minute the first time you try to generate an image. Fortunately, after
|
||||
the warm up period rendering will be fast.
|
||||
|
||||
9. Subsequently, to relaunch the script, be sure to run "conda
|
||||
activate invokeai", enter the `InvokeAI` directory, and then launch
|
||||
the invoke script. If you forget to activate the 'invokeai'
|
||||
environment, the script will fail with multiple `ModuleNotFound`
|
||||
errors.
|
||||
|
||||
## Updating to newer versions of the script
|
||||
|
||||
This distribution is changing rapidly. If you used the `git clone` method
|
||||
(step 5) to download the InvokeAI directory, then to update to the latest and
|
||||
greatest version, launch the Anaconda window, enter `InvokeAI` and type:
|
||||
|
||||
```bash
|
||||
git pull
|
||||
conda env update
|
||||
python scripts/preload_models.py --no-interactive #optional
|
||||
```
|
||||
|
||||
This will bring your local copy into sync with the remote one. The
|
||||
last step may be needed to take advantage of new features or released
|
||||
models. The `--no-interactive` flag will prevent the script from
|
||||
prompting you to download the big Stable Diffusion weights files.
|
||||
|
||||
## pip Install
|
||||
|
||||
To install InvokeAI with only the PIP package manager, please follow
|
||||
these steps:
|
||||
|
||||
1. Make sure you are using Python 3.9 or higher. Some InvokeAI
|
||||
features require this:
|
||||
|
||||
```bash
|
||||
python -V
|
||||
```
|
||||
|
||||
2. Install the `virtualenv` tool if you don't have it already:
|
||||
```bash
|
||||
pip install virtualenv
|
||||
```
|
||||
|
||||
3. From within the InvokeAI top-level directory, create and activate a
|
||||
virtual environment named `invokeai`:
|
||||
|
||||
```bash
|
||||
virtualenv invokeai
|
||||
source invokeai/bin/activate
|
||||
```
|
||||
|
||||
4. Pick the correct `requirements*.txt` file for your hardware and
|
||||
operating system.
|
||||
|
||||
We have created a series of environment files suited for different
|
||||
operating systems and GPU hardware. They are located in the
|
||||
`environments-and-requirements` directory:
|
||||
|
||||
```bash
|
||||
requirements-lin-amd.txt # Linux with an AMD (ROCm) GPU
|
||||
requirements-lin-arm64.txt # Linux running on arm64 systems
|
||||
requirements-lin-cuda.txt # Linux with an NVIDIA (CUDA) GPU
|
||||
requirements-mac-mps-cpu.txt # Macintoshes with MPS acceleration
|
||||
requirements-lin-win-colab-cuda.txt # Windows with an NVIDA (CUDA) GPU
|
||||
# (supports Google Colab too)
|
||||
```
|
||||
|
||||
Select the appropriate requirements file, and make a link to it
|
||||
from `environment.txt` in the top-level InvokeAI directory. The
|
||||
command to do this from the top-level directory is:
|
||||
|
||||
!!! todo "Macintosh and Linux"
|
||||
|
||||
```bash
|
||||
ln -sf environments-and-requirements/requirements-xxx-yyy.txt requirements.txt
|
||||
```
|
||||
|
||||
Replace `xxx` and `yyy` with the appropriate OS and GPU codes.
|
||||
|
||||
!!! todo "Windows"
|
||||
|
||||
```bash
|
||||
mklink requirements.txt environments-and-requirements\requirements-lin-win-colab-cuda.txt
|
||||
```
|
||||
|
||||
Note that the order of arguments is reversed between the Linux/Mac and Windows
|
||||
commands!
|
||||
|
||||
Please do not link directly to the file
|
||||
`environments-and-requirements/requirements.txt`. This is a base requirements
|
||||
file that does not have the platform-specific libraries.
|
||||
|
||||
When this is done, confirm that a file `requirements.txt` has been
|
||||
created in the InvokeAI root directory and that it points to the
|
||||
correct file in the `environments-and-requirements`.
|
||||
|
||||
5. Run PIP
|
||||
|
||||
Be sure that the `invokeai` environment is active before doing
|
||||
this:
|
||||
|
||||
```bash
|
||||
pip install -r requirements.txt
|
||||
```
|
||||
|
||||
## Troubleshooting
|
||||
|
||||
Here are some common issues and their suggested solutions.
|
||||
|
||||
### Conda install
|
||||
|
||||
1. Conda fails before completing `conda update`:
|
||||
|
||||
The usual source of these errors is a package
|
||||
incompatibility. While we have tried to minimize these, over time
|
||||
packages get updated and sometimes introduce incompatibilities.
|
||||
|
||||
We suggest that you search [Issues](https://github.com/invoke-ai/InvokeAI/issues) or the
|
||||
Bug Report and Support channel of the [InvokeAI Discord](https://discord.gg/ZmtBAhwWhy).
|
||||
|
||||
You may also try to install the broken packages manually using PIP. To do this, activate
|
||||
the `invokeai` environment, and run `pip install` with the name and version of the
|
||||
package that is causing the incompatibility. For example:
|
||||
|
||||
```bash
|
||||
pip install test-tube==0.7.5
|
||||
```
|
||||
|
||||
You can keep doing this until all requirements are satisfied and
|
||||
the `invoke.py` script runs without errors. Please report to
|
||||
[Issues](https://github.com/invoke-ai/InvokeAI/issues) what you
|
||||
were able to do to work around the problem so that others can
|
||||
benefit from your investigation.
|
||||
|
||||
2. `preload_models.py` or `invoke.py` crashes at an early stage
|
||||
|
||||
This is usually due to an incomplete or corrupted Conda install.
|
||||
Make sure you have linked to the correct environment file and run
|
||||
`conda update` again.
|
||||
|
||||
If the problem persists, a more extreme measure is to clear Conda's
|
||||
caches and remove the `invokeai` environment:
|
||||
|
||||
```bash
|
||||
conda deactivate
|
||||
conda env remove -n invokeai
|
||||
conda clean -a
|
||||
conda update
|
||||
```
|
||||
|
||||
This removes all cached library files, including ones that may have
|
||||
been corrupted somehow. (This is not supposed to happen, but does
|
||||
anyway).
|
||||
|
||||
3. `invoke.py` crashes at a later stage.
|
||||
|
||||
If the CLI or web site had been working ok, but something
|
||||
unexpected happens later on during the session, you've encountered
|
||||
a code bug that is probably unrelated to an install issue. Please
|
||||
search [Issues](https://github.com/invoke-ai/InvokeAI/issues), file
|
||||
a bug report, or ask for help on [Discord](https://discord.gg/ZmtBAhwWhy)
|
||||
|
||||
4. My renders are running very slowly!
|
||||
|
||||
You may have installed the wrong torch (machine learning) package,
|
||||
and the system is running on CPU rather than the GPU. To check,
|
||||
look at the log messages that appear when `invoke.py` is first
|
||||
starting up. One of the earlier lines should say `Using device type
|
||||
cuda`. On AMD systems, it will also say "cuda", and on Macintoshes,
|
||||
it should say "mps". If instead the message says it is running on
|
||||
"cpu", then you may need to install the correct torch library.
|
||||
|
||||
You may be able to fix this by installing a different torch
|
||||
library. Here are the magic incantations for Conda and PIP.
|
||||
|
||||
!!! todo "For CUDA systems"
|
||||
|
||||
(conda)
|
||||
```bash
|
||||
conda install pytorch torchvision torchaudio pytorch-cuda=11.6 -c pytorch -c nvidia
|
||||
```
|
||||
|
||||
(pip)
|
||||
```bash
|
||||
pip3 install torch torchvision torchaudio --extra-index-url https://download.pytorch.org/whl/cu116
|
||||
```
|
||||
|
||||
!!! todo "For AMD systems"
|
||||
|
||||
(conda)
|
||||
```bash
|
||||
conda activate invokeai
|
||||
pip3 install torch torchvision torchaudio --extra-index-url https://download.pytorch.org/whl/rocm5.2/
|
||||
```
|
||||
|
||||
(pip)
|
||||
```bash
|
||||
pip3 install torch torchvision torchaudio --extra-index-url https://download.pytorch.org/whl/rocm5.2/
|
||||
```
|
||||
|
||||
More information and troubleshooting tips can be found at https://pytorch.org.
|
||||
@@ -1,62 +0,0 @@
|
||||
---
|
||||
title: Overview
|
||||
---
|
||||
|
||||
We offer several ways to install InvokeAI, each one suited to your
|
||||
experience and preferences.
|
||||
|
||||
1. [InvokeAI installer](INSTALL_INVOKE.md)
|
||||
|
||||
This is a installer script that installs InvokeAI and all the
|
||||
third party libraries it depends on. When a new version of
|
||||
InvokeAI is released, you will download and reinstall the new
|
||||
version.
|
||||
|
||||
This installer is designed for people who want the system to "just
|
||||
work", don't have an interest in tinkering with it, and do not
|
||||
care about upgrading to unreleased experimental features.
|
||||
|
||||
**Important Caveats**
|
||||
- This script does not support AMD GPUs. For Linux AMD support,
|
||||
please use the manual or source code installer methods.
|
||||
- This script has difficulty on some Macintosh machines
|
||||
that have previously been used for Python development due to
|
||||
conflicting development tools versions. Mac developers may wish
|
||||
to try the source code installer or one of the manual methods instead.
|
||||
|
||||
2. [Source code installer](INSTALL_SOURCE.md)
|
||||
|
||||
This is a script that will install InvokeAI and all its essential
|
||||
third party libraries. In contrast to the previous installer, it
|
||||
includes access to a "developer console" which will allow you to
|
||||
access experimental features on the development branch.
|
||||
|
||||
This method is recommended for individuals who are wish to stay
|
||||
on the cutting edge of InvokeAI development and are not afraid
|
||||
of occasional breakage.
|
||||
|
||||
3. [Manual Installation](INSTALL_MANUAL.md)
|
||||
|
||||
In this method you will manually run the commands needed to install
|
||||
InvokeAI and its dependencies. We offer two recipes: one suited to
|
||||
those who prefer the `conda` tool, and one suited to those who prefer
|
||||
`pip` and Python virtual environments.
|
||||
|
||||
This method is recommended for users who have previously used `conda`
|
||||
or `pip` in the past, developers, and anyone who wishes to remain on
|
||||
the cutting edge of future InvokeAI development and is willing to put
|
||||
up with occasional glitches and breakage.
|
||||
|
||||
4. [Docker Installation](INSTALL_DOCKER.md)
|
||||
|
||||
We also offer a method for creating Docker containers containing
|
||||
InvokeAI and its dependencies. This method is recommended for
|
||||
individuals with experience with Docker containers and understand
|
||||
the pluses and minuses of a container-based install.
|
||||
|
||||
5. [Jupyter Notebooks Installation](INSTALL_JUPYTER.md)
|
||||
|
||||
This method is suitable for running InvokeAI on a Google Colab
|
||||
account. It is recommended for individuals who have previously
|
||||
worked on the Colab and are comfortable with the Jupyter notebook
|
||||
environment.
|
||||
@@ -31,6 +31,7 @@ dependencies:
|
||||
- pip:
|
||||
- dependency_injector==4.40.0
|
||||
- getpass_asterisk
|
||||
- gfpgan
|
||||
- omegaconf==2.1.1
|
||||
- pyreadline3
|
||||
- realesrgan
|
||||
@@ -38,8 +39,7 @@ dependencies:
|
||||
- test-tube>=0.7.5
|
||||
- git+https://github.com/openai/CLIP.git@main#egg=clip
|
||||
- git+https://github.com/Birch-san/k-diffusion.git@mps#egg=k_diffusion
|
||||
- git+https://github.com/invoke-ai/clipseg.git@relaxed-python-requirement#egg=clipseg
|
||||
- git+https://github.com/invoke-ai/GFPGAN#egg=gfpgan
|
||||
- git+https://github.com/invoke-ai/clipseg.git@models-rename#egg=clipseg
|
||||
- -e .
|
||||
variables:
|
||||
PYTORCH_ENABLE_MPS_FALLBACK: 1
|
||||
|
||||
@@ -18,6 +18,7 @@ dependencies:
|
||||
- flask_cors==3.0.10
|
||||
- flask_socketio==5.3.0
|
||||
- getpass_asterisk
|
||||
- gfpgan
|
||||
- imageio-ffmpeg==0.4.2
|
||||
- imageio==2.9.0
|
||||
- kornia==0.6.0
|
||||
@@ -41,5 +42,4 @@ dependencies:
|
||||
- git+https://github.com/openai/CLIP.git@main#egg=clip
|
||||
- git+https://github.com/Birch-san/k-diffusion.git@mps#egg=k_diffusion
|
||||
- git+https://github.com/invoke-ai/clipseg.git@relaxed-python-requirement#egg=clipseg
|
||||
- git+https://github.com/invoke-ai/GFPGAN#egg=gfpgan
|
||||
- -e .
|
||||
|
||||
@@ -21,6 +21,7 @@ dependencies:
|
||||
- flask_cors==3.0.10
|
||||
- flask_socketio==5.3.0
|
||||
- getpass_asterisk
|
||||
- gfpgan
|
||||
- imageio-ffmpeg==0.4.2
|
||||
- imageio==2.9.0
|
||||
- kornia==0.6.0
|
||||
@@ -40,6 +41,5 @@ dependencies:
|
||||
- transformers==4.21.3
|
||||
- git+https://github.com/openai/CLIP.git@main#egg=clip
|
||||
- git+https://github.com/Birch-san/k-diffusion.git@mps#egg=k_diffusion
|
||||
- git+https://github.com/invoke-ai/clipseg.git@relaxed-python-requirement#egg=clipseg
|
||||
- git+https://github.com/invoke-ai/GFPGAN#egg=gfpgan
|
||||
- git+https://github.com/invoke-ai/clipseg.git@models-rename#egg=clipseg
|
||||
- -e .
|
||||
|
||||
@@ -2,63 +2,55 @@ name: invokeai
|
||||
channels:
|
||||
- pytorch
|
||||
- conda-forge
|
||||
- defaults
|
||||
dependencies:
|
||||
- python=3.10
|
||||
- pip>=22.2
|
||||
- pytorch=1.12
|
||||
- pytorch-lightning=1.7
|
||||
- torchvision=0.13
|
||||
- torchmetrics=0.10
|
||||
- torch-fidelity=0.3
|
||||
- python=3.9.13
|
||||
- pip=22.2.2
|
||||
- pytorch=1.12.1
|
||||
- torchvision=0.13.1
|
||||
|
||||
# I suggest to keep the other deps sorted for convenience.
|
||||
# To determine what the latest versions should be, run:
|
||||
#
|
||||
# ```shell
|
||||
# sed -E 's/invokeai/invokeai-updated/;20,99s/- ([^=]+)==.+/- \1/' environment-mac.yml > environment-mac-updated.yml
|
||||
# CONDA_SUBDIR=osx-arm64 conda env create -f environment-mac-updated.yml && conda list -n invokeai-updated | awk ' {print " - " $1 "==" $2;} '
|
||||
# ```
|
||||
|
||||
- albumentations=1.2
|
||||
- coloredlogs=15.0
|
||||
- diffusers=0.6
|
||||
- einops=0.3
|
||||
- eventlet
|
||||
- grpcio=1.46
|
||||
- flask=2.1
|
||||
- flask-socketio=5.3
|
||||
- flask-cors=3.0
|
||||
- albumentations=1.2.1
|
||||
- coloredlogs=15.0.1
|
||||
- diffusers=0.6.0
|
||||
- einops=0.4.1
|
||||
- grpcio=1.46.4
|
||||
- humanfriendly=10.0
|
||||
- imageio=2.21
|
||||
- imageio-ffmpeg=0.4
|
||||
- imgaug=0.4
|
||||
- kornia=0.6
|
||||
- mpmath=1.2
|
||||
- nomkl=3
|
||||
- numpy=1.23
|
||||
- omegaconf=2.1
|
||||
- openh264=2.3
|
||||
- onnx=1.12
|
||||
- onnxruntime=1.12
|
||||
- pudb=2019.2
|
||||
- protobuf=3.20
|
||||
- py-opencv=4.6
|
||||
- scipy=1.9
|
||||
- streamlit=1.12
|
||||
- sympy=1.10
|
||||
- send2trash=1.8
|
||||
- tensorboard=2.10
|
||||
- transformers=4.23
|
||||
- imageio=2.21.2
|
||||
- imageio-ffmpeg=0.4.7
|
||||
- imgaug=0.4.0
|
||||
- kornia=0.6.7
|
||||
- mpmath=1.2.1
|
||||
- nomkl # arm64 has only 1.0 while x64 needs 3.0
|
||||
- numpy=1.23.4
|
||||
- omegaconf=2.1.1
|
||||
- openh264=2.3.0
|
||||
- onnx=1.12.0
|
||||
- onnxruntime=1.12.1
|
||||
- pudb=2022.1
|
||||
- pytorch-lightning=1.7.7
|
||||
- scipy=1.9.3
|
||||
- streamlit=1.12.2
|
||||
- taming-transformers-rom1504
|
||||
- sympy=1.10.1
|
||||
- tensorboard=2.10.0
|
||||
- torchmetrics=0.10.1
|
||||
- py-opencv=4.6.0
|
||||
- flask=2.1.3
|
||||
- flask-socketio=5.3.0
|
||||
- flask-cors=3.0.10
|
||||
- eventlet=0.33.1
|
||||
- protobuf=3.20.1
|
||||
- send2trash=1.8.0
|
||||
- transformers=4.23.1
|
||||
- torch-fidelity=0.3.0
|
||||
- pip:
|
||||
- getpass_asterisk
|
||||
- taming-transformers-rom1504
|
||||
- dependency_injector==4.40.0
|
||||
- realesrgan==0.2.5.0
|
||||
- test-tube==0.7.5
|
||||
- git+https://github.com/openai/CLIP.git@main#egg=clip
|
||||
- git+https://github.com/invoke-ai/k-diffusion.git@mps#egg=k_diffusion
|
||||
- git+https://github.com/invoke-ai/Real-ESRGAN.git#egg=realesrgan
|
||||
- git+https://github.com/invoke-ai/GFPGAN.git#egg=gfpgan
|
||||
- git+https://github.com/invoke-ai/clipseg.git@relaxed-python-requirement#egg=clipseg
|
||||
- git+https://github.com/Birch-san/k-diffusion.git@mps#egg=k_diffusion
|
||||
- git+https://github.com/TencentARC/GFPGAN.git#egg=gfpgan
|
||||
- git+https://github.com/invoke-ai/clipseg.git@models-rename#egg=clipseg
|
||||
- -e .
|
||||
variables:
|
||||
PYTORCH_ENABLE_MPS_FALLBACK: 1
|
||||
|
||||
@@ -13,7 +13,6 @@ dependencies:
|
||||
- cudatoolkit=11.6
|
||||
- pip:
|
||||
- albumentations==0.4.3
|
||||
- basicsr==1.4.1
|
||||
- dependency_injector==4.40.0
|
||||
- diffusers==0.6.0
|
||||
- einops==0.3.0
|
||||
@@ -22,6 +21,7 @@ dependencies:
|
||||
- flask_cors==3.0.10
|
||||
- flask_socketio==5.3.0
|
||||
- getpass_asterisk
|
||||
- gfpgan
|
||||
- imageio-ffmpeg==0.4.2
|
||||
- imageio==2.9.0
|
||||
- kornia==0.6.0
|
||||
@@ -42,5 +42,4 @@ dependencies:
|
||||
- git+https://github.com/openai/CLIP.git@main#egg=clip
|
||||
- git+https://github.com/Birch-san/k-diffusion.git@mps#egg=k_diffusion
|
||||
- git+https://github.com/invoke-ai/clipseg.git@relaxed-python-requirement#egg=clipseg
|
||||
- git+https://github.com/invoke-ai/GFPGAN#egg=gfpgan
|
||||
- -e .
|
||||
|
||||
@@ -1,3 +1,5 @@
|
||||
--prefer-binary
|
||||
|
||||
# pip will resolve the version which matches torch
|
||||
albumentations
|
||||
dependency_injector==4.40.0
|
||||
@@ -9,6 +11,7 @@ flask_cors==3.0.10
|
||||
flask_socketio==5.3.0
|
||||
flaskwebgui==0.3.7
|
||||
getpass_asterisk
|
||||
gfpgan
|
||||
huggingface-hub
|
||||
imageio
|
||||
imageio-ffmpeg
|
||||
@@ -32,5 +35,4 @@ torchmetrics
|
||||
transformers==4.21.*
|
||||
git+https://github.com/openai/CLIP.git@main#egg=clip
|
||||
git+https://github.com/Birch-san/k-diffusion.git@mps#egg=k-diffusion
|
||||
git+https://github.com/invoke-ai/clipseg.git@relaxed-python-requirement#egg=clipseg
|
||||
git+https://github.com/invoke-ai/GFPGAN#egg=gfpgan
|
||||
git+https://github.com/invoke-ai/clipseg.git@models-rename#egg=clipseg
|
||||
|
||||
@@ -2,7 +2,6 @@
|
||||
|
||||
# Get hardware-appropriate torch/torchvision
|
||||
--extra-index-url https://download.pytorch.org/whl/cu116 --trusted-host https://download.pytorch.org
|
||||
basicsr==1.4.1
|
||||
torch==1.12.1
|
||||
torchvision==0.13.1
|
||||
-e .
|
||||
|
||||
@@ -5,7 +5,7 @@
|
||||
- `python scripts/dream.py --web` serves both frontend and backend at
|
||||
http://localhost:9090
|
||||
|
||||
## Environment
|
||||
## Evironment
|
||||
|
||||
Install [node](https://nodejs.org/en/download/) (includes npm) and optionally
|
||||
[yarn](https://yarnpkg.com/getting-started/install).
|
||||
@@ -15,7 +15,7 @@ packages.
|
||||
|
||||
## Dev
|
||||
|
||||
1. From `frontend/`, run `npm run dev` / `yarn dev` to start the dev server.
|
||||
1. From `frontend/`, run `npm dev` / `yarn dev` to start the dev server.
|
||||
2. Run `python scripts/dream.py --web`.
|
||||
3. Navigate to the dev server address e.g. `http://localhost:5173/`.
|
||||
|
||||
|
||||
File diff suppressed because one or more lines are too long
829
frontend/dist/assets/index.4488003f.js
vendored
Normal file
829
frontend/dist/assets/index.4488003f.js
vendored
Normal file
File diff suppressed because one or more lines are too long
501
frontend/dist/assets/index.8eb7dfe4.js
vendored
Normal file
501
frontend/dist/assets/index.8eb7dfe4.js
vendored
Normal file
File diff suppressed because one or more lines are too long
690
frontend/dist/assets/index.ae92a637.js
vendored
Normal file
690
frontend/dist/assets/index.ae92a637.js
vendored
Normal file
File diff suppressed because one or more lines are too long
517
frontend/dist/assets/index.cc049b93.js
vendored
Normal file
517
frontend/dist/assets/index.cc049b93.js
vendored
Normal file
File diff suppressed because one or more lines are too long
517
frontend/dist/assets/index.e2832fd4.js
vendored
Normal file
517
frontend/dist/assets/index.e2832fd4.js
vendored
Normal file
File diff suppressed because one or more lines are too long
2
frontend/dist/index.html
vendored
2
frontend/dist/index.html
vendored
@@ -6,7 +6,7 @@
|
||||
<meta name="viewport" content="width=device-width, initial-scale=1.0" />
|
||||
<title>InvokeAI - A Stable Diffusion Toolkit</title>
|
||||
<link rel="shortcut icon" type="icon" href="./assets/favicon.0d253ced.ico" />
|
||||
<script type="module" crossorigin src="./assets/index.a8ba2a6c.js"></script>
|
||||
<script type="module" crossorigin src="./assets/index.1fc0290b.js"></script>
|
||||
<link rel="stylesheet" href="./assets/index.40a72c80.css">
|
||||
</head>
|
||||
|
||||
|
||||
10651
frontend/package-lock.json
generated
Normal file
10651
frontend/package-lock.json
generated
Normal file
File diff suppressed because it is too large
Load Diff
@@ -1,4 +1,4 @@
|
||||
import { IconButton, Image, Spinner } from '@chakra-ui/react';
|
||||
import { IconButton, Image } from '@chakra-ui/react';
|
||||
import { useState } from 'react';
|
||||
import { FaAngleLeft, FaAngleRight } from 'react-icons/fa';
|
||||
import { RootState, useAppDispatch, useAppSelector } from '../../app/store';
|
||||
@@ -30,6 +30,7 @@ export const imagesSelector = createSelector(
|
||||
|
||||
return {
|
||||
imageToDisplay: intermediateImage ? intermediateImage : currentImage,
|
||||
isIntermediate: intermediateImage,
|
||||
currentCategory,
|
||||
isOnFirstImage: currentImageIndex === 0,
|
||||
isOnLastImage:
|
||||
@@ -55,6 +56,7 @@ export default function CurrentImagePreview() {
|
||||
isOnLastImage,
|
||||
shouldShowImageDetails,
|
||||
imageToDisplay,
|
||||
isIntermediate,
|
||||
} = useAppSelector(imagesSelector);
|
||||
|
||||
const [shouldShowNextPrevButtons, setShouldShowNextPrevButtons] =
|
||||
@@ -81,8 +83,8 @@ export default function CurrentImagePreview() {
|
||||
{imageToDisplay && (
|
||||
<Image
|
||||
src={imageToDisplay.url}
|
||||
width={imageToDisplay.width}
|
||||
height={imageToDisplay.height}
|
||||
width={isIntermediate ? imageToDisplay.width : undefined}
|
||||
height={isIntermediate ? imageToDisplay.height : undefined}
|
||||
/>
|
||||
)}
|
||||
{!shouldShowImageDetails && (
|
||||
|
||||
2968
frontend/yarn.lock
2968
frontend/yarn.lock
File diff suppressed because it is too large
Load Diff
Binary file not shown.
@@ -1,29 +0,0 @@
|
||||
#!/usr/bin/env bash
|
||||
|
||||
set -euo pipefail
|
||||
IFS=$'\n\t'
|
||||
|
||||
echo "Be certain that you're in the 'installer' directory before continuing."
|
||||
read -p "Press any key to continue, or CTRL-C to exit..."
|
||||
|
||||
# make the installer zip for linux and mac
|
||||
rm -rf InvokeAI
|
||||
mkdir -p InvokeAI
|
||||
cp install.sh InvokeAI
|
||||
cp readme.txt InvokeAI
|
||||
|
||||
zip -r InvokeAI-linux.zip InvokeAI
|
||||
zip -r InvokeAI-mac.zip InvokeAI
|
||||
|
||||
# make the installer zip for windows
|
||||
rm -rf InvokeAI
|
||||
mkdir -p InvokeAI
|
||||
cp install.bat InvokeAI
|
||||
cp readme.txt InvokeAI
|
||||
cp WinLongPathsEnabled.reg InvokeAI
|
||||
|
||||
zip -r InvokeAI-windows.zip InvokeAI
|
||||
|
||||
rm -rf InvokeAI
|
||||
|
||||
echo "The installer zips are ready for distribution."
|
||||
@@ -1,164 +0,0 @@
|
||||
@echo off
|
||||
|
||||
@rem This script will install git (if not found on the PATH variable)
|
||||
@rem using micromamba (an 8mb static-linked single-file binary, conda replacement).
|
||||
@rem For users who already have git, this step will be skipped.
|
||||
|
||||
@rem Next, it'll download the project's source code.
|
||||
@rem Then it will download a self-contained, standalone Python and unpack it.
|
||||
@rem Finally, it'll create the Python virtual environment and preload the models.
|
||||
|
||||
@rem This enables a user to install this project without manually installing git or Python
|
||||
|
||||
echo ***** Installing InvokeAI.. *****
|
||||
|
||||
set PATH=c:\windows\system32
|
||||
|
||||
@rem Config
|
||||
set INSTALL_ENV_DIR=%cd%\installer_files\env
|
||||
@rem https://mamba.readthedocs.io/en/latest/installation.html
|
||||
set MICROMAMBA_DOWNLOAD_URL=https://github.com/cmdr2/stable-diffusion-ui/releases/download/v1.1/micromamba.exe
|
||||
set RELEASE_URL=https://github.com/invoke-ai/InvokeAI
|
||||
set RELEASE_SOURCEBALL=/archive/refs/heads/v2.1.3.tar.gz
|
||||
set PYTHON_BUILD_STANDALONE_URL=https://github.com/indygreg/python-build-standalone/releases/download
|
||||
set PYTHON_BUILD_STANDALONE=20221002/cpython-3.10.7+20221002-x86_64-pc-windows-msvc-shared-install_only.tar.gz
|
||||
|
||||
set PACKAGES_TO_INSTALL=
|
||||
|
||||
call git --version >.tmp1 2>.tmp2
|
||||
if "%ERRORLEVEL%" NEQ "0" set PACKAGES_TO_INSTALL=%PACKAGES_TO_INSTALL% git
|
||||
|
||||
@rem Cleanup
|
||||
del /q .tmp1 .tmp2
|
||||
|
||||
@rem (if necessary) install git into a contained environment
|
||||
if "%PACKAGES_TO_INSTALL%" NEQ "" (
|
||||
@rem download micromamba
|
||||
echo ***** Downloading micromamba from %MICROMAMBA_DOWNLOAD_URL% to micromamba.exe *****
|
||||
|
||||
call curl -L "%MICROMAMBA_DOWNLOAD_URL%" > micromamba.exe
|
||||
|
||||
@rem test the mamba binary
|
||||
echo ***** Micromamba version: *****
|
||||
call micromamba.exe --version
|
||||
|
||||
@rem create the installer env
|
||||
if not exist "%INSTALL_ENV_DIR%" (
|
||||
call micromamba.exe create -y --prefix "%INSTALL_ENV_DIR%"
|
||||
)
|
||||
|
||||
echo ***** Packages to install:%PACKAGES_TO_INSTALL% *****
|
||||
|
||||
call micromamba.exe install -y --prefix "%INSTALL_ENV_DIR%" -c conda-forge %PACKAGES_TO_INSTALL%
|
||||
|
||||
if not exist "%INSTALL_ENV_DIR%" (
|
||||
echo ----- There was a problem while installing "%PACKAGES_TO_INSTALL%" using micromamba. Cannot continue. -----
|
||||
pause
|
||||
exit /b
|
||||
)
|
||||
)
|
||||
|
||||
del /q micromamba.exe
|
||||
|
||||
@rem For 'git' only
|
||||
set PATH=%INSTALL_ENV_DIR%\Library\bin;%PATH%
|
||||
|
||||
@rem Download/unpack/clean up InvokeAI release sourceball
|
||||
set err_msg=----- InvokeAI source download failed -----
|
||||
curl -L %RELEASE_URL%/%RELEASE_SOURCEBALL% --output InvokeAI.tgz
|
||||
if %errorlevel% neq 0 goto err_exit
|
||||
|
||||
set err_msg=----- InvokeAI source unpack failed -----
|
||||
tar -zxf InvokeAI.tgz
|
||||
if %errorlevel% neq 0 goto err_exit
|
||||
|
||||
del /q InvokeAI.tgz
|
||||
|
||||
set err_msg=----- InvokeAI source copy failed -----
|
||||
cd InvokeAI-*
|
||||
xcopy . .. /e /h
|
||||
if %errorlevel% neq 0 goto err_exit
|
||||
cd ..
|
||||
|
||||
@rem cleanup
|
||||
for /f %%i in ('dir /b InvokeAI-*') do rd /s /q %%i
|
||||
rd /s /q .dev_scripts .github docker-build tests
|
||||
del /q requirements.in requirements-mkdocs.txt shell.nix
|
||||
|
||||
echo ***** Unpacked InvokeAI source *****
|
||||
|
||||
@rem Download/unpack/clean up python-build-standalone
|
||||
set err_msg=----- Python download failed -----
|
||||
curl -L %PYTHON_BUILD_STANDALONE_URL%/%PYTHON_BUILD_STANDALONE% --output python.tgz
|
||||
if %errorlevel% neq 0 goto err_exit
|
||||
|
||||
set err_msg=----- Python unpack failed -----
|
||||
tar -zxf python.tgz
|
||||
if %errorlevel% neq 0 goto err_exit
|
||||
|
||||
del /q python.tgz
|
||||
|
||||
echo ***** Unpacked python-build-standalone *****
|
||||
|
||||
@rem create venv
|
||||
set err_msg=----- problem creating venv -----
|
||||
.\python\python -E -s -m venv .venv
|
||||
@rem In reality, the following is ALL that 'activate.bat' does,
|
||||
@rem aside from setting the prompt, which we don't care about
|
||||
set PYTHONPATH=
|
||||
set PATH=.venv\Scripts;%PATH%
|
||||
if %errorlevel% neq 0 goto err_exit
|
||||
|
||||
echo ***** Created Python virtual environment *****
|
||||
|
||||
@rem Print venv's Python version
|
||||
set err_msg=----- problem calling venv's python -----
|
||||
echo We're running under
|
||||
.venv\Scripts\python --version
|
||||
if %errorlevel% neq 0 goto err_exit
|
||||
|
||||
set err_msg=----- pip update failed -----
|
||||
.venv\Scripts\python -m pip install --no-cache-dir --no-warn-script-location --upgrade pip
|
||||
if %errorlevel% neq 0 goto err_exit
|
||||
|
||||
echo ***** Updated pip *****
|
||||
|
||||
set err_msg=----- requirements file copy failed -----
|
||||
copy installer\py3.10-windows-x86_64-cuda-reqs.txt requirements.txt
|
||||
if %errorlevel% neq 0 goto err_exit
|
||||
|
||||
set err_msg=----- main pip install failed -----
|
||||
.venv\Scripts\python -m pip install --no-cache-dir --no-warn-script-location -r requirements.txt
|
||||
if %errorlevel% neq 0 goto err_exit
|
||||
|
||||
set err_msg=----- clipseg install failed -----
|
||||
.venv\Scripts\python -m pip install --no-cache-dir --no-warn-script-location git+https://github.com/invoke-ai/clipseg.git@relaxed-python-requirement#egg=clipseg
|
||||
if %errorlevel% neq 0 goto err_exit
|
||||
|
||||
set err_msg=----- InvokeAI setup failed -----
|
||||
.venv\Scripts\python -m pip install --no-cache-dir --no-warn-script-location -e .
|
||||
if %errorlevel% neq 0 goto err_exit
|
||||
|
||||
echo ***** Installed Python dependencies *****
|
||||
|
||||
@rem preload the models
|
||||
call .venv\Scripts\python scripts\preload_models.py
|
||||
set err_msg=----- model download clone failed -----
|
||||
if %errorlevel% neq 0 goto err_exit
|
||||
|
||||
echo ***** Finished downloading models *****
|
||||
|
||||
echo ***** Installing invoke.bat ******
|
||||
copy installer\invoke.bat .\invoke.bat
|
||||
echo All done! Execute the file invoke.bat in this directory to start InvokeAI
|
||||
|
||||
@rem more cleanup
|
||||
rd /s /q installer installer_files
|
||||
|
||||
pause
|
||||
exit
|
||||
|
||||
:err_exit
|
||||
echo %err_msg%
|
||||
pause
|
||||
exit
|
||||
@@ -1,211 +0,0 @@
|
||||
#!/usr/bin/env bash
|
||||
|
||||
set -euo pipefail
|
||||
IFS=$'\n\t'
|
||||
|
||||
function _err_exit {
|
||||
if test "$1" -ne 0
|
||||
then
|
||||
echo -e "Error code $1; Error caught was '$2'"
|
||||
read -p "Press any key to exit..."
|
||||
exit
|
||||
fi
|
||||
}
|
||||
|
||||
# This script will install git (if not found on the PATH variable)
|
||||
# using micromamba (an 8mb static-linked single-file binary, conda replacement).
|
||||
# For users who already have git, this step will be skipped.
|
||||
|
||||
# Next, it'll download the project's source code.
|
||||
# Then it will download a self-contained, standalone Python and unpack it.
|
||||
# Finally, it'll create the Python virtual environment and preload the models.
|
||||
|
||||
# This enables a user to install this project without manually installing git or Python
|
||||
|
||||
echo -e "\n***** Installing InvokeAI... *****\n"
|
||||
|
||||
|
||||
OS_NAME=$(uname -s)
|
||||
case "${OS_NAME}" in
|
||||
Linux*) OS_NAME="linux";;
|
||||
Darwin*) OS_NAME="darwin";;
|
||||
*) echo -e "\n----- Unknown OS: $OS_NAME! This script runs only on Linux or MacOS -----\n" && exit
|
||||
esac
|
||||
|
||||
OS_ARCH=$(uname -m)
|
||||
case "${OS_ARCH}" in
|
||||
x86_64*) ;;
|
||||
arm64*) ;;
|
||||
*) echo -e "\n----- Unknown system architecture: $OS_ARCH! This script runs only on x86_64 or arm64 -----\n" && exit
|
||||
esac
|
||||
|
||||
# https://mamba.readthedocs.io/en/latest/installation.html
|
||||
MAMBA_OS_NAME=$OS_NAME
|
||||
MAMBA_ARCH=$OS_ARCH
|
||||
if [ "$OS_NAME" == "darwin" ]; then
|
||||
MAMBA_OS_NAME="osx"
|
||||
fi
|
||||
|
||||
if [ "$OS_ARCH" == "linux" ]; then
|
||||
MAMBA_ARCH="aarch64"
|
||||
fi
|
||||
|
||||
if [ "$OS_ARCH" == "x86_64" ]; then
|
||||
MAMBA_ARCH="64"
|
||||
fi
|
||||
|
||||
PY_ARCH=$OS_ARCH
|
||||
if [ "$OS_ARCH" == "arm64" ]; then
|
||||
PY_ARCH="aarch64"
|
||||
fi
|
||||
|
||||
# Compute device ('cd' segment of reqs files) detect goes here
|
||||
# This needs a ton of work
|
||||
# Suggestions:
|
||||
# - lspci
|
||||
# - check $PATH for nvidia-smi, gtt CUDA/GPU version from output
|
||||
# - Surely there's a similar utility for AMD?
|
||||
CD="cuda"
|
||||
if [ "$OS_NAME" == "darwin" ] && [ "$OS_ARCH" == "arm64" ]; then
|
||||
CD="mps"
|
||||
fi
|
||||
|
||||
# config
|
||||
INSTALL_ENV_DIR="$(pwd)/installer_files/env"
|
||||
MICROMAMBA_DOWNLOAD_URL="https://micro.mamba.pm/api/micromamba/${MAMBA_OS_NAME}-${MAMBA_ARCH}/latest"
|
||||
RELEASE_URL=https://github.com/invoke-ai/InvokeAI
|
||||
RELEASE_SOURCEBALL=/archive/refs/heads/v2.1.3.tar.gz
|
||||
PYTHON_BUILD_STANDALONE_URL=https://github.com/indygreg/python-build-standalone/releases/download
|
||||
if [ "$OS_NAME" == "darwin" ]; then
|
||||
PYTHON_BUILD_STANDALONE=20221002/cpython-3.10.7+20221002-${PY_ARCH}-apple-darwin-install_only.tar.gz
|
||||
elif [ "$OS_NAME" == "linux" ]; then
|
||||
PYTHON_BUILD_STANDALONE=20221002/cpython-3.10.7+20221002-${PY_ARCH}-unknown-linux-gnu-install_only.tar.gz
|
||||
fi
|
||||
|
||||
PACKAGES_TO_INSTALL=""
|
||||
|
||||
if ! hash "git" &>/dev/null; then PACKAGES_TO_INSTALL="$PACKAGES_TO_INSTALL git"; fi
|
||||
|
||||
# (if necessary) install git and conda into a contained environment
|
||||
if [ "$PACKAGES_TO_INSTALL" != "" ]; then
|
||||
# download micromamba
|
||||
echo -e "\n***** Downloading micromamba from $MICROMAMBA_DOWNLOAD_URL to micromamba *****\n"
|
||||
|
||||
curl -L "$MICROMAMBA_DOWNLOAD_URL" | tar -xvj bin/micromamba -O > micromamba
|
||||
|
||||
chmod u+x "micromamba"
|
||||
|
||||
# test the mamba binary
|
||||
echo -e "\n***** Micromamba version: *****\n"
|
||||
"micromamba" --version
|
||||
|
||||
# create the installer env
|
||||
if [ ! -e "$INSTALL_ENV_DIR" ]; then
|
||||
"micromamba" create -y --prefix "$INSTALL_ENV_DIR"
|
||||
fi
|
||||
|
||||
echo -e "\n***** Packages to install:$PACKAGES_TO_INSTALL *****\n"
|
||||
|
||||
"micromamba" install -y --prefix "$INSTALL_ENV_DIR" -c conda-forge $PACKAGES_TO_INSTALL
|
||||
|
||||
if [ ! -e "$INSTALL_ENV_DIR" ]; then
|
||||
echo -e "\n----- There was a problem while initializing micromamba. Cannot continue. -----\n"
|
||||
exit
|
||||
fi
|
||||
fi
|
||||
|
||||
rm -f micromamba.exe
|
||||
|
||||
export PATH="$INSTALL_ENV_DIR/bin:$PATH"
|
||||
|
||||
# Download/unpack/clean up InvokeAI release sourceball
|
||||
_err_msg="\n----- InvokeAI source download failed -----\n"
|
||||
curl -L $RELEASE_URL/$RELEASE_SOURCEBALL --output InvokeAI.tgz
|
||||
_err_exit $? _err_msg
|
||||
_err_msg="\n----- InvokeAI source unpack failed -----\n"
|
||||
tar -zxf InvokeAI.tgz
|
||||
_err_exit $? _err_msg
|
||||
|
||||
rm -f InvokeAI.tgz
|
||||
|
||||
_err_msg="\n----- InvokeAI source copy failed -----\n"
|
||||
cd InvokeAI-*
|
||||
cp -r . ..
|
||||
_err_exit $? _err_msg
|
||||
cd ..
|
||||
|
||||
# cleanup
|
||||
rm -rf InvokeAI-*/
|
||||
rm -rf .dev_scripts/ .github/ docker-build/ tests/ requirements.in requirements-mkdocs.txt shell.nix
|
||||
|
||||
echo -e "\n***** Unpacked InvokeAI source *****\n"
|
||||
|
||||
# Download/unpack/clean up python-build-standalone
|
||||
_err_msg="\n----- Python download failed -----\n"
|
||||
curl -L $PYTHON_BUILD_STANDALONE_URL/$PYTHON_BUILD_STANDALONE --output python.tgz
|
||||
_err_exit $? _err_msg
|
||||
_err_msg="\n----- Python unpack failed -----\n"
|
||||
tar -zxf python.tgz
|
||||
_err_exit $? _err_msg
|
||||
|
||||
rm -f python.tgz
|
||||
|
||||
echo -e "\n***** Unpacked python-build-standalone *****\n"
|
||||
|
||||
# create venv
|
||||
_err_msg="\n----- problem creating venv -----\n"
|
||||
./python/bin/python3 -E -s -m venv .venv
|
||||
_err_exit $? _err_msg
|
||||
# In reality, the following is ALL that 'activate.bat' does,
|
||||
# aside from setting the prompt, which we don't care about
|
||||
export PYTHONPATH=
|
||||
export PATH=.venv/bin:$PATH
|
||||
|
||||
echo -e "\n***** Created Python virtual environment *****\n"
|
||||
|
||||
# Print venv's Python version
|
||||
_err_msg="\n----- problem calling venv's python -----\n"
|
||||
echo -e "We're running under"
|
||||
.venv/bin/python3 --version
|
||||
_err_exit $? _err_msg
|
||||
|
||||
_err_msg="\n----- pip update failed -----\n"
|
||||
.venv/bin/python3 -m pip install --no-cache-dir --no-warn-script-location --upgrade pip
|
||||
_err_exit $? _err_msg
|
||||
|
||||
echo -e "\n***** Updated pip *****\n"
|
||||
|
||||
_err_msg="\n----- requirements file copy failed -----\n"
|
||||
cp installer/py3.10-${OS_NAME}-"${OS_ARCH}"-${CD}-reqs.txt requirements.txt
|
||||
_err_exit $? _err_msg
|
||||
|
||||
_err_msg="\n----- main pip install failed -----\n"
|
||||
.venv/bin/python3 -m pip install --no-cache-dir --no-warn-script-location -r requirements.txt
|
||||
_err_exit $? _err_msg
|
||||
|
||||
_err_msg="\n----- clipseg install failed -----\n"
|
||||
.venv/bin/python3 -m pip install --no-cache-dir --no-warn-script-location git+https://github.com/invoke-ai/clipseg.git@relaxed-python-requirement#egg=clipseg
|
||||
_err_exit $? _err_msg
|
||||
|
||||
_err_msg="\n----- InvokeAI setup failed -----\n"
|
||||
.venv/bin/python3 -m pip install --no-cache-dir --no-warn-script-location -e .
|
||||
_err_exit $? _err_msg
|
||||
|
||||
echo -e "\n***** Installed Python dependencies *****\n"
|
||||
|
||||
# preload the models
|
||||
.venv/bin/python3 scripts/preload_models.py
|
||||
_err_msg="\n----- model download clone failed -----\n"
|
||||
_err_exit $? _err_msg
|
||||
|
||||
echo -e "\n***** Finished downloading models *****\n"
|
||||
|
||||
echo -e "\n***** Installing invoke.sh ******\n"
|
||||
cp installer/invoke.sh .
|
||||
|
||||
# more cleanup
|
||||
rm -rf installer/ installer_files/
|
||||
|
||||
echo "All done! Run the command './invoke.sh' to start InvokeAI."
|
||||
read -p "Press any key to exit..."
|
||||
exit
|
||||
@@ -1,27 +0,0 @@
|
||||
@echo off
|
||||
|
||||
set PATH=c:\windows\system32
|
||||
set PATH=.venv\Scripts;%PATH%
|
||||
|
||||
echo Do you want to generate images using the
|
||||
echo 1. command-line
|
||||
echo 2. browser-based UI
|
||||
echo 3. open the developer console
|
||||
set /P restore="Please enter 1, 2 or 3: "
|
||||
IF /I "%restore%" == "1" (
|
||||
echo Starting the InvokeAI command-line..
|
||||
.venv\Scripts\python scripts\invoke.py
|
||||
) ELSE IF /I "%restore%" == "2" (
|
||||
echo Starting the InvokeAI browser-based UI..
|
||||
.venv\Scripts\python scripts\invoke.py --web
|
||||
) ELSE IF /I "%restore%" == "3" (
|
||||
echo Developer Console
|
||||
call where python
|
||||
call python --version
|
||||
|
||||
cmd /k
|
||||
) ELSE (
|
||||
echo Invalid selection
|
||||
pause
|
||||
exit /b
|
||||
)
|
||||
@@ -1,24 +0,0 @@
|
||||
#!/usr/bin/env bash
|
||||
|
||||
set -euo pipefail
|
||||
IFS=$'\n\t'
|
||||
|
||||
PATH=.venv/scripts:$PATH
|
||||
|
||||
if [ "$0" != "bash" ]; then
|
||||
echo "Do you want to generate images using the"
|
||||
echo "1. command-line"
|
||||
echo "2. browser-based UI"
|
||||
echo "3. open the developer console"
|
||||
read -p "Please enter 1, 2, or 3: " yn
|
||||
case $yn in
|
||||
1 ) printf "\nStarting the InvokeAI command-line..\n"; .venv/bin/python scripts/invoke.py;;
|
||||
2 ) printf "\nStarting the InvokeAI browser-based UI..\n"; .venv/bin/python scripts/invoke.py --web;;
|
||||
3 ) printf "\nDeveloper Console:\n"; file_name=$(basename "${BASH_SOURCE[0]}"); bash --init-file "$file_name";;
|
||||
* ) echo "Invalid selection"; exit;;
|
||||
esac
|
||||
else # in developer console
|
||||
python --version
|
||||
echo "Press ^D to exit"
|
||||
export PS1="(InvokeAI) \u@\h \w> "
|
||||
fi
|
||||
File diff suppressed because it is too large
Load Diff
File diff suppressed because it is too large
Load Diff
File diff suppressed because it is too large
Load Diff
File diff suppressed because it is too large
Load Diff
@@ -1,17 +0,0 @@
|
||||
InvokeAI
|
||||
|
||||
Project homepage: https://github.com/invoke-ai/InvokeAI
|
||||
|
||||
Installation on Windows:
|
||||
NOTE: You might need to enable Windows Long Paths. If you're not sure,
|
||||
then you almost certainly need to. Simply double-click the 'WinLongPathsEnabled.reg'
|
||||
file. Note that you will need to have admin privileges in order to
|
||||
do this.
|
||||
|
||||
Please double-click the 'install.bat' file (while keeping it inside the invokeAI folder).
|
||||
|
||||
Installation on Linux and Mac:
|
||||
Please open the terminal, and run './install.sh' (while keeping it inside the invokeAI folder).
|
||||
|
||||
After installation, please run the 'invoke.bat' file (on Windows) or 'invoke.sh'
|
||||
file (on Linux/Mac) to start InvokeAI.
|
||||
@@ -1,24 +0,0 @@
|
||||
--prefer-binary
|
||||
--extra-index-url https://download.pytorch.org/whl/cu116
|
||||
--trusted-host https://download.pytorch.org
|
||||
albumentations
|
||||
diffusers
|
||||
eventlet
|
||||
flask_cors
|
||||
flask_socketio
|
||||
flaskwebgui
|
||||
getpass_asterisk
|
||||
imageio-ffmpeg
|
||||
pyreadline3
|
||||
realesrgan
|
||||
send2trash
|
||||
streamlit
|
||||
taming-transformers-rom1504
|
||||
test-tube
|
||||
torch-fidelity
|
||||
torchvision==0.13.1 ; platform_system == 'Darwin'
|
||||
torchvision==0.13.1+cu116 ; platform_system == 'Linux' or platform_system == 'Windows'
|
||||
transformers
|
||||
https://github.com/openai/CLIP/archive/d50d76daa670286dd6cacf3bcd80b5e4823fc8e1.zip
|
||||
https://github.com/TencentARC/GFPGAN/archive/2eac2033893ca7f427f4035d80fe95b92649ac56.zip
|
||||
https://github.com/invoke-ai/k-diffusion/archive/7f16b2c33411f26b3eae78d10648d625cb0c1095.zip
|
||||
@@ -23,7 +23,6 @@ if [ "$0" != "bash" ]; then
|
||||
* ) echo "Invalid selection"; exit;;
|
||||
esac
|
||||
else # in developer console
|
||||
which python
|
||||
python --version
|
||||
echo "Press ^D to exit"
|
||||
export PS1="(InvokeAI) \u@\h \w> "
|
||||
fi
|
||||
@@ -561,15 +561,17 @@ class Generate:
|
||||
):
|
||||
# retrieve the seed from the image;
|
||||
seed = None
|
||||
image_metadata = None
|
||||
prompt = None
|
||||
|
||||
args = metadata_from_png(image_path)
|
||||
seed = opt.seed or args.seed
|
||||
if seed is None or seed < 0:
|
||||
seed = random.randrange(0, np.iinfo(np.uint32).max)
|
||||
|
||||
prompt = opt.prompt or args.prompt or ''
|
||||
print(f'>> using seed {seed} and prompt "{prompt}" for {image_path}')
|
||||
args = metadata_from_png(image_path)
|
||||
seed = args.seed
|
||||
prompt = args.prompt
|
||||
print(f'>> retrieved seed {seed} and prompt "{prompt}" from {image_path}')
|
||||
|
||||
if not seed:
|
||||
print('* Could not recover seed for image. Replacing with 42. This will not affect image quality')
|
||||
seed = 42
|
||||
|
||||
# try to reuse the same filename prefix as the original file.
|
||||
# we take everything up to the first period
|
||||
@@ -616,11 +618,7 @@ class Generate:
|
||||
extend_instructions[direction]=int(pixels)
|
||||
except ValueError:
|
||||
print(f'** invalid extension instruction. Use <directions> <pixels>..., as in "top 64 left 128 right 64 bottom 64"')
|
||||
|
||||
opt.seed = seed
|
||||
opt.prompt = prompt
|
||||
|
||||
if len(extend_instructions) > 0:
|
||||
if len(extend_instructions)>0:
|
||||
restorer = Outcrop(image,self,)
|
||||
return restorer.process (
|
||||
extend_instructions,
|
||||
@@ -1035,9 +1033,7 @@ class Generate:
|
||||
return True
|
||||
return False
|
||||
|
||||
def _check_for_erasure(self, image:Image.Image)->bool:
|
||||
if image.mode not in ('RGBA','RGB'):
|
||||
return False
|
||||
def _check_for_erasure(self, image):
|
||||
width, height = image.size
|
||||
pixdata = image.load()
|
||||
colored = 0
|
||||
|
||||
@@ -247,6 +247,8 @@ class Args(object):
|
||||
switches.append('--seamless')
|
||||
if a['hires_fix']:
|
||||
switches.append('--hires_fix')
|
||||
if a['strength'] and a['strength']>0:
|
||||
switches.append(f'-f {a["strength"]}')
|
||||
|
||||
# img2img generations have parameters relevant only to them and have special handling
|
||||
if a['init_img'] and len(a['init_img'])>0:
|
||||
@@ -552,8 +554,14 @@ class Args(object):
|
||||
postprocessing_group.add_argument(
|
||||
'--gfpgan_model_path',
|
||||
type=str,
|
||||
default='./models/gfpgan/GFPGANv1.4.pth',
|
||||
help='Indicates the path to the GFPGAN model',
|
||||
default='./GFPGANv1.4.pth',
|
||||
help='Indicates the path to the GFPGAN model, relative to --gfpgan_dir.',
|
||||
)
|
||||
postprocessing_group.add_argument(
|
||||
'--gfpgan_dir',
|
||||
type=str,
|
||||
default='./models/gfpgan',
|
||||
help='Indicates the directory containing the GFPGAN code.',
|
||||
)
|
||||
web_server_group.add_argument(
|
||||
'--web',
|
||||
@@ -858,11 +866,6 @@ class Args(object):
|
||||
default=32,
|
||||
help='When outpainting, the tile size to use for filling outpaint areas',
|
||||
)
|
||||
postprocessing_group.add_argument(
|
||||
'--new_prompt',
|
||||
type=str,
|
||||
help='Change the text prompt applied during postprocessing (default, use original generation prompt)',
|
||||
)
|
||||
postprocessing_group.add_argument(
|
||||
'-ft',
|
||||
'--facetool',
|
||||
|
||||
@@ -63,7 +63,7 @@ class Generator():
|
||||
**kwargs
|
||||
)
|
||||
results = []
|
||||
seed = seed if seed is not None and seed >= 0 else self.new_seed()
|
||||
seed = seed if seed is not None else self.new_seed()
|
||||
first_seed = seed
|
||||
seed, initial_noise = self.generate_initial_noise(seed, width, height)
|
||||
|
||||
|
||||
@@ -169,8 +169,7 @@ class Inpaint(Img2Img):
|
||||
# Fill missing areas of original image
|
||||
init_filled = self.tile_fill_missing(
|
||||
self.pil_image.copy(),
|
||||
seed = self.seed if (self.seed is not None
|
||||
and self.seed >= 0) else self.new_seed(),
|
||||
seed = self.seed,
|
||||
tile_size = tile_size
|
||||
)
|
||||
init_filled.paste(init_image, (0,0), init_image.split()[-1])
|
||||
|
||||
@@ -10,6 +10,8 @@ from ldm.models.diffusion.ddim import DDIMSampler
|
||||
from ldm.invoke.generator.omnibus import Omnibus
|
||||
from ldm.models.diffusion.shared_invokeai_diffusion import InvokeAIDiffuserComponent
|
||||
from PIL import Image
|
||||
from ldm.invoke.devices import choose_autocast
|
||||
from ldm.invoke.image_util import InitImageResizer
|
||||
|
||||
class Txt2Img2Img(Generator):
|
||||
def __init__(self, model, precision):
|
||||
@@ -44,16 +46,13 @@ class Txt2Img2Img(Generator):
|
||||
ddim_num_steps=steps, ddim_eta=ddim_eta, verbose=False
|
||||
)
|
||||
|
||||
#x = self.get_noise(init_width, init_height)
|
||||
x = x_T
|
||||
|
||||
if self.free_gpu_mem and self.model.model.device != self.model.device:
|
||||
self.model.model.to(self.model.device)
|
||||
|
||||
samples, _ = sampler.sample(
|
||||
batch_size = 1,
|
||||
S = steps,
|
||||
x_T = x,
|
||||
x_T = x_T,
|
||||
conditioning = c,
|
||||
shape = shape,
|
||||
verbose = False,
|
||||
@@ -69,11 +68,21 @@ class Txt2Img2Img(Generator):
|
||||
)
|
||||
|
||||
# resizing
|
||||
samples = torch.nn.functional.interpolate(
|
||||
samples,
|
||||
size=(height // self.downsampling_factor, width // self.downsampling_factor),
|
||||
mode="bilinear"
|
||||
)
|
||||
|
||||
image = self.sample_to_image(samples)
|
||||
image = InitImageResizer(image).resize(width, height)
|
||||
|
||||
image = np.array(image).astype(np.float32) / 255.0
|
||||
image = image[None].transpose(0, 3, 1, 2)
|
||||
image = torch.from_numpy(image)
|
||||
image = 2.0 * image - 1.0
|
||||
image = image.to(self.model.device)
|
||||
|
||||
scope = choose_autocast(self.precision)
|
||||
with scope(self.model.device.type):
|
||||
samples = self.model.get_first_stage_encoding(
|
||||
self.model.encode_first_stage(image)
|
||||
) # move back to latent space
|
||||
|
||||
t_enc = int(strength * steps)
|
||||
ddim_sampler = DDIMSampler(self.model, device=self.model.device)
|
||||
|
||||
@@ -109,13 +109,10 @@ class ModelCache(object):
|
||||
Set the default model. The change will not take
|
||||
effect until you call model_cache.commit()
|
||||
'''
|
||||
print(f'DEBUG: before set_default_model()\n{OmegaConf.to_yaml(self.config)}')
|
||||
assert model_name in self.models,f"unknown model '{model_name}'"
|
||||
config = self.config
|
||||
for model in config:
|
||||
config[model].pop('default',None)
|
||||
config[model_name]['default'] = True
|
||||
print(f'DEBUG: after set_default_model():\n{OmegaConf.to_yaml(self.config)}')
|
||||
for model in self.models:
|
||||
self.models[model].pop('default',None)
|
||||
self.models[model_name]['default'] = True
|
||||
|
||||
def list_models(self) -> dict:
|
||||
'''
|
||||
|
||||
@@ -636,7 +636,7 @@ def split_weighted_subprompts(text, skip_normalize=False)->list:
|
||||
weight_sum = sum(map(lambda x: x[1], parsed_prompts))
|
||||
if weight_sum == 0:
|
||||
print(
|
||||
"* Warning: Subprompt weights add up to zero. Discarding and using even weights instead.")
|
||||
"Warning: Subprompt weights add up to zero. Discarding and using even weights instead.")
|
||||
equal_weight = 1 / max(len(parsed_prompts), 1)
|
||||
return [(x[0], equal_weight) for x in parsed_prompts]
|
||||
return [(x[0], x[1] / weight_sum) for x in parsed_prompts]
|
||||
|
||||
@@ -284,7 +284,6 @@ class Completer(object):
|
||||
switch,partial_path = match.groups()
|
||||
partial_path = partial_path.lstrip()
|
||||
|
||||
|
||||
matches = list()
|
||||
path = os.path.expanduser(partial_path)
|
||||
|
||||
@@ -322,7 +321,6 @@ class Completer(object):
|
||||
matches.append(
|
||||
switch+os.path.join(os.path.dirname(full_path), node)
|
||||
)
|
||||
|
||||
return matches
|
||||
|
||||
class DummyCompleter(Completer):
|
||||
|
||||
@@ -2,9 +2,9 @@ class Restoration():
|
||||
def __init__(self) -> None:
|
||||
pass
|
||||
|
||||
def load_face_restore_models(self, gfpgan_model_path='./models/gfpgan/GFPGANv1.4.pth'):
|
||||
def load_face_restore_models(self, gfpgan_dir='./src/gfpgan', gfpgan_model_path='experiments/pretrained_models/GFPGANv1.4.pth'):
|
||||
# Load GFPGAN
|
||||
gfpgan = self.load_gfpgan(gfpgan_model_path)
|
||||
gfpgan = self.load_gfpgan(gfpgan_dir, gfpgan_model_path)
|
||||
if gfpgan.gfpgan_model_exists:
|
||||
print('>> GFPGAN Initialized')
|
||||
else:
|
||||
@@ -22,9 +22,9 @@ class Restoration():
|
||||
return gfpgan, codeformer
|
||||
|
||||
# Face Restore Models
|
||||
def load_gfpgan(self, gfpgan_model_path):
|
||||
def load_gfpgan(self, gfpgan_dir, gfpgan_model_path):
|
||||
from ldm.invoke.restoration.gfpgan import GFPGAN
|
||||
return GFPGAN(gfpgan_model_path)
|
||||
return GFPGAN(gfpgan_dir, gfpgan_model_path)
|
||||
|
||||
def load_codeformer(self):
|
||||
from ldm.invoke.restoration.codeformer import CodeFormerRestoration
|
||||
|
||||
@@ -10,14 +10,17 @@ from PIL import Image
|
||||
class GFPGAN():
|
||||
def __init__(
|
||||
self,
|
||||
gfpgan_model_path='./models/gfpgan/GFPGANv1.4.pth') -> None:
|
||||
gfpgan_dir='models/gfpgan',
|
||||
gfpgan_model_path='GFPGANv1.4.pth'
|
||||
) -> None:
|
||||
|
||||
self.model_path = os.path.join(gfpgan_model_path)
|
||||
self.model_path = os.path.join(gfpgan_dir, gfpgan_model_path)
|
||||
self.gfpgan_model_exists = os.path.isfile(self.model_path)
|
||||
|
||||
if not self.gfpgan_model_exists:
|
||||
print('## NOT FOUND: GFPGAN model not found at ' + self.model_path)
|
||||
return None
|
||||
sys.path.append(os.path.abspath(gfpgan_dir))
|
||||
|
||||
def model_exists(self):
|
||||
return os.path.isfile(self.model_path)
|
||||
@@ -48,7 +51,7 @@ class GFPGAN():
|
||||
f'>> WARNING: GFPGAN not initialized.'
|
||||
)
|
||||
print(
|
||||
f'>> Download https://github.com/TencentARC/GFPGAN/releases/download/v1.3.0/GFPGANv1.4.pth to {self.model_path}'
|
||||
f'>> Download https://github.com/TencentARC/GFPGAN/releases/download/v1.3.0/GFPGANv1.4.pth to {self.model_path}, \nor change GFPGAN directory with --gfpgan_dir.'
|
||||
)
|
||||
|
||||
image = image.convert('RGB')
|
||||
|
||||
@@ -28,12 +28,11 @@ class Outcrop(object):
|
||||
self.generate._set_sampler()
|
||||
|
||||
def wrapped_callback(img,seed,**kwargs):
|
||||
preferred_seed = orig_opt.seed if orig_opt.seed >= 0 else seed
|
||||
image_callback(img,preferred_seed,use_prefix=prefix,**kwargs)
|
||||
image_callback(img,orig_opt.seed,use_prefix=prefix,**kwargs)
|
||||
|
||||
result= self.generate.prompt2image(
|
||||
opt.prompt,
|
||||
seed = opt.seed or orig_opt.seed,
|
||||
orig_opt.prompt,
|
||||
seed = orig_opt.seed, # uncomment to make it deterministic
|
||||
sampler = self.generate.sampler,
|
||||
steps = opt.steps,
|
||||
cfg_scale = opt.cfg_scale,
|
||||
|
||||
@@ -282,6 +282,7 @@ class CrossAttention(nn.Module):
|
||||
|
||||
def get_attention_mem_efficient(self, q, k, v):
|
||||
if q.device.type == 'cuda':
|
||||
torch.cuda.empty_cache()
|
||||
#print("in get_attention_mem_efficient with q shape", q.shape, ", k shape", k.shape, ", free memory is", get_mem_free_total(q.device))
|
||||
return self.einsum_op_cuda(q, k, v)
|
||||
|
||||
|
||||
@@ -29,7 +29,6 @@ infile = None
|
||||
def main():
|
||||
"""Initialize command-line parsers and the diffusion model"""
|
||||
global infile
|
||||
print('* Initializing, be patient...')
|
||||
|
||||
opt = Args()
|
||||
args = opt.parse_args()
|
||||
@@ -47,6 +46,7 @@ def main():
|
||||
print('--max_loaded_models must be >= 1; using 1')
|
||||
args.max_loaded_models = 1
|
||||
|
||||
print('* Initializing, be patient...')
|
||||
from ldm.generate import Generate
|
||||
|
||||
# these two lines prevent a horrible warning message from appearing
|
||||
@@ -90,12 +90,7 @@ def main():
|
||||
safety_checker=opt.safety_checker,
|
||||
max_loaded_models=opt.max_loaded_models,
|
||||
)
|
||||
except FileNotFoundError:
|
||||
print('** You appear to be missing configs/models.yaml')
|
||||
print('** You can either exit this script and run scripts/preload_models.py, or fix the problem now.')
|
||||
emergency_model_create(opt)
|
||||
sys.exit(-1)
|
||||
except (IOError, KeyError) as e:
|
||||
except (FileNotFoundError, IOError, KeyError) as e:
|
||||
print(f'{e}. Aborting.')
|
||||
sys.exit(-1)
|
||||
|
||||
@@ -213,10 +208,7 @@ def main_loop(gen, opt):
|
||||
setattr(opt,attr,path)
|
||||
|
||||
# retrieve previous value of seed if requested
|
||||
# Exception: for postprocess operations negative seed values
|
||||
# mean "discard the original seed and generate a new one"
|
||||
# (this is a non-obvious hack and needs to be reworked)
|
||||
if opt.seed is not None and opt.seed < 0 and operation != 'postprocess':
|
||||
if opt.seed is not None and opt.seed < 0:
|
||||
try:
|
||||
opt.seed = last_results[opt.seed][1]
|
||||
print(f'>> Reusing previous seed {opt.seed}')
|
||||
@@ -285,7 +277,7 @@ def main_loop(gen, opt):
|
||||
filename = f'{prefix}.{use_prefix}.{seed}.png'
|
||||
tm = opt.text_mask[0]
|
||||
th = opt.text_mask[1] if len(opt.text_mask)>1 else 0.5
|
||||
formatted_dream_prompt = f'!mask {opt.input_file_path} -tm {tm} {th}'
|
||||
formatted_dream_prompt = f'!mask {opt.prompt} -tm {tm} {th}'
|
||||
path = file_writer.save_image_and_prompt_to_png(
|
||||
image = image,
|
||||
dream_prompt = formatted_dream_prompt,
|
||||
@@ -325,7 +317,7 @@ def main_loop(gen, opt):
|
||||
tool = re.match('postprocess:(\w+)',opt.last_operation).groups()[0]
|
||||
add_postprocessing_to_metadata(
|
||||
opt,
|
||||
opt.input_file_path,
|
||||
opt.prompt,
|
||||
filename,
|
||||
tool,
|
||||
formatted_dream_prompt,
|
||||
@@ -490,7 +482,6 @@ def do_command(command:str, gen, opt:Args, completer) -> tuple:
|
||||
command = '-h'
|
||||
return command, operation
|
||||
|
||||
|
||||
def add_weights_to_config(model_path:str, gen, opt, completer):
|
||||
print(f'>> Model import in process. Please enter the values needed to configure this model:')
|
||||
print()
|
||||
@@ -587,7 +578,7 @@ def write_config_file(conf_path, gen, model_name, new_config, clobber=False, mak
|
||||
|
||||
try:
|
||||
print('>> Verifying that new model loads...')
|
||||
gen.model_cache.add_model(model_name, new_config, clobber)
|
||||
yaml_str = gen.model_cache.add_model(model_name, new_config, clobber)
|
||||
assert gen.set_model(model_name) is not None, 'model failed to load'
|
||||
except AssertionError as e:
|
||||
print(f'** aborting **')
|
||||
@@ -613,7 +604,6 @@ def do_textmask(gen, opt, callback):
|
||||
image_path = os.path.join(opt.outdir,image_path)
|
||||
assert os.path.exists(image_path), '** "{opt.prompt}" not found. Please enter the name of an existing image file to mask **'
|
||||
assert opt.text_mask is not None and len(opt.text_mask) >= 1, '** Please provide a text mask with -tm **'
|
||||
opt.input_file_path = image_path
|
||||
tm = opt.text_mask[0]
|
||||
threshold = float(opt.text_mask[1]) if len(opt.text_mask) > 1 else 0.5
|
||||
gen.apply_textmask(
|
||||
@@ -624,17 +614,10 @@ def do_textmask(gen, opt, callback):
|
||||
)
|
||||
|
||||
def do_postprocess (gen, opt, callback):
|
||||
file_path = opt.prompt # treat the prompt as the file pathname
|
||||
if opt.new_prompt is not None:
|
||||
opt.prompt = opt.new_prompt
|
||||
else:
|
||||
opt.prompt = None
|
||||
|
||||
file_path = opt.prompt # treat the prompt as the file pathname
|
||||
if os.path.dirname(file_path) == '': #basename given
|
||||
file_path = os.path.join(opt.outdir,file_path)
|
||||
|
||||
opt.input_file_path = file_path
|
||||
|
||||
tool=None
|
||||
if opt.facetool_strength > 0:
|
||||
tool = opt.facetool
|
||||
@@ -673,10 +656,7 @@ def do_postprocess (gen, opt, callback):
|
||||
def add_postprocessing_to_metadata(opt,original_file,new_file,tool,command):
|
||||
original_file = original_file if os.path.exists(original_file) else os.path.join(opt.outdir,original_file)
|
||||
new_file = new_file if os.path.exists(new_file) else os.path.join(opt.outdir,new_file)
|
||||
try:
|
||||
meta = retrieve_metadata(original_file)['sd-metadata']
|
||||
except AttributeError:
|
||||
meta = retrieve_metadata(new_file)['sd-metadata']
|
||||
meta = retrieve_metadata(original_file)['sd-metadata']
|
||||
if 'image' not in meta:
|
||||
meta = metadata_dumps(opt,seeds=[opt.seed])['image']
|
||||
meta['image'] = {}
|
||||
@@ -724,7 +704,7 @@ def prepare_image_metadata(
|
||||
elif len(prior_variations) > 0:
|
||||
formatted_dream_prompt = opt.dream_prompt_str(seed=first_seed)
|
||||
elif operation == 'postprocess':
|
||||
formatted_dream_prompt = '!fix '+opt.dream_prompt_str(seed=seed,prompt=opt.input_file_path)
|
||||
formatted_dream_prompt = '!fix '+opt.dream_prompt_str(seed=seed)
|
||||
else:
|
||||
formatted_dream_prompt = opt.dream_prompt_str(seed=seed)
|
||||
return filename,formatted_dream_prompt
|
||||
@@ -809,7 +789,7 @@ def load_face_restoration(opt):
|
||||
from ldm.invoke.restoration import Restoration
|
||||
restoration = Restoration()
|
||||
if opt.restore:
|
||||
gfpgan, codeformer = restoration.load_face_restore_models(opt.gfpgan_model_path)
|
||||
gfpgan, codeformer = restoration.load_face_restore_models(opt.gfpgan_dir, opt.gfpgan_model_path)
|
||||
else:
|
||||
print('>> Face restoration disabled')
|
||||
if opt.esrgan:
|
||||
@@ -898,36 +878,6 @@ def write_commands(opt, file_path:str, outfilepath:str):
|
||||
f.write('\n'.join(commands))
|
||||
print(f'>> File {outfilepath} with commands created')
|
||||
|
||||
def emergency_model_create(opt:Args):
|
||||
completer = get_completer(opt)
|
||||
completer.complete_extensions(('.yaml','.yml','.ckpt','.vae.pt'))
|
||||
completer.set_default_dir('.')
|
||||
valid_path = False
|
||||
while not valid_path:
|
||||
weights_file = input('Enter the path to a downloaded models file, or ^C to exit: ')
|
||||
valid_path = os.path.exists(weights_file)
|
||||
dir,basename = os.path.split(weights_file)
|
||||
|
||||
valid_name = False
|
||||
while not valid_name:
|
||||
name = input('Enter a short name for this model (no spaces): ')
|
||||
name = 'unnamed model' if len(name)==0 else name
|
||||
valid_name = ' ' not in name
|
||||
|
||||
description = input('Enter a description for this model: ')
|
||||
description = 'no description' if len(description)==0 else description
|
||||
|
||||
with open(opt.conf, 'w', encoding='utf-8') as f:
|
||||
f.write(f'{name}:\n')
|
||||
f.write(f' description: {description}\n')
|
||||
f.write(f' weights: {weights_file}\n')
|
||||
f.write(f' config: ./configs/stable-diffusion/v1-inference.yaml\n')
|
||||
f.write(f' width: 512\n')
|
||||
f.write(f' height: 512\n')
|
||||
f.write(f' default: true\n')
|
||||
print(f'Config file {opt.conf} is created. This script will now exit.')
|
||||
print(f'After restarting you may examine the entry with !models and edit it with !edit.')
|
||||
|
||||
######################################
|
||||
|
||||
if __name__ == '__main__':
|
||||
|
||||
@@ -487,8 +487,14 @@ def create_argv_parser():
|
||||
parser.add_argument(
|
||||
'--gfpgan_model_path',
|
||||
type=str,
|
||||
default='./models/gfpgan/GFPGANv1.4.pth',
|
||||
help='Indicates the path to the GFPGAN model.',
|
||||
default='experiments/pretrained_models/GFPGANv1.3.pth',
|
||||
help='Indicates the path to the GFPGAN model, relative to --gfpgan_dir.',
|
||||
)
|
||||
parser.add_argument(
|
||||
'--gfpgan_dir',
|
||||
type=str,
|
||||
default='./src/gfpgan',
|
||||
help='Indicates the directory containing the GFPGAN code.',
|
||||
)
|
||||
parser.add_argument(
|
||||
'--web',
|
||||
|
||||
@@ -104,15 +104,13 @@ def postscript():
|
||||
print(
|
||||
'''\n** Model Installation Successful **\nYou're all set! You may now launch InvokeAI using one of these two commands:
|
||||
Web version:
|
||||
|
||||
python scripts/invoke.py --web (connect to http://localhost:9090)
|
||||
|
||||
Command-line version:
|
||||
|
||||
python scripts/invoke.py
|
||||
|
||||
Remember to activate that 'invokeai' environment before running invoke.py.
|
||||
|
||||
Or, if you used one of the automated installers, execute "invoke.sh" (Linux/Mac)
|
||||
or "invoke.bat" (Windows) to start the script.
|
||||
|
||||
Have fun!
|
||||
'''
|
||||
)
|
||||
@@ -448,15 +446,15 @@ def download_gfpgan():
|
||||
for model in (
|
||||
[
|
||||
'https://github.com/TencentARC/GFPGAN/releases/download/v1.3.0/GFPGANv1.4.pth',
|
||||
'./models/gfpgan/GFPGANv1.4.pth'
|
||||
'models/gfpgan/GFPGANv1.4.pth'
|
||||
],
|
||||
[
|
||||
'https://github.com/xinntao/facexlib/releases/download/v0.1.0/detection_Resnet50_Final.pth',
|
||||
'./models/gfpgan/weights/detection_Resnet50_Final.pth'
|
||||
'models/gfpgan/weights/detection_Resnet50_Final.pth'
|
||||
],
|
||||
[
|
||||
'https://github.com/xinntao/facexlib/releases/download/v0.2.2/parsing_parsenet.pth',
|
||||
'./models/gfpgan/weights/parsing_parsenet.pth'
|
||||
'models/gfpgan/weights/parsing_parsenet.pth'
|
||||
],
|
||||
):
|
||||
model_url,model_dest = model
|
||||
|
||||
@@ -1,16 +0,0 @@
|
||||
InvokeAI
|
||||
|
||||
Project homepage: https://github.com/invoke-ai/InvokeAI
|
||||
|
||||
Installation on Windows:
|
||||
You may need to enable Windows Long Paths to install InvokeAI. If you're not
|
||||
sure what this is, you almost certainly need to do this. Simply double-click the
|
||||
"WinLongPathsEnabled.reg" file located in this directory, and approve the Windows
|
||||
warnings. Note that you will need to have admin privileges in order to do this.
|
||||
|
||||
Then double-click the 'install.bat' file (while keeping it inside the invokeAI folder).
|
||||
|
||||
Installation on Linux and Mac:
|
||||
Please open the terminal, and run './install.sh' (while keeping it inside the invokeAI folder).
|
||||
|
||||
After installation, please run the 'invoke.bat' file (on Windows) or 'invoke.sh' file (on Linux/Mac) to start InvokeAI.
|
||||
@@ -22,5 +22,3 @@ case "${OS_NAME}" in
|
||||
esac
|
||||
|
||||
python scripts/preload_models.py
|
||||
|
||||
|
||||
Reference in New Issue
Block a user