mirror of
https://github.com/invoke-ai/InvokeAI.git
synced 2026-01-23 10:38:09 -05:00
Compare commits
179 Commits
| Author | SHA1 | Date | |
|---|---|---|---|
|
|
a20914434b | ||
|
|
0d134195fd | ||
|
|
649d8c8573 | ||
|
|
a358d370a0 | ||
|
|
94a9033c4f | ||
|
|
18a947c503 | ||
|
|
a23b031895 | ||
|
|
23af68c7d7 | ||
|
|
e258beeb51 | ||
|
|
7460c069b8 | ||
|
|
e481bfac61 | ||
|
|
5040747c67 | ||
|
|
d1ab65a431 | ||
|
|
af4ee7feb8 | ||
|
|
764fb29ade | ||
|
|
1014d3ba44 | ||
|
|
40a48aca88 | ||
|
|
92abc00f16 | ||
|
|
a5719aabf8 | ||
|
|
44a18511fa | ||
|
|
b850dbadaf | ||
|
|
9ef8b944d5 | ||
|
|
efc5a98488 | ||
|
|
1417c87928 | ||
|
|
2dd6fc2b93 | ||
|
|
22213612a0 | ||
|
|
71ee44a827 | ||
|
|
b17ca0a5e7 | ||
|
|
71bbfe4a1a | ||
|
|
5702271991 | ||
|
|
10781e7dc4 | ||
|
|
099d1157c5 | ||
|
|
ab825bf7ee | ||
|
|
10cfeb5ada | ||
|
|
e97515d045 | ||
|
|
0f04bc5789 | ||
|
|
3f74aabecd | ||
|
|
b1a99a51b7 | ||
|
|
8004f8a6d9 | ||
|
|
ff8ff2212a | ||
|
|
8e5363cd83 | ||
|
|
1450779146 | ||
|
|
8cd5d95b8a | ||
|
|
abd6407394 | ||
|
|
734dacfbe9 | ||
|
|
636620b1d5 | ||
|
|
1fe41146f0 | ||
|
|
2ad6ef355a | ||
|
|
865502ee4f | ||
|
|
c7984f3299 | ||
|
|
7f150ed833 | ||
|
|
badf4e256c | ||
|
|
e64c60bbb3 | ||
|
|
1780618543 | ||
|
|
f91fd27624 | ||
|
|
09e41e8f76 | ||
|
|
6eeb2107b3 | ||
|
|
17053ad8b7 | ||
|
|
fefb4dc1f8 | ||
|
|
d05b1b3544 | ||
|
|
82d4904c07 | ||
|
|
1cdcf33cfa | ||
|
|
6616fa835a | ||
|
|
7b9a4564b1 | ||
|
|
fcdefa0620 | ||
|
|
ef8b3ce639 | ||
|
|
36870a8f53 | ||
|
|
b70420951d | ||
|
|
1f0c5b4cf1 | ||
|
|
8648da8111 | ||
|
|
45b4593563 | ||
|
|
41b04316cf | ||
|
|
e97c6db2a3 | ||
|
|
896820a349 | ||
|
|
06c8f468bf | ||
|
|
61920e2701 | ||
|
|
f34ba7ca70 | ||
|
|
c30ef0895d | ||
|
|
aa3a774f73 | ||
|
|
2c30555b84 | ||
|
|
743f605773 | ||
|
|
519c661abb | ||
|
|
22c956c75f | ||
|
|
13696adc3a | ||
|
|
0196571a12 | ||
|
|
9666f466ab | ||
|
|
240e5486c8 | ||
|
|
8164b6b9cf | ||
|
|
4fc82d554f | ||
|
|
96b34c0f85 | ||
|
|
dd5a88dcee | ||
|
|
95ed56bf82 | ||
|
|
1ae80f5ab9 | ||
|
|
1f0bd3ca6c | ||
|
|
a1971f6830 | ||
|
|
c6118e8898 | ||
|
|
7ba958cf7f | ||
|
|
383905d5d2 | ||
|
|
6173e3e9ca | ||
|
|
3feb7d8922 | ||
|
|
1d9edbd0dd | ||
|
|
d439abdb89 | ||
|
|
ee47ea0c89 | ||
|
|
300bb2e627 | ||
|
|
ccf8593501 | ||
|
|
0fda612f3f | ||
|
|
5afff65b71 | ||
|
|
7e55bdefce | ||
|
|
620cf84d3d | ||
|
|
cfe567c62a | ||
|
|
cefe12f1df | ||
|
|
1e51c39928 | ||
|
|
42a02bbb80 | ||
|
|
f1ae6dae4c | ||
|
|
6195579910 | ||
|
|
16c8b23b34 | ||
|
|
07ae626b22 | ||
|
|
8d171bb044 | ||
|
|
6e33ca7e9e | ||
|
|
db46e12f2b | ||
|
|
868e4b2db8 | ||
|
|
2e562742c1 | ||
|
|
68e6958009 | ||
|
|
ea6e3a7949 | ||
|
|
b2879ca99f | ||
|
|
4e911566c3 | ||
|
|
9bafda6a15 | ||
|
|
871a8a5375 | ||
|
|
0eef74bc00 | ||
|
|
423ae32097 | ||
|
|
8282e5d045 | ||
|
|
19305cdbdf | ||
|
|
eb9028ab30 | ||
|
|
21483f5d07 | ||
|
|
82dcbac28f | ||
|
|
d43bd4625d | ||
|
|
ea891324a2 | ||
|
|
8fd9ea2193 | ||
|
|
fb02666856 | ||
|
|
f6f5c2731b | ||
|
|
b4e3f771e0 | ||
|
|
99bb9491ac | ||
|
|
0453f21127 | ||
|
|
9fc09aa4bd | ||
|
|
5e87062cf8 | ||
|
|
3e7a459990 | ||
|
|
bbf4c03e50 | ||
|
|
611a3a9753 | ||
|
|
1611f0d181 | ||
|
|
08835115e4 | ||
|
|
2d84e28d32 | ||
|
|
ef17aae8ab | ||
|
|
0cc39f01a3 | ||
|
|
688d7258f1 | ||
|
|
4513320bf1 | ||
|
|
533fd04ef0 | ||
|
|
dff5681cf0 | ||
|
|
5a2790a69b | ||
|
|
7c5305ccba | ||
|
|
4013e8ad6f | ||
|
|
d1dfd257f9 | ||
|
|
5322d735ee | ||
|
|
cdb107dcda | ||
|
|
be1393a41c | ||
|
|
e554c2607f | ||
|
|
6215592b12 | ||
|
|
349cc25433 | ||
|
|
214d276379 | ||
|
|
ef24d76adc | ||
|
|
ab2b5a691d | ||
|
|
c7de2b2801 | ||
|
|
e8075658ac | ||
|
|
4202dabee1 | ||
|
|
d67db2bcf1 | ||
|
|
7159ec885f | ||
|
|
b5cf734ba9 | ||
|
|
f7dc8eafee | ||
|
|
762ca60a30 | ||
|
|
e7fb9f342c |
1
.github/CODEOWNERS
vendored
1
.github/CODEOWNERS
vendored
@@ -2,4 +2,3 @@ ldm/invoke/pngwriter.py @CapableWeb
|
||||
ldm/invoke/server_legacy.py @CapableWeb
|
||||
scripts/legacy_api.py @CapableWeb
|
||||
tests/legacy_tests.sh @CapableWeb
|
||||
installer/ @tildebyte
|
||||
|
||||
4
.gitignore
vendored
4
.gitignore
vendored
@@ -228,10 +228,6 @@ requirements.txt
|
||||
# source installer files
|
||||
source_installer/*zip
|
||||
source_installer/invokeAI
|
||||
install.bat
|
||||
install.sh
|
||||
update.bat
|
||||
update.sh
|
||||
|
||||
# this may be present if the user created a venv
|
||||
invokeai
|
||||
|
||||
@@ -99,7 +99,8 @@ overridden on a per-prompt basis (see
|
||||
| `--sampler <sampler>` | `-A<sampler>` | `k_lms` | Sampler to use. Use `-h` to get list of available samplers. |
|
||||
| `--seamless` | | `False` | Create interesting effects by tiling elements of the image. |
|
||||
| `--embedding_path <path>` | | `None` | Path to pre-trained embedding manager checkpoints, for custom models |
|
||||
| `--gfpgan_model_path` | | `experiments/pretrained_models/GFPGANv1.4.pth` | Path to GFPGAN model file. |
|
||||
| `--gfpgan_dir` | | `src/gfpgan` | Path to where GFPGAN is installed. |
|
||||
| `--gfpgan_model_path` | | `experiments/pretrained_models/GFPGANv1.4.pth` | Path to GFPGAN model file, relative to `--gfpgan_dir`. |
|
||||
| `--free_gpu_mem` | | `False` | Free GPU memory after sampling, to allow image decoding and saving in low VRAM conditions |
|
||||
| `--precision` | | `auto` | Set model precision, default is selected by device. Options: auto, float32, float16, autocast |
|
||||
|
||||
|
||||
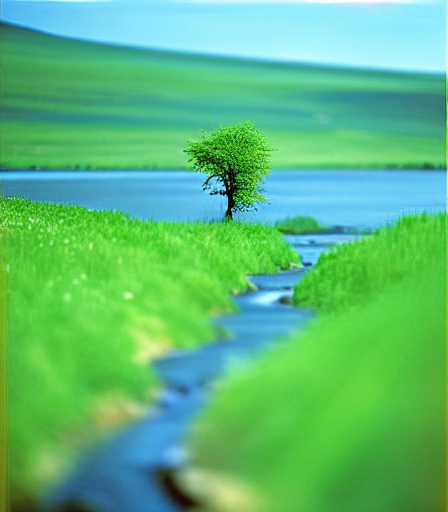
@@ -19,13 +19,13 @@ tree on a hill with a river, nature photograph, national geographic -I./test-pic
|
||||
This will take the original image shown here:
|
||||
|
||||
<figure markdown>
|
||||
{ width=320 }
|
||||

|
||||
</figure>
|
||||
|
||||
and generate a new image based on it as shown here:
|
||||
|
||||
<figure markdown>
|
||||
{ width=320 }
|
||||

|
||||
</figure>
|
||||
|
||||
The `--init_img` (`-I`) option gives the path to the seed picture. `--strength`
|
||||
@@ -45,16 +45,15 @@ Note that the prompt makes a big difference. For example, this slight variation
|
||||
on the prompt produces a very different image:
|
||||
|
||||
<figure markdown>
|
||||
{ width=320 }
|
||||

|
||||
<caption markdown>photograph of a tree on a hill with a river</caption>
|
||||
</figure>
|
||||
|
||||
!!! tip
|
||||
|
||||
When designing prompts, think about how the images scraped from the internet were
|
||||
captioned. Very few photographs will be labeled "photograph" or "photorealistic."
|
||||
They will, however, be captioned with the publication, photographer, camera model,
|
||||
or film settings.
|
||||
When designing prompts, think about how the images scraped from the internet were captioned. Very few photographs will
|
||||
be labeled "photograph" or "photorealistic." They will, however, be captioned with the publication, photographer, camera
|
||||
model, or film settings.
|
||||
|
||||
If the initial image contains transparent regions, then Stable Diffusion will
|
||||
only draw within the transparent regions, a process called
|
||||
@@ -62,17 +61,17 @@ only draw within the transparent regions, a process called
|
||||
However, for this to work correctly, the color information underneath the
|
||||
transparent needs to be preserved, not erased.
|
||||
|
||||
!!! warning "**IMPORTANT ISSUE** "
|
||||
!!! warning
|
||||
|
||||
`img2img` does not work properly on initial images smaller
|
||||
than 512x512. Please scale your image to at least 512x512 before using it.
|
||||
Larger images are not a problem, but may run out of VRAM on your GPU card. To
|
||||
fix this, use the --fit option, which downscales the initial image to fit within
|
||||
the box specified by width x height:
|
||||
**IMPORTANT ISSUE** `img2img` does not work properly on initial images smaller
|
||||
than 512x512. Please scale your image to at least 512x512 before using it.
|
||||
Larger images are not a problem, but may run out of VRAM on your GPU card. To
|
||||
fix this, use the --fit option, which downscales the initial image to fit within
|
||||
the box specified by width x height:
|
||||
|
||||
```
|
||||
tree on a hill with a river, national geographic -I./test-pictures/big-sketch.png -H512 -W512 --fit
|
||||
```
|
||||
```
|
||||
tree on a hill with a river, national geographic -I./test-pictures/big-sketch.png -H512 -W512 --fit
|
||||
```
|
||||
|
||||
## How does it actually work, though?
|
||||
|
||||
@@ -88,7 +87,7 @@ from a prompt. If the step count is 10, then the "latent space" (Stable
|
||||
Diffusion's internal representation of the image) for the prompt "fire" with
|
||||
seed `1592514025` develops something like this:
|
||||
|
||||
```bash
|
||||
```commandline
|
||||
invoke> "fire" -s10 -W384 -H384 -S1592514025
|
||||
```
|
||||
|
||||
@@ -134,9 +133,9 @@ Notice how much more fuzzy the starting image is for strength `0.7` compared to
|
||||
|
||||
| | strength = 0.7 | strength = 0.4 |
|
||||
| --------------------------- | ------------------------------------------------------------- | ------------------------------------------------------------- |
|
||||
| initial image that SD sees |  |  |
|
||||
| initial image that SD sees |  |  |
|
||||
| steps argument to `invoke>` | `-S10` | `-S10` |
|
||||
| steps actually taken | `7` | `4` |
|
||||
| steps actually taken | 7 | 4 |
|
||||
| latent space at each step |  |  |
|
||||
| output |  |  |
|
||||
|
||||
@@ -151,7 +150,7 @@ If you want to try this out yourself, all of these are using a seed of
|
||||
`1592514025` with a width/height of `384`, step count `10`, the default sampler
|
||||
(`k_lms`), and the single-word prompt `"fire"`:
|
||||
|
||||
```bash
|
||||
```commandline
|
||||
invoke> "fire" -s10 -W384 -H384 -S1592514025 -I /tmp/fire-drawing.png --strength 0.7
|
||||
```
|
||||
|
||||
@@ -171,7 +170,7 @@ give each generation 20 steps.
|
||||
Here's strength `0.4` (note step count `50`, which is `20 ÷ 0.4` to make sure SD
|
||||
does `20` steps from my image):
|
||||
|
||||
```bash
|
||||
```commandline
|
||||
invoke> "fire" -s50 -W384 -H384 -S1592514025 -I /tmp/fire-drawing.png -f 0.4
|
||||
```
|
||||
|
||||
|
||||
@@ -92,21 +92,6 @@ The new image is larger than the original (576x704) because 64 pixels were added
|
||||
to the top and right sides. You will need enough VRAM to process an image of
|
||||
this size.
|
||||
|
||||
#### Outcropping non-InvokeAI images
|
||||
|
||||
You can outcrop an arbitrary image that was not generated by InvokeAI,
|
||||
but your results will vary. The `inpainting-1.5` model is highly
|
||||
recommended, but if not feasible, then you may be able to improve the
|
||||
output by conditioning the outcropping with a text prompt that
|
||||
describes the scene using the `--new_prompt` argument:
|
||||
|
||||
```bash
|
||||
invoke> !fix images/vacation.png --outcrop top 128 --new_prompt "family vacation"
|
||||
```
|
||||
|
||||
You may also provide a different seed for outcropping to use by passing
|
||||
`-S<seed>`. A negative seed will generate a new random seed.
|
||||
|
||||
A number of caveats:
|
||||
|
||||
1. Although you can specify any pixel values, they will be rounded up to the
|
||||
|
||||
@@ -6,39 +6,49 @@ title: Postprocessing
|
||||
|
||||
## Intro
|
||||
|
||||
This extension provides the ability to restore faces and upscale images.
|
||||
This extension provides the ability to restore faces and upscale
|
||||
images.
|
||||
|
||||
Face restoration and upscaling can be applied at the time you generate the
|
||||
images, or at any later time against a previously-generated PNG file, using the
|
||||
[!fix](#fixing-previously-generated-images) command.
|
||||
[Outpainting and outcropping](OUTPAINTING.md) can only be applied after the
|
||||
fact.
|
||||
Face restoration and upscaling can be applied at the time you generate
|
||||
the images, or at any later time against a previously-generated PNG
|
||||
file, using the [!fix](#fixing-previously-generated-images)
|
||||
command. [Outpainting and outcropping](OUTPAINTING.md) can only be
|
||||
applied after the fact.
|
||||
|
||||
## Face Fixing
|
||||
|
||||
The default face restoration module is GFPGAN. The default upscale is
|
||||
Real-ESRGAN. For an alternative face restoration module, see
|
||||
[CodeFormer Support](#codeformer-support) below.
|
||||
Real-ESRGAN. For an alternative face restoration module, see [CodeFormer
|
||||
Support](#codeformer-support) below.
|
||||
|
||||
As of version 1.14, environment.yaml will install the Real-ESRGAN package into
|
||||
the standard install location for python packages, and will put GFPGAN into a
|
||||
subdirectory of "src" in the InvokeAI directory. Upscaling with Real-ESRGAN
|
||||
should "just work" without further intervention. Simply pass the `--upscale`
|
||||
(`-U`) option on the `invoke>` command line, or indicate the desired scale on
|
||||
the popup in the Web GUI.
|
||||
As of version 1.14, environment.yaml will install the Real-ESRGAN
|
||||
package into the standard install location for python packages, and
|
||||
will put GFPGAN into a subdirectory of "src" in the InvokeAI
|
||||
directory. Upscaling with Real-ESRGAN should "just work" without
|
||||
further intervention. Simply pass the `--upscale` (`-U`) option on the
|
||||
`invoke>` command line, or indicate the desired scale on the popup in
|
||||
the Web GUI.
|
||||
|
||||
**GFPGAN** requires a series of downloadable model files to work. These are
|
||||
loaded when you run `scripts/preload_models.py`. If GFPAN is failing with an
|
||||
error, please run the following from the InvokeAI directory:
|
||||
**GFPGAN** requires a series of downloadable model files to
|
||||
work. These are loaded when you run `scripts/preload_models.py`. If
|
||||
GFPAN is failing with an error, please run the following from the
|
||||
InvokeAI directory:
|
||||
|
||||
```bash
|
||||
python scripts/preload_models.py
|
||||
```
|
||||
|
||||
If you do not run this script in advance, the GFPGAN module will attempt to
|
||||
download the models files the first time you try to perform facial
|
||||
If you do not run this script in advance, the GFPGAN module will attempt
|
||||
to download the models files the first time you try to perform facial
|
||||
reconstruction.
|
||||
|
||||
Alternatively, if you have GFPGAN installed elsewhere, or if you are
|
||||
using an earlier version of this package which asked you to install
|
||||
GFPGAN in a sibling directory, you may use the `--gfpgan_dir` argument
|
||||
with `invoke.py` to set a custom path to your GFPGAN directory. _There
|
||||
are other GFPGAN related boot arguments if you wish to customize
|
||||
further._
|
||||
|
||||
## Usage
|
||||
|
||||
You will now have access to two new prompt arguments.
|
||||
@@ -109,15 +119,15 @@ actions.
|
||||
This repo also allows you to perform face restoration using
|
||||
[CodeFormer](https://github.com/sczhou/CodeFormer).
|
||||
|
||||
In order to setup CodeFormer to work, you need to download the models like with
|
||||
GFPGAN. You can do this either by running `preload_models.py` or by manually
|
||||
downloading the
|
||||
[model file](https://github.com/sczhou/CodeFormer/releases/download/v0.1.0/codeformer.pth)
|
||||
In order to setup CodeFormer to work, you need to download the models
|
||||
like with GFPGAN. You can do this either by running
|
||||
`preload_models.py` or by manually downloading the [model
|
||||
file](https://github.com/sczhou/CodeFormer/releases/download/v0.1.0/codeformer.pth)
|
||||
and saving it to `ldm/invoke/restoration/codeformer/weights` folder.
|
||||
|
||||
You can use `-ft` prompt argument to swap between CodeFormer and the default
|
||||
GFPGAN. The above mentioned `-G` prompt argument will allow you to control the
|
||||
strength of the restoration effect.
|
||||
You can use `-ft` prompt argument to swap between CodeFormer and the
|
||||
default GFPGAN. The above mentioned `-G` prompt argument will allow
|
||||
you to control the strength of the restoration effect.
|
||||
|
||||
### Usage
|
||||
|
||||
@@ -147,9 +157,9 @@ situations when there is very little facial data to work with.
|
||||
## Fixing Previously-Generated Images
|
||||
|
||||
It is easy to apply face restoration and/or upscaling to any
|
||||
previously-generated file. Just use the syntax
|
||||
`!fix path/to/file.png <options>`. For example, to apply GFPGAN at strength 0.8
|
||||
and upscale 2X for a file named `./outputs/img-samples/000044.2945021133.png`,
|
||||
previously-generated file. Just use the syntax `!fix path/to/file.png
|
||||
<options>`. For example, to apply GFPGAN at strength 0.8 and upscale
|
||||
2X for a file named `./outputs/img-samples/000044.2945021133.png`,
|
||||
just run:
|
||||
|
||||
```bash
|
||||
|
||||
@@ -1,7 +1,9 @@
|
||||
---
|
||||
title: Overview
|
||||
title: Installation Overview
|
||||
---
|
||||
|
||||
## Installation
|
||||
|
||||
We offer several ways to install InvokeAI, each one suited to your
|
||||
experience and preferences.
|
||||
|
||||
@@ -16,14 +18,6 @@ experience and preferences.
|
||||
work", don't have an interest in tinkering with it, and do not
|
||||
care about upgrading to unreleased experimental features.
|
||||
|
||||
**Important Caveats**
|
||||
- This script does not support AMD GPUs. For Linux AMD support,
|
||||
please use the manual or source code installer methods.
|
||||
- This script has difficulty on some Macintosh machines
|
||||
that have previously been used for Python development due to
|
||||
conflicting development tools versions. Mac developers may wish
|
||||
to try the source code installer or one of the manual methods instead.
|
||||
|
||||
2. [Source code installer](INSTALL_SOURCE.md)
|
||||
|
||||
This is a script that will install InvokeAI and all its essential
|
||||
@@ -4,17 +4,12 @@ title: Docker
|
||||
|
||||
# :fontawesome-brands-docker: Docker
|
||||
|
||||
!!! warning "For end users"
|
||||
## Before you begin
|
||||
|
||||
We highly recommend to Install InvokeAI locally using [these instructions](index.md)"
|
||||
|
||||
!!! tip "For developers"
|
||||
|
||||
For container-related development tasks or for enabling easy
|
||||
deployment to other environments (on-premises or cloud), follow these
|
||||
instructions.
|
||||
|
||||
For general use, install locally to leverage your machine's GPU.
|
||||
- For end users: Install InvokeAI locally using the instructions for your OS.
|
||||
- For developers: For container-related development tasks or for enabling easy
|
||||
deployment to other environments (on-premises or cloud), follow these
|
||||
instructions. For general use, install locally to leverage your machine's GPU.
|
||||
|
||||
## Why containers?
|
||||
|
||||
@@ -42,19 +37,16 @@ another environment with NVIDIA GPUs on-premises or in the cloud.
|
||||
|
||||
#### Install [Docker](https://github.com/santisbon/guides#docker)
|
||||
|
||||
On the [Docker Desktop app](https://docs.docker.com/get-docker/), go to
|
||||
Preferences, Resources, Advanced. Increase the CPUs and Memory to avoid this
|
||||
On the Docker Desktop app, go to Preferences, Resources, Advanced. Increase the
|
||||
CPUs and Memory to avoid this
|
||||
[Issue](https://github.com/invoke-ai/InvokeAI/issues/342). You may need to
|
||||
increase Swap and Disk image size too.
|
||||
|
||||
#### Get a Huggingface-Token
|
||||
|
||||
Besides the Docker Agent you will need an Account on
|
||||
[huggingface.co](https://huggingface.co/join).
|
||||
|
||||
After you succesfully registered your account, go to
|
||||
[huggingface.co/settings/tokens](https://huggingface.co/settings/tokens), create
|
||||
a token and copy it, since you will need in for the next step.
|
||||
Go to [Hugging Face](https://huggingface.co/settings/tokens), create a token and
|
||||
temporary place it somewhere like a open texteditor window (but dont save it!,
|
||||
only keep it open, we need it in the next step)
|
||||
|
||||
### Setup
|
||||
|
||||
@@ -102,25 +94,25 @@ After the build process is done, you can run the container via the provided
|
||||
./docker-build/run.sh
|
||||
```
|
||||
|
||||
When used without arguments, the container will start the webserver and provide
|
||||
When used without arguments, the container will start the website and provide
|
||||
you the link to open it. But if you want to use some other parameters you can
|
||||
also do so.
|
||||
|
||||
!!! example ""
|
||||
!!! example
|
||||
|
||||
```bash
|
||||
./docker-build/run.sh --from_file tests/validate_pr_prompt.txt
|
||||
docker-build/run.sh --from_file tests/validate_pr_prompt.txt
|
||||
```
|
||||
|
||||
The output folder is located on the volume which is also used to store the model.
|
||||
|
||||
Find out more about available CLI-Parameters at [features/CLI.md](../features/CLI.md/#arguments)
|
||||
Find out more about available CLI-Parameter at [features/CLI.md](../features/CLI.md)
|
||||
|
||||
---
|
||||
|
||||
!!! warning "Deprecated"
|
||||
|
||||
From here on you will find the the previous Docker-Docs, which will still
|
||||
From here on you will find the rest of the previous Docker-Docs, which will still
|
||||
provide some usefull informations.
|
||||
|
||||
## Usage (time to have fun)
|
||||
|
||||
@@ -2,41 +2,30 @@
|
||||
title: InvokeAI Installer
|
||||
---
|
||||
|
||||
The InvokeAI installer is a shell script that will install InvokeAI onto a stock
|
||||
computer running recent versions of Linux, MacOSX or Windows. It will leave you
|
||||
with a version that runs a stable version of InvokeAI. When a new version of
|
||||
InvokeAI is released, you will download and reinstall the new version.
|
||||
The InvokeAI installer is a shell script that will install InvokeAI
|
||||
onto a stock computer running recent versions of Linux, MacOSX or
|
||||
Windows. It will leave you with a version that runs a stable version
|
||||
of InvokeAI. When a new version of InvokeAI is released, you will
|
||||
download and reinstall the new version.
|
||||
|
||||
If you wish to tinker with unreleased versions of InvokeAI that introduce
|
||||
potentially unstable new features, you should consider using the
|
||||
[source installer](INSTALL_SOURCE.md) or one of the
|
||||
[manual install](INSTALL_MANUAL.md) methods.
|
||||
If you wish to tinker with unreleased versions of InvokeAI that
|
||||
introduce potentially unstable new features, you should consider using
|
||||
the [source installer](INSTALL_SOURCE.md) or one of the [manual
|
||||
install](INSTALL_MANUAL.md) methods.
|
||||
|
||||
**Important Caveats**
|
||||
- This script does not support AMD GPUs. For Linux AMD support,
|
||||
please use the manual or source code installer methods.
|
||||
Before you begin, make sure that you meet the [hardware
|
||||
requirements](index.md#Hardware_Requirements) and has the appropriate
|
||||
GPU drivers installed. In particular, if you are a Linux user with an
|
||||
AMD GPU installed, you may need to install the [ROCm
|
||||
driver](https://rocmdocs.amd.com/en/latest/Installation_Guide/Installation-Guide.html).
|
||||
|
||||
- This script has difficulty on some Macintosh machines
|
||||
that have previously been used for Python development due to
|
||||
conflicting development tools versions. Mac developers may wish
|
||||
to try the source code installer or one of the manual methods instead.
|
||||
|
||||
!!! todo
|
||||
|
||||
Before you begin, make sure that you meet
|
||||
the[hardware requirements](/#hardware-requirements) and has the
|
||||
appropriate GPU drivers installed. In particular, if you are a Linux user with
|
||||
an AMD GPU installed, you may need to install the
|
||||
[ROCm-driver](https://rocmdocs.amd.com/en/latest/Installation_Guide/Installation-Guide.html).
|
||||
|
||||
Installation requires roughly 18G of free disk space to load the libraries and
|
||||
recommended model weights files.
|
||||
Installation requires roughly 18G of free disk space to load the
|
||||
libraries and recommended model weights files.
|
||||
|
||||
## Steps to Install
|
||||
|
||||
1. Download the
|
||||
[latest release](https://github.com/invoke-ai/InvokeAI/releases/latest) of
|
||||
InvokeAI's installer for your platform
|
||||
1. Download the [latest release](https://github.com/invoke-ai/InvokeAI/releases/latest)
|
||||
of InvokeAI's installer for your platform
|
||||
|
||||
2. Place the downloaded package someplace where you have plenty of HDD space,
|
||||
and have full permissions (i.e. `~/` on Lin/Mac; your home folder on Windows)
|
||||
@@ -45,8 +34,7 @@ recommended model weights files.
|
||||
|
||||
4. Open the extracted 'InvokeAI' folder
|
||||
|
||||
5. Double-click 'install.bat' (Windows), or 'install.sh' (Lin/Mac) (or run from
|
||||
a terminal)
|
||||
5. Double-click 'install.bat' (Windows), or 'install.sh' (Lin/Mac) (or run from a terminal)
|
||||
|
||||
6. Follow the prompts
|
||||
|
||||
@@ -55,10 +43,10 @@ recommended model weights files.
|
||||
|
||||
## Troubleshooting
|
||||
|
||||
If you run into problems during or after installation, the InvokeAI team is
|
||||
available to help you. Either create an
|
||||
[Issue](https://github.com/invoke-ai/InvokeAI/issues) at our GitHub site, or
|
||||
make a request for help on the "bugs-and-support" channel of our
|
||||
[Discord server](https://discord.gg/ZmtBAhwWhy). We are a 100% volunteer
|
||||
organization, but typically somebody will be available to help you within 24
|
||||
hours, and often much sooner.
|
||||
If you run into problems during or after installation, the InvokeAI
|
||||
team is available to help you. Either create an
|
||||
[Issue](https://github.com/invoke-ai/InvokeAI/issues) at our GitHub
|
||||
site, or make a request for help on the "bugs-and-support" channel of
|
||||
our [Discord server](https://discord.gg/ZmtBAhwWhy). We are a 100%
|
||||
volunteer organization, but typically somebody will be available to
|
||||
help you within 24 hours, and often much sooner.
|
||||
|
||||
@@ -14,7 +14,8 @@ download the notebook from the link above and load it up in VSCode
|
||||
(with the appropriate extensions installed)/Jupyter/JupyterLab and
|
||||
start running the cells one-by-one.
|
||||
|
||||
!!! Note "you will need NVIDIA drivers, Python 3.10, and Git installed beforehand"
|
||||
Note that you will need NVIDIA drivers, Python 3.10, and Git installed beforehand.
|
||||
|
||||
|
||||
## Walkthrough
|
||||
|
||||
@@ -24,4 +25,4 @@ start running the cells one-by-one.
|
||||
|
||||
### Updating to the development version
|
||||
|
||||
## Troubleshooting
|
||||
## Troubleshooting
|
||||
@@ -2,54 +2,51 @@
|
||||
title: Manual Installation
|
||||
---
|
||||
|
||||
<figure markdown>
|
||||
# :fontawesome-brands-linux: Linux | :fontawesome-brands-apple: macOS | :fontawesome-brands-windows: Windows
|
||||
</figure>
|
||||
|
||||
!!! warning "This is for advanced Users"
|
||||
|
||||
who are already expirienced with using conda or pip
|
||||
# :fontawesome-brands-linux: Linux
|
||||
# :fontawesome-brands-apple: macOS
|
||||
# :fontawesome-brands-windows: Windows
|
||||
|
||||
## Introduction
|
||||
|
||||
You have two choices for manual installation, the [first one](#Conda_method)
|
||||
based on the Anaconda3 package manager (`conda`), and
|
||||
[a second one](#PIP_method) which uses basic Python virtual environment (`venv`)
|
||||
commands and the PIP package manager. Both methods require you to enter commands
|
||||
on the terminal, also known as the "console".
|
||||
You have two choices for manual installation, the [first
|
||||
one](#Conda_method) based on the Anaconda3 package manager (`conda`),
|
||||
and [a second one](#PIP_method) which uses basic Python virtual
|
||||
environment (`venv`) commands and the PIP package manager. Both
|
||||
methods require you to enter commands on the command-line shell, also
|
||||
known as the "console".
|
||||
|
||||
On Windows systems you are encouraged to install and use the
|
||||
[Powershell](https://learn.microsoft.com/en-us/powershell/scripting/install/installing-powershell-on-windows?view=powershell-7.3),
|
||||
which provides compatibility with Linux and Mac shells and nice features such as
|
||||
command-line completion.
|
||||
which provides compatibility with Linux and Mac shells and nice
|
||||
features such as command-line completion.
|
||||
|
||||
### Conda method
|
||||
|
||||
1. Check that your system meets the
|
||||
[hardware requirements](index.md#Hardware_Requirements) and has the
|
||||
appropriate GPU drivers installed. In particular, if you are a Linux user
|
||||
with an AMD GPU installed, you may need to install the
|
||||
[ROCm driver](https://rocmdocs.amd.com/en/latest/Installation_Guide/Installation-Guide.html).
|
||||
1. Check that your system meets the [hardware
|
||||
requirements](index.md#Hardware_Requirements) and has the appropriate
|
||||
GPU drivers installed. In particular, if you are a Linux user with an
|
||||
AMD GPU installed, you may need to install the [ROCm
|
||||
driver](https://rocmdocs.amd.com/en/latest/Installation_Guide/Installation-Guide.html).
|
||||
|
||||
InvokeAI does not yet support Windows machines with AMD GPUs due to the lack
|
||||
of ROCm driver support on this platform.
|
||||
InvokeAI does not yet support Windows machines with AMD GPUs due to
|
||||
the lack of ROCm driver support on this platform.
|
||||
|
||||
To confirm that the appropriate drivers are installed, run `nvidia-smi` on
|
||||
NVIDIA/CUDA systems, and `rocm-smi` on AMD systems. These should return
|
||||
information about the installed video card.
|
||||
To confirm that the appropriate drivers are installed, run
|
||||
`nvidia-smi` on NVIDIA/CUDA systems, and `rocm-smi` on AMD
|
||||
systems. These should return information about the installed video
|
||||
card.
|
||||
|
||||
Macintosh users with MPS acceleration, or anybody with a CPU-only system,
|
||||
can skip this step.
|
||||
Macintosh users with MPS acceleration, or anybody with a CPU-only
|
||||
system, can skip this step.
|
||||
|
||||
2. You will need to install Anaconda3 and Git if they are not already
|
||||
available. Use your operating system's preferred package manager, or
|
||||
download the installers manually. You can find them here:
|
||||
2. You will need to install Anaconda3 and Git if they are not already
|
||||
available. Use your operating system's preferred installer, or
|
||||
download installers from the following URLs
|
||||
|
||||
- [Anaconda3](https://www.anaconda.com/)
|
||||
- [git](https://git-scm.com/downloads)
|
||||
- Anaconda3 (https://www.anaconda.com/)
|
||||
- git (https://git-scm.com/downloads)
|
||||
|
||||
3. Clone the [InvokeAI](https://github.com/invoke-ai/InvokeAI) source code from
|
||||
GitHub:
|
||||
3. Copy the InvokeAI source code from GitHub using `git`:
|
||||
|
||||
```bash
|
||||
git clone https://github.com/invoke-ai/InvokeAI.git
|
||||
@@ -58,158 +55,122 @@ command-line completion.
|
||||
This will create InvokeAI folder where you will follow the rest of the
|
||||
steps.
|
||||
|
||||
4. Enter the newly-created InvokeAI folder:
|
||||
3. Enter the newly-created InvokeAI folder. From this step forward make sure
|
||||
that you are working in the InvokeAI directory!
|
||||
|
||||
```bash
|
||||
cd InvokeAI
|
||||
```
|
||||
4. Select the appropriate environment file:
|
||||
|
||||
From this step forward make sure that you are working in the InvokeAI
|
||||
directory!
|
||||
|
||||
5. Select the appropriate environment file:
|
||||
|
||||
We have created a series of environment files suited for different operating
|
||||
systems and GPU hardware. They are located in the
|
||||
We have created a series of environment files suited for different
|
||||
operating systems and GPU hardware. They are located in the
|
||||
`environments-and-requirements` directory:
|
||||
|
||||
<figure markdown>
|
||||
```bash
|
||||
environment-lin-amd.yml # Linux with an AMD (ROCm) GPU
|
||||
environment-lin-cuda.yml # Linux with an NVIDIA CUDA GPU
|
||||
environment-mac.yml # Macintoshes with MPS acceleration
|
||||
environment-win-cuda.yml # Windows with an NVIDA CUDA GPU
|
||||
```
|
||||
|
||||
| filename | OS |
|
||||
| :----------------------: | :----------------------------: |
|
||||
| environment-lin-amd.yml | Linux with an AMD (ROCm) GPU |
|
||||
| environment-lin-cuda.yml | Linux with an NVIDIA CUDA GPU |
|
||||
| environment-mac.yml | Macintosh |
|
||||
| environment-win-cuda.yml | Windows with an NVIDA CUDA GPU |
|
||||
Select the appropriate environment file, and make a link to it
|
||||
from `environment.yml` in the top-level InvokeAI directory. The
|
||||
command to do this from the top-level directory is:
|
||||
|
||||
</figure>
|
||||
|
||||
Choose the appropriate environment file for your system and link or copy it
|
||||
to `environment.yml` in InvokeAI's top-level directory. To do so, run
|
||||
following command from the repository-root:
|
||||
|
||||
!!! Example ""
|
||||
|
||||
=== "Macintosh and Linux"
|
||||
|
||||
!!! todo "Replace `xxx` and `yyy` with the appropriate OS and GPU codes as seen in the table above"
|
||||
|
||||
```bash
|
||||
ln -sf environments-and-requirements/environment-xxx-yyy.yml environment.yml
|
||||
```
|
||||
|
||||
When this is done, confirm that a file `environment.yml` has been linked in
|
||||
the InvokeAI root directory and that it points to the correct file in the
|
||||
`environments-and-requirements`.
|
||||
|
||||
```bash
|
||||
ls -la
|
||||
```
|
||||
|
||||
=== "Windows"
|
||||
|
||||
!!! todo " Since it requires admin privileges to create links, we will use the copy command to create your `environment.yml`"
|
||||
|
||||
```cmd
|
||||
copy environments-and-requirements\environment-win-cuda.yml environment.yml
|
||||
```
|
||||
|
||||
Afterwards verify that the file `environment.yml` has been created, either via the
|
||||
explorer or by using the command `dir` from the terminal
|
||||
|
||||
```cmd
|
||||
dir
|
||||
```
|
||||
|
||||
!!! warning "Do not try to run conda on directly on the subdirectory environments file. This won't work. Instead, copy or link it to the top-level directory as shown."
|
||||
!!! todo "Macintosh and Linux"
|
||||
|
||||
6. Create the conda environment:
|
||||
```bash
|
||||
ln -sf environments-and-requirements/environment-xxx-yyy.yml environment.yml
|
||||
```
|
||||
|
||||
```bash
|
||||
conda env update
|
||||
```
|
||||
Replace `xxx` and `yyy` with the appropriate OS and GPU codes.
|
||||
|
||||
This will create a new environment named `invokeai` and install all InvokeAI
|
||||
dependencies into it. If something goes wrong you should take a look at
|
||||
[troubleshooting](#troubleshooting).
|
||||
!!! todo "Windows requires admin privileges to make links, so we use the copy (cp) command"
|
||||
|
||||
```bash
|
||||
cp environments-and-requirements\environment-win-cuda.yml environment.yml
|
||||
```
|
||||
|
||||
7. Activate the `invokeai` environment:
|
||||
When this is done, confirm that a file `environment.yml` has been created in
|
||||
the InvokeAI root directory and that it points to the correct file in the
|
||||
`environments-and-requirements`.
|
||||
|
||||
In order to use the newly created environment you will first need to
|
||||
activate it
|
||||
4. Run conda:
|
||||
|
||||
```bash
|
||||
conda activate invokeai
|
||||
```
|
||||
```bash
|
||||
conda env update
|
||||
```
|
||||
|
||||
Your command-line prompt should change to indicate that `invokeai` is active
|
||||
by prepending `(invokeai)`.
|
||||
This will create a new environment named `invokeai` and install all
|
||||
InvokeAI dependencies into it.
|
||||
|
||||
8. Pre-Load the model weights files:
|
||||
If something goes wrong at this point, see
|
||||
[troubleshooting](#Troubleshooting).
|
||||
|
||||
!!! tip
|
||||
5. Activate the `invokeai` environment:
|
||||
|
||||
If you have already downloaded the weights file(s) for another Stable
|
||||
Diffusion distribution, you may skip this step (by selecting "skip" when
|
||||
prompted) and configure InvokeAI to use the previously-downloaded files. The
|
||||
process for this is described in [here](INSTALLING_MODELS.md).
|
||||
```bash
|
||||
conda activate invokeai
|
||||
```
|
||||
|
||||
```bash
|
||||
python scripts/preload_models.py
|
||||
```
|
||||
Your command-line prompt should change to indicate that `invokeai` is active.
|
||||
|
||||
The script `preload_models.py` will interactively guide you through the
|
||||
process of downloading and installing the weights files needed for InvokeAI.
|
||||
Note that the main Stable Diffusion weights file is protected by a license
|
||||
agreement that you have to agree to. The script will list the steps you need
|
||||
to take to create an account on the site that hosts the weights files,
|
||||
accept the agreement, and provide an access token that allows InvokeAI to
|
||||
legally download and install the weights files.
|
||||
6. Load the model weights files:
|
||||
|
||||
If you get an error message about a module not being installed, check that
|
||||
the `invokeai` environment is active and if not, repeat step 5.
|
||||
```bash
|
||||
python scripts/preload_models.py
|
||||
```
|
||||
|
||||
9. Run the command-line- or the web- interface:
|
||||
(Windows users should use the backslash instead of the slash)
|
||||
|
||||
!!! example ""
|
||||
The script `preload_models.py` will interactively guide you through
|
||||
downloading and installing the weights files needed for
|
||||
InvokeAI. Note that the main Stable Diffusion weights file is
|
||||
protected by a license agreement that you have to agree to. The
|
||||
script will list the steps you need to take to create an account on
|
||||
the site that hosts the weights files, accept the agreement, and
|
||||
provide an access token that allows InvokeAI to legally download
|
||||
and install the weights files.
|
||||
|
||||
!!! warning "Make sure that the conda environment is activated, which should create `(invokeai)` in front of your prompt!"
|
||||
If you have already downloaded the weights file(s) for another
|
||||
Stable Diffusion distribution, you may skip this step (by selecting
|
||||
"skip" when prompted) and configure InvokeAI to use the
|
||||
previously-downloaded files. The process for this is described in
|
||||
[INSTALLING_MODELS.md].
|
||||
|
||||
=== "CLI"
|
||||
If you get an error message about a module not being installed,
|
||||
check that the `invokeai` environment is active and if not, repeat
|
||||
step 5.
|
||||
|
||||
```bash
|
||||
python scripts/invoke.py
|
||||
```
|
||||
7. Run the command-line interface or the web interface:
|
||||
|
||||
=== "local Webserver"
|
||||
```bash
|
||||
python scripts/invoke.py # command line
|
||||
python scripts/invoke.py --web # web interface
|
||||
```
|
||||
|
||||
```bash
|
||||
python scripts/invoke.py --web
|
||||
```
|
||||
(Windows users replace backslash with forward slash)
|
||||
|
||||
If you choose the run the web interface, point your browser at
|
||||
http://localhost:9090 in order to load the GUI.
|
||||
|
||||
=== "Public Webserver"
|
||||
8. Render away!
|
||||
|
||||
```bash
|
||||
python scripts/invoke.py --web --host 0.0.0.0
|
||||
```
|
||||
Browse the features listed in the [Stable Diffusion Toolkit
|
||||
Docs](https://invoke-ai.git) to learn about all the things you can
|
||||
do with InvokeAI.
|
||||
|
||||
If you choose the run the web interface, point your browser at
|
||||
http://localhost:9090 in order to load the GUI.
|
||||
Note that some GPUs are slow to warm up. In particular, when using
|
||||
an AMD card with the ROCm driver, you may have to wait for over a
|
||||
minute the first time you try to generate an image. Fortunately, after
|
||||
the warm up period rendering will be fast.
|
||||
|
||||
10. Render away!
|
||||
|
||||
Browse the [features](../features/CLI.md) section to learn about all the things you
|
||||
can do with InvokeAI.
|
||||
|
||||
Note that some GPUs are slow to warm up. In particular, when using an AMD
|
||||
card with the ROCm driver, you may have to wait for over a minute the first
|
||||
time you try to generate an image. Fortunately, after the warm up period
|
||||
rendering will be fast.
|
||||
|
||||
11. Subsequently, to relaunch the script, be sure to run "conda activate
|
||||
invokeai", enter the `InvokeAI` directory, and then launch the invoke
|
||||
script. If you forget to activate the 'invokeai' environment, the script
|
||||
will fail with multiple `ModuleNotFound` errors.
|
||||
9. Subsequently, to relaunch the script, be sure to run "conda
|
||||
activate invokeai", enter the `InvokeAI` directory, and then launch
|
||||
the invoke script. If you forget to activate the 'invokeai'
|
||||
environment, the script will fail with multiple `ModuleNotFound`
|
||||
errors.
|
||||
|
||||
## Updating to newer versions of the script
|
||||
|
||||
@@ -223,194 +184,185 @@ conda env update
|
||||
python scripts/preload_models.py --no-interactive #optional
|
||||
```
|
||||
|
||||
This will bring your local copy into sync with the remote one. The last step may
|
||||
be needed to take advantage of new features or released models. The
|
||||
`--no-interactive` flag will prevent the script from prompting you to download
|
||||
the big Stable Diffusion weights files.
|
||||
This will bring your local copy into sync with the remote one. The
|
||||
last step may be needed to take advantage of new features or released
|
||||
models. The `--no-interactive` flag will prevent the script from
|
||||
prompting you to download the big Stable Diffusion weights files.
|
||||
|
||||
## pip Install
|
||||
|
||||
To install InvokeAI with only the PIP package manager, please follow these
|
||||
steps:
|
||||
To install InvokeAI with only the PIP package manager, please follow
|
||||
these steps:
|
||||
|
||||
1. Make sure you are using Python 3.9 or higher. The rest of the install
|
||||
procedure depends on this:
|
||||
1. Make sure you are using Python 3.9 or higher. The rest of the install
|
||||
procedure depends on this:
|
||||
|
||||
```bash
|
||||
python -V
|
||||
```
|
||||
```bash
|
||||
python -V
|
||||
```
|
||||
|
||||
2. Install the `virtualenv` tool if you don't have it already:
|
||||
2. Install the `virtualenv` tool if you don't have it already:
|
||||
```bash
|
||||
pip install virtualenv
|
||||
```
|
||||
|
||||
```bash
|
||||
pip install virtualenv
|
||||
```
|
||||
3. From within the InvokeAI top-level directory, create and activate a
|
||||
virtual environment named `invokeai`:
|
||||
|
||||
3. From within the InvokeAI top-level directory, create and activate a virtual
|
||||
environment named `invokeai`:
|
||||
```bash
|
||||
virtualenv invokeai
|
||||
source invokeai/bin/activate
|
||||
```
|
||||
|
||||
```bash
|
||||
virtualenv invokeai
|
||||
source invokeai/bin/activate
|
||||
```
|
||||
4. Pick the correct `requirements*.txt` file for your hardware and
|
||||
operating system.
|
||||
|
||||
4. Pick the correct `requirements*.txt` file for your hardware and operating
|
||||
system.
|
||||
|
||||
We have created a series of environment files suited for different operating
|
||||
systems and GPU hardware. They are located in the
|
||||
We have created a series of environment files suited for different
|
||||
operating systems and GPU hardware. They are located in the
|
||||
`environments-and-requirements` directory:
|
||||
|
||||
<figure markdown>
|
||||
|
||||
| filename | OS |
|
||||
| :---------------------------------: | :-------------------------------------------------------------: |
|
||||
| requirements-lin-amd.txt | Linux with an AMD (ROCm) GPU |
|
||||
| requirements-lin-arm64.txt | Linux running on arm64 systems |
|
||||
| requirements-lin-cuda.txt | Linux with an NVIDIA (CUDA) GPU |
|
||||
| requirements-mac-mps-cpu.txt | Macintoshes with MPS acceleration |
|
||||
| requirements-lin-win-colab-cuda.txt | Windows with an NVIDA (CUDA) GPU<br>(supports Google Colab too) |
|
||||
|
||||
</figure>
|
||||
|
||||
Select the appropriate requirements file, and make a link to it from
|
||||
`requirements.txt` in the top-level InvokeAI directory. The command to do
|
||||
this from the top-level directory is:
|
||||
|
||||
!!! example ""
|
||||
|
||||
=== "Macintosh and Linux"
|
||||
|
||||
!!! info "Replace `xxx` and `yyy` with the appropriate OS and GPU codes."
|
||||
|
||||
```bash
|
||||
ln -sf environments-and-requirements/requirements-xxx-yyy.txt requirements.txt
|
||||
```
|
||||
|
||||
=== "Windows"
|
||||
|
||||
!!! info "on Windows, admin privileges are required to make links, so we use the copy command instead"
|
||||
|
||||
```cmd
|
||||
copy environments-and-requirements\requirements-lin-win-colab-cuda.txt requirements.txt
|
||||
```
|
||||
|
||||
!!! warning
|
||||
|
||||
Please do not link or copy `environments-and-requirements/requirements-base.txt`.
|
||||
This is a base requirements file that does not have the platform-specific
|
||||
libraries. Also, be sure to link or copy the platform-specific file to
|
||||
a top-level file named `requirements.txt` as shown here. Running pip on
|
||||
a requirements file in a subdirectory will not work as expected.
|
||||
|
||||
When this is done, confirm that a file named `requirements.txt` has been
|
||||
created in the InvokeAI root directory and that it points to the correct
|
||||
file in `environments-and-requirements`.
|
||||
|
||||
5. Run PIP
|
||||
|
||||
Be sure that the `invokeai` environment is active before doing this:
|
||||
|
||||
```bash
|
||||
pip install --prefer-binary -r requirements.txt
|
||||
requirements-lin-amd.txt # Linux with an AMD (ROCm) GPU
|
||||
requirements-lin-arm64.txt # Linux running on arm64 systems
|
||||
requirements-lin-cuda.txt # Linux with an NVIDIA (CUDA) GPU
|
||||
requirements-mac-mps-cpu.txt # Macintoshes with MPS acceleration
|
||||
requirements-lin-win-colab-cuda.txt # Windows with an NVIDA (CUDA) GPU
|
||||
# (supports Google Colab too)
|
||||
```
|
||||
|
||||
---
|
||||
Select the appropriate requirements file, and make a link to it
|
||||
from `environment.txt` in the top-level InvokeAI directory. The
|
||||
command to do this from the top-level directory is:
|
||||
|
||||
!!! todo "Macintosh and Linux"
|
||||
|
||||
```bash
|
||||
ln -sf environments-and-requirements/requirements-xxx-yyy.txt requirements.txt
|
||||
```
|
||||
|
||||
Replace `xxx` and `yyy` with the appropriate OS and GPU codes.
|
||||
|
||||
!!! todo "Windows requires admin privileges to make links, so we use the copy (cp) command instead"
|
||||
|
||||
```bash
|
||||
cp environments-and-requirements\requirements-lin-win-colab-cuda.txt requirements.txt
|
||||
```
|
||||
|
||||
Note that the order of arguments is reversed between the Linux/Mac and Windows
|
||||
commands!
|
||||
|
||||
Please do not link directly to the file
|
||||
`environments-and-requirements/requirements.txt`. This is a base requirements
|
||||
file that does not have the platform-specific libraries.
|
||||
|
||||
When this is done, confirm that a file `requirements.txt` has been
|
||||
created in the InvokeAI root directory and that it points to the
|
||||
correct file in the `environments-and-requirements`.
|
||||
|
||||
5. Run PIP
|
||||
|
||||
Be sure that the `invokeai` environment is active before doing
|
||||
this:
|
||||
|
||||
```bash
|
||||
pip install --prefer-binary -r requirements.txt
|
||||
```
|
||||
|
||||
## Troubleshooting
|
||||
|
||||
Here are some common issues and their suggested solutions.
|
||||
|
||||
### Conda
|
||||
### Conda install
|
||||
|
||||
#### Conda fails before completing `conda update`
|
||||
1. Conda fails before completing `conda update`:
|
||||
|
||||
The usual source of these errors is a package incompatibility. While we have
|
||||
tried to minimize these, over time packages get updated and sometimes introduce
|
||||
incompatibilities.
|
||||
The usual source of these errors is a package
|
||||
incompatibility. While we have tried to minimize these, over time
|
||||
packages get updated and sometimes introduce incompatibilities.
|
||||
|
||||
We suggest that you search
|
||||
[Issues](https://github.com/invoke-ai/InvokeAI/issues) or the "bugs-and-support"
|
||||
channel of the [InvokeAI Discord](https://discord.gg/ZmtBAhwWhy).
|
||||
We suggest that you search
|
||||
[Issues](https://github.com/invoke-ai/InvokeAI/issues) or the
|
||||
"bugs-and-support" channel of the [InvokeAI
|
||||
Discord](https://discord.gg/ZmtBAhwWhy).
|
||||
|
||||
You may also try to install the broken packages manually using PIP. To do this,
|
||||
activate the `invokeai` environment, and run `pip install` with the name and
|
||||
version of the package that is causing the incompatibility. For example:
|
||||
You may also try to install the broken packages manually using PIP. To do this, activate
|
||||
the `invokeai` environment, and run `pip install` with the name and version of the
|
||||
package that is causing the incompatibility. For example:
|
||||
|
||||
```bash
|
||||
pip install test-tube==0.7.5
|
||||
```
|
||||
```bash
|
||||
pip install test-tube==0.7.5
|
||||
```
|
||||
|
||||
You can keep doing this until all requirements are satisfied and the `invoke.py`
|
||||
script runs without errors. Please report to
|
||||
[Issues](https://github.com/invoke-ai/InvokeAI/issues) what you were able to do
|
||||
to work around the problem so that others can benefit from your investigation.
|
||||
You can keep doing this until all requirements are satisfied and
|
||||
the `invoke.py` script runs without errors. Please report to
|
||||
[Issues](https://github.com/invoke-ai/InvokeAI/issues) what you
|
||||
were able to do to work around the problem so that others can
|
||||
benefit from your investigation.
|
||||
|
||||
#### `preload_models.py` or `invoke.py` crashes at an early stage
|
||||
2. `preload_models.py` or `invoke.py` crashes at an early stage
|
||||
|
||||
This is usually due to an incomplete or corrupted Conda install. Make sure you
|
||||
have linked to the correct environment file and run `conda update` again.
|
||||
This is usually due to an incomplete or corrupted Conda install.
|
||||
Make sure you have linked to the correct environment file and run
|
||||
`conda update` again.
|
||||
|
||||
If the problem persists, a more extreme measure is to clear Conda's caches and
|
||||
remove the `invokeai` environment:
|
||||
If the problem persists, a more extreme measure is to clear Conda's
|
||||
caches and remove the `invokeai` environment:
|
||||
|
||||
```bash
|
||||
conda deactivate
|
||||
conda env remove -n invokeai
|
||||
conda clean -a
|
||||
conda update
|
||||
```
|
||||
```bash
|
||||
conda deactivate
|
||||
conda env remove -n invokeai
|
||||
conda clean -a
|
||||
conda update
|
||||
```
|
||||
|
||||
This removes all cached library files, including ones that may have been
|
||||
corrupted somehow. (This is not supposed to happen, but does anyway).
|
||||
This removes all cached library files, including ones that may have
|
||||
been corrupted somehow. (This is not supposed to happen, but does
|
||||
anyway).
|
||||
|
||||
3. `invoke.py` crashes at a later stage.
|
||||
|
||||
#### `invoke.py` crashes at a later stage
|
||||
If the CLI or web site had been working ok, but something
|
||||
unexpected happens later on during the session, you've encountered
|
||||
a code bug that is probably unrelated to an install issue. Please
|
||||
search [Issues](https://github.com/invoke-ai/InvokeAI/issues), file
|
||||
a bug report, or ask for help on [Discord](https://discord.gg/ZmtBAhwWhy)
|
||||
|
||||
If the CLI or web site had been working ok, but something unexpected happens
|
||||
later on during the session, you've encountered a code bug that is probably
|
||||
unrelated to an install issue. Please search
|
||||
[Issues](https://github.com/invoke-ai/InvokeAI/issues), file a bug report, or
|
||||
ask for help on [Discord](https://discord.gg/ZmtBAhwWhy)
|
||||
4. My renders are running very slowly!
|
||||
|
||||
#### My renders are running very slowly
|
||||
You may have installed the wrong torch (machine learning) package,
|
||||
and the system is running on CPU rather than the GPU. To check,
|
||||
look at the log messages that appear when `invoke.py` is first
|
||||
starting up. One of the earlier lines should say `Using device type
|
||||
cuda`. On AMD systems, it will also say "cuda", and on Macintoshes,
|
||||
it should say "mps". If instead the message says it is running on
|
||||
"cpu", then you may need to install the correct torch library.
|
||||
|
||||
You may have installed the wrong torch (machine learning) package, and the
|
||||
system is running on CPU rather than the GPU. To check, look at the log messages
|
||||
that appear when `invoke.py` is first starting up. One of the earlier lines
|
||||
should say `Using device type cuda`. On AMD systems, it will also say "cuda",
|
||||
and on Macintoshes, it should say "mps". If instead the message says it is
|
||||
running on "cpu", then you may need to install the correct torch library.
|
||||
You may be able to fix this by installing a different torch
|
||||
library. Here are the magic incantations for Conda and PIP.
|
||||
|
||||
You may be able to fix this by installing a different torch library. Here are
|
||||
the magic incantations for Conda and PIP.
|
||||
!!! todo "For CUDA systems"
|
||||
|
||||
!!! todo "For CUDA systems"
|
||||
(conda)
|
||||
```bash
|
||||
conda install pytorch torchvision torchaudio pytorch-cuda=11.6 -c pytorch -c nvidia
|
||||
```
|
||||
|
||||
- conda
|
||||
(pip)
|
||||
```bash
|
||||
pip3 install torch torchvision torchaudio --extra-index-url https://download.pytorch.org/whl/cu116
|
||||
```
|
||||
|
||||
```bash
|
||||
conda install pytorch torchvision torchaudio pytorch-cuda=11.6 -c pytorch -c nvidia
|
||||
```
|
||||
!!! todo "For AMD systems"
|
||||
|
||||
- pip
|
||||
(conda)
|
||||
```bash
|
||||
conda activate invokeai
|
||||
pip3 install torch torchvision torchaudio --extra-index-url https://download.pytorch.org/whl/rocm5.2/
|
||||
```
|
||||
|
||||
```bash
|
||||
pip3 install torch torchvision torchaudio --extra-index-url https://download.pytorch.org/whl/cu116
|
||||
```
|
||||
(pip)
|
||||
```bash
|
||||
pip3 install torch torchvision torchaudio --extra-index-url https://download.pytorch.org/whl/rocm5.2/
|
||||
```
|
||||
|
||||
!!! todo "For AMD systems"
|
||||
|
||||
- conda
|
||||
|
||||
```bash
|
||||
conda activate invokeai
|
||||
pip3 install torch torchvision torchaudio --extra-index-url https://download.pytorch.org/whl/rocm5.2/
|
||||
```
|
||||
|
||||
- pip
|
||||
|
||||
```bash
|
||||
pip3 install torch torchvision torchaudio --extra-index-url https://download.pytorch.org/whl/rocm5.2/
|
||||
```
|
||||
|
||||
More information and troubleshooting tips can be found at https://pytorch.org.
|
||||
More information and troubleshooting tips can be found at https://pytorch.org.
|
||||
@@ -1,137 +1,148 @@
|
||||
---
|
||||
title: Source Installer
|
||||
title: The InvokeAI Source Installer
|
||||
---
|
||||
|
||||
# The InvokeAI Source Installer
|
||||
|
||||
## Introduction
|
||||
|
||||
The source installer is a shell script that attempts to automate every step
|
||||
needed to install and run InvokeAI on a stock computer running recent versions
|
||||
of Linux, MacOS or Windows. It will leave you with a version that runs a stable
|
||||
version of InvokeAI with the option to upgrade to experimental versions later.
|
||||
It is not as foolproof as the [InvokeAI installer](INSTALL_INVOKE.md)
|
||||
The source installer is a shell script that attempts to automate every
|
||||
step needed to install and run InvokeAI on a stock computer running
|
||||
recent versions of Linux, MacOSX or Windows. It will leave you with a
|
||||
version that runs a stable version of InvokeAI with the option to
|
||||
upgrade to experimental versions later. It is not as foolproof as the
|
||||
[InvokeAI installer](INSTALL_INVOKE.md)
|
||||
|
||||
Before you begin, make sure that you meet the
|
||||
[hardware requirements](index.md#Hardware_Requirements) and has the appropriate
|
||||
GPU drivers installed. In particular, if you are a Linux user with an AMD GPU
|
||||
installed, you may need to install the
|
||||
[ROCm driver](https://rocmdocs.amd.com/en/latest/Installation_Guide/Installation-Guide.html).
|
||||
Before you begin, make sure that you meet the [hardware
|
||||
requirements](index.md#Hardware_Requirements) and has the appropriate
|
||||
GPU drivers installed. In particular, if you are a Linux user with an
|
||||
AMD GPU installed, you may need to install the [ROCm
|
||||
driver](https://rocmdocs.amd.com/en/latest/Installation_Guide/Installation-Guide.html).
|
||||
|
||||
Installation requires roughly 18G of free disk space to load the libraries and
|
||||
recommended model weights files.
|
||||
Installation requires roughly 18G of free disk space to load the
|
||||
libraries and recommended model weights files.
|
||||
|
||||
## Walk through
|
||||
|
||||
Though there are multiple steps, there really is only one click involved to kick
|
||||
off the process.
|
||||
Though there are multiple steps, there really is only one click
|
||||
involved to kick off the process.
|
||||
|
||||
1. The source installer is distributed in ZIP files. Go to the
|
||||
[latest release](https://github.com/invoke-ai/InvokeAI/releases/latest), and
|
||||
look for a series of files named:
|
||||
1. The source installer is distributed in ZIP files. Go to the [latest
|
||||
release](https://github.com/invoke-ai/InvokeAI/releases/latest), and
|
||||
look for a series of files named:
|
||||
|
||||
- invokeAI-src-installer-mac.zip
|
||||
- invokeAI-src-installer-windows.zip
|
||||
- invokeAI-src-installer-linux.zip
|
||||
- invokeAI-src-installer-mac.zip
|
||||
- invokeAI-src-installer-windows.zip
|
||||
- invokeAI-src-installer-linux.zip
|
||||
|
||||
Download the one that is appropriate for your operating system.
|
||||
Download the one that is appropriate for your operating system.
|
||||
|
||||
2. Unpack the zip file into a directory that has at least 18G of free space. Do
|
||||
_not_ unpack into a directory that has an earlier version of InvokeAI.
|
||||
2. Unpack the zip file into a directory that has at least 18G of free
|
||||
space. Do *not* unpack into a directory that has an earlier version of
|
||||
InvokeAI.
|
||||
|
||||
This will create a new directory named "InvokeAI". This example shows how
|
||||
this would look using the `unzip` command-line tool, but you may use any
|
||||
graphical or command-line Zip extractor:
|
||||
This will create a new directory named "InvokeAI". This example
|
||||
shows how this would look using the `unzip` command-line tool,
|
||||
but you may use any graphical or command-line Zip extractor:
|
||||
|
||||
```bash
|
||||
C:\Documents\Linco> unzip invokeAI-windows.zip
|
||||
Archive: C: \Linco\Downloads\invokeAI-linux.zip
|
||||
creating: invokeAI\
|
||||
inflating: invokeAI\install.bat
|
||||
inflating: invokeAI\readme.txt
|
||||
```
|
||||
|
||||
```cmd
|
||||
C:\Documents\Linco> unzip invokeAI-windows.zip
|
||||
Archive: C: \Linco\Downloads\invokeAI-linux.zip
|
||||
creating: invokeAI\
|
||||
inflating: invokeAI\install.bat
|
||||
inflating: invokeAI\readme.txt
|
||||
```
|
||||
3. If you are using a desktop GUI, double-click the installer file.
|
||||
It will be named `install.bat` on Windows systems and `install.sh`
|
||||
on Linux and Macintosh systems.
|
||||
|
||||
3. If you are using a desktop GUI, double-click the installer file. It will be
|
||||
named `install.bat` on Windows systems and `install.sh` on Linux and
|
||||
Macintosh systems.
|
||||
4. Alternatively, form the command line, run the shell script or .bat
|
||||
file:
|
||||
|
||||
4. Alternatively, form the command line, run the shell script or .bat file:
|
||||
```bash
|
||||
C:\Documents\Linco> cd invokeAI
|
||||
C:\Documents\Linco> install.bat
|
||||
```
|
||||
|
||||
```cmd
|
||||
C:\Documents\Linco> cd invokeAI
|
||||
C:\Documents\Linco\invokeAI> install.bat
|
||||
```
|
||||
5. Sit back and let the install script work. It will install various
|
||||
binary requirements including Conda, Git and Python, then download
|
||||
the current InvokeAI code and install it along with its
|
||||
dependencies.
|
||||
|
||||
5. Sit back and let the install script work. It will install various binary
|
||||
requirements including Conda, Git and Python, then download the current
|
||||
InvokeAI code and install it along with its dependencies.
|
||||
6. After installation completes, the installer will launch a script
|
||||
called `preload_models.py`, which will guide you through the
|
||||
first-time process of selecting one or more Stable Diffusion model
|
||||
weights files, downloading and configuring them.
|
||||
|
||||
6. After installation completes, the installer will launch a script called
|
||||
`preload_models.py`, which will guide you through the first-time process of
|
||||
selecting one or more Stable Diffusion model weights files, downloading and
|
||||
configuring them.
|
||||
Note that the main Stable Diffusion weights file is protected by a
|
||||
license agreement that you must agree to in order to use. The
|
||||
script will list the steps you need to take to create an account on
|
||||
the official site that hosts the weights files, accept the
|
||||
agreement, and provide an access token that allows InvokeAI to
|
||||
legally download and install the weights files.
|
||||
|
||||
Note that the main Stable Diffusion weights file is protected by a license
|
||||
agreement that you must agree to in order to use. The script will list the
|
||||
steps you need to take to create an account on the official site that hosts
|
||||
the weights files, accept the agreement, and provide an access token that
|
||||
allows InvokeAI to legally download and install the weights files.
|
||||
If you have already downloaded the weights file(s) for another
|
||||
Stable Diffusion distribution, you may skip this step (by selecting
|
||||
"skip" when prompted) and configure InvokeAI to use the
|
||||
previously-downloaded files. The process for this is described in
|
||||
[INSTALLING_MODELS.md].
|
||||
|
||||
If you have already downloaded the weights file(s) for another Stable
|
||||
Diffusion distribution, you may skip this step (by selecting "skip" when
|
||||
prompted) and configure InvokeAI to use the previously-downloaded files. The
|
||||
process for this is described in [Installing Models](INSTALLING_MODELS.md).
|
||||
7. The script will now exit and you'll be ready to generate some
|
||||
images. The invokeAI directory will contain numerous files. Look
|
||||
for a shell script named `invoke.sh` (Linux/Mac) or `invoke.bat`
|
||||
(Windows). Launch the script by double-clicking it or typing
|
||||
its name at the command-line:
|
||||
|
||||
7. The script will now exit and you'll be ready to generate some images. The
|
||||
invokeAI directory will contain numerous files. Look for a shell script
|
||||
named `invoke.sh` (Linux/Mac) or `invoke.bat` (Windows). Launch the script
|
||||
by double-clicking it or typing its name at the command-line:
|
||||
```bash
|
||||
C:\Documents\Linco\invokeAI> cd invokeAI
|
||||
C:\Documents\Linco\invokeAI> invoke.bat
|
||||
```
|
||||
|
||||
```cmd
|
||||
C:\Documents\Linco> cd invokeAI
|
||||
C:\Documents\Linco\invokeAI> invoke.bat
|
||||
```
|
||||
The `invoke.bat` (`invoke.sh`) script will give you the choice of
|
||||
starting (1) the command-line interface, or (2) the web GUI. If you
|
||||
start the latter, you can load the user interface by pointing your
|
||||
browser at http://localhost:9090.
|
||||
|
||||
The `invoke.bat` (`invoke.sh`) script will give you the choice of starting (1)
|
||||
the command-line interface, or (2) the web GUI. If you start the latter, you can
|
||||
load the user interface by pointing your browser at http://localhost:9090.
|
||||
The `invoke` script also offers you a third option labeled "open
|
||||
the developer console". If you choose this option, you will be
|
||||
dropped into a command-line interface in which you can run python
|
||||
commands directly, access developer tools, and launch InvokeAI
|
||||
with customized options. To do the latter, you would launch the
|
||||
script `scripts/invoke.py` as shown in this example:
|
||||
|
||||
The `invoke` script also offers you a third option labeled "open the developer
|
||||
console". If you choose this option, you will be dropped into a command-line
|
||||
interface in which you can run python commands directly, access developer tools,
|
||||
and launch InvokeAI with customized options. To do the latter, you would launch
|
||||
the script `scripts/invoke.py` as shown in this example:
|
||||
```bash
|
||||
python scripts\invoke.py --web --max_load_models=3 \
|
||||
--model=waifu-1.3 --steps=30 --outdir=C:/Documents/AIPhotos
|
||||
```
|
||||
|
||||
```cmd
|
||||
python scripts/invoke.py --web --max_load_models=3 \
|
||||
--model=waifu-1.3 --steps=30 --outdir=C:/Documents/AIPhotos
|
||||
```
|
||||
|
||||
These options are described in detail in the
|
||||
[Command-Line Interface](../features/CLI.md) documentation.
|
||||
These options are described in detail in the [Command-Line
|
||||
Interface](../features/CLI.md) documentation.
|
||||
|
||||
## Updating to newer versions
|
||||
|
||||
This section describes how to update InvokeAI to new versions of the software.
|
||||
This section describes how to update InvokeAI to new versions of the
|
||||
software.
|
||||
|
||||
### Updating the stable version
|
||||
|
||||
This distribution is changing rapidly, and we add new features on a daily basis.
|
||||
To update to the latest released version (recommended), run the `update.sh`
|
||||
(Linux/Mac) or `update.bat` (Windows) scripts. This will fetch the latest
|
||||
release and re-run the `preload_models` script to download any updated models
|
||||
files that may be needed. You can also use this to add additional models that
|
||||
you did not select at installation time.
|
||||
This distribution is changing rapidly, and we add new features on a
|
||||
daily basis. To update to the latest released version (recommended),
|
||||
run the `update.sh` (Linux/Mac) or `update.bat` (Windows)
|
||||
scripts. This will fetch the latest release and re-run the
|
||||
`preload_models` script to download any updated models files that may
|
||||
be needed. You can also use this to add additional models that you did
|
||||
not select at installation time.
|
||||
|
||||
### Updating to the development version
|
||||
|
||||
There may be times that there is a feature in the `development` branch of
|
||||
InvokeAI that you'd like to take advantage of. Or perhaps there is a branch that
|
||||
corrects an annoying bug. To do this, you will use the developer's console.
|
||||
There may be times that there is a feature in the `development` branch
|
||||
of InvokeAI that you'd like to take advantage of. Or perhaps there is
|
||||
a branch that corrects an annoying bug. To do this, you will use the
|
||||
developer's console.
|
||||
|
||||
From within the invokeAI directory, run the command `invoke.sh` (Linux/Mac) or
|
||||
`invoke.bat` (Windows) and selection option (3) to open the developers console.
|
||||
Then run the following command to get the `development branch`:
|
||||
From within the invokeAI directory, run the command `invoke.sh`
|
||||
(Linux/Mac) or `invoke.bat` (Windows) and selection option (3) to open
|
||||
the developers console. Then run the following command to get the
|
||||
`development branch`:
|
||||
|
||||
```bash
|
||||
git checkout development
|
||||
@@ -139,18 +150,19 @@ git pull
|
||||
conda env update
|
||||
```
|
||||
|
||||
You can now close the developer console and run `invoke` as before. If you get
|
||||
complaints about missing models, then you may need to do the additional step of
|
||||
running `preload_models.py`. This happens relatively infrequently. To do this,
|
||||
simply open up the developer's console again and type
|
||||
`python scripts/preload_models.py`.
|
||||
You can now close the developer console and run `invoke` as before.
|
||||
If you get complaints about missing models, then you may need to do
|
||||
the additional step of running `preload_models.py`. This happens
|
||||
relatively infrequently. To do this, simply open up the developer's
|
||||
console again and type `python scripts/preload_models.py`.
|
||||
|
||||
## Troubleshooting
|
||||
|
||||
If you run into problems during or after installation, the InvokeAI team is
|
||||
available to help you. Either create an
|
||||
[Issue](https://github.com/invoke-ai/InvokeAI/issues) at our GitHub site, or
|
||||
make a request for help on the "bugs-and-support" channel of our
|
||||
[Discord server](https://discord.gg/ZmtBAhwWhy). We are a 100% volunteer
|
||||
organization, but typically somebody will be available to help you within 24
|
||||
hours, and often much sooner.
|
||||
If you run into problems during or after installation, the InvokeAI
|
||||
team is available to help you. Either create an
|
||||
[Issue](https://github.com/invoke-ai/InvokeAI/issues) at our GitHub
|
||||
site, or make a request for help on the "bugs-and-support" channel of
|
||||
our [Discord server](https://discord.gg/ZmtBAhwWhy). We are a 100%
|
||||
volunteer organization, but typically somebody will be available to
|
||||
help you within 24 hours, and often much sooner.
|
||||
|
||||
|
||||
@@ -31,6 +31,7 @@ dependencies:
|
||||
- pip:
|
||||
- dependency_injector==4.40.0
|
||||
- getpass_asterisk
|
||||
- gfpgan
|
||||
- omegaconf==2.1.1
|
||||
- pyreadline3
|
||||
- realesrgan
|
||||
@@ -39,7 +40,6 @@ dependencies:
|
||||
- git+https://github.com/openai/CLIP.git@main#egg=clip
|
||||
- git+https://github.com/Birch-san/k-diffusion.git@mps#egg=k_diffusion
|
||||
- git+https://github.com/invoke-ai/clipseg.git@relaxed-python-requirement#egg=clipseg
|
||||
- git+https://github.com/invoke-ai/GFPGAN#egg=gfpgan
|
||||
- -e .
|
||||
variables:
|
||||
PYTORCH_ENABLE_MPS_FALLBACK: 1
|
||||
|
||||
@@ -18,6 +18,7 @@ dependencies:
|
||||
- flask_cors==3.0.10
|
||||
- flask_socketio==5.3.0
|
||||
- getpass_asterisk
|
||||
- gfpgan
|
||||
- imageio-ffmpeg==0.4.2
|
||||
- imageio==2.9.0
|
||||
- kornia==0.6.0
|
||||
@@ -41,5 +42,4 @@ dependencies:
|
||||
- git+https://github.com/openai/CLIP.git@main#egg=clip
|
||||
- git+https://github.com/Birch-san/k-diffusion.git@mps#egg=k_diffusion
|
||||
- git+https://github.com/invoke-ai/clipseg.git@relaxed-python-requirement#egg=clipseg
|
||||
- git+https://github.com/invoke-ai/GFPGAN#egg=gfpgan
|
||||
- -e .
|
||||
|
||||
@@ -21,6 +21,7 @@ dependencies:
|
||||
- flask_cors==3.0.10
|
||||
- flask_socketio==5.3.0
|
||||
- getpass_asterisk
|
||||
- gfpgan
|
||||
- imageio-ffmpeg==0.4.2
|
||||
- imageio==2.9.0
|
||||
- kornia==0.6.0
|
||||
@@ -41,5 +42,4 @@ dependencies:
|
||||
- git+https://github.com/openai/CLIP.git@main#egg=clip
|
||||
- git+https://github.com/Birch-san/k-diffusion.git@mps#egg=k_diffusion
|
||||
- git+https://github.com/invoke-ai/clipseg.git@relaxed-python-requirement#egg=clipseg
|
||||
- git+https://github.com/invoke-ai/GFPGAN#egg=gfpgan
|
||||
- -e .
|
||||
|
||||
@@ -22,6 +22,7 @@ dependencies:
|
||||
- flask_cors==3.0.10
|
||||
- flask_socketio==5.3.0
|
||||
- getpass_asterisk
|
||||
- gfpgan
|
||||
- imageio-ffmpeg==0.4.2
|
||||
- imageio==2.9.0
|
||||
- kornia==0.6.0
|
||||
@@ -42,5 +43,4 @@ dependencies:
|
||||
- git+https://github.com/openai/CLIP.git@main#egg=clip
|
||||
- git+https://github.com/Birch-san/k-diffusion.git@mps#egg=k_diffusion
|
||||
- git+https://github.com/invoke-ai/clipseg.git@relaxed-python-requirement#egg=clipseg
|
||||
- git+https://github.com/invoke-ai/GFPGAN#egg=gfpgan
|
||||
- -e .
|
||||
|
||||
@@ -9,6 +9,7 @@ flask_cors==3.0.10
|
||||
flask_socketio==5.3.0
|
||||
flaskwebgui==0.3.7
|
||||
getpass_asterisk
|
||||
gfpgan
|
||||
huggingface-hub
|
||||
imageio
|
||||
imageio-ffmpeg
|
||||
@@ -33,4 +34,3 @@ transformers==4.21.*
|
||||
git+https://github.com/openai/CLIP.git@main#egg=clip
|
||||
git+https://github.com/Birch-san/k-diffusion.git@mps#egg=k-diffusion
|
||||
git+https://github.com/invoke-ai/clipseg.git@relaxed-python-requirement#egg=clipseg
|
||||
git+https://github.com/invoke-ai/GFPGAN#egg=gfpgan
|
||||
|
||||
File diff suppressed because one or more lines are too long
829
frontend/dist/assets/index.4488003f.js
vendored
Normal file
829
frontend/dist/assets/index.4488003f.js
vendored
Normal file
File diff suppressed because one or more lines are too long
501
frontend/dist/assets/index.8eb7dfe4.js
vendored
Normal file
501
frontend/dist/assets/index.8eb7dfe4.js
vendored
Normal file
File diff suppressed because one or more lines are too long
690
frontend/dist/assets/index.ae92a637.js
vendored
Normal file
690
frontend/dist/assets/index.ae92a637.js
vendored
Normal file
File diff suppressed because one or more lines are too long
517
frontend/dist/assets/index.cc049b93.js
vendored
Normal file
517
frontend/dist/assets/index.cc049b93.js
vendored
Normal file
File diff suppressed because one or more lines are too long
517
frontend/dist/assets/index.e2832fd4.js
vendored
Normal file
517
frontend/dist/assets/index.e2832fd4.js
vendored
Normal file
File diff suppressed because one or more lines are too long
2
frontend/dist/index.html
vendored
2
frontend/dist/index.html
vendored
@@ -6,7 +6,7 @@
|
||||
<meta name="viewport" content="width=device-width, initial-scale=1.0" />
|
||||
<title>InvokeAI - A Stable Diffusion Toolkit</title>
|
||||
<link rel="shortcut icon" type="icon" href="./assets/favicon.0d253ced.ico" />
|
||||
<script type="module" crossorigin src="./assets/index.a8ba2a6c.js"></script>
|
||||
<script type="module" crossorigin src="./assets/index.1fc0290b.js"></script>
|
||||
<link rel="stylesheet" href="./assets/index.40a72c80.css">
|
||||
</head>
|
||||
|
||||
|
||||
10651
frontend/package-lock.json
generated
Normal file
10651
frontend/package-lock.json
generated
Normal file
File diff suppressed because it is too large
Load Diff
@@ -1,4 +1,4 @@
|
||||
import { IconButton, Image, Spinner } from '@chakra-ui/react';
|
||||
import { IconButton, Image } from '@chakra-ui/react';
|
||||
import { useState } from 'react';
|
||||
import { FaAngleLeft, FaAngleRight } from 'react-icons/fa';
|
||||
import { RootState, useAppDispatch, useAppSelector } from '../../app/store';
|
||||
@@ -30,6 +30,7 @@ export const imagesSelector = createSelector(
|
||||
|
||||
return {
|
||||
imageToDisplay: intermediateImage ? intermediateImage : currentImage,
|
||||
isIntermediate: intermediateImage,
|
||||
currentCategory,
|
||||
isOnFirstImage: currentImageIndex === 0,
|
||||
isOnLastImage:
|
||||
@@ -55,6 +56,7 @@ export default function CurrentImagePreview() {
|
||||
isOnLastImage,
|
||||
shouldShowImageDetails,
|
||||
imageToDisplay,
|
||||
isIntermediate,
|
||||
} = useAppSelector(imagesSelector);
|
||||
|
||||
const [shouldShowNextPrevButtons, setShouldShowNextPrevButtons] =
|
||||
@@ -81,8 +83,8 @@ export default function CurrentImagePreview() {
|
||||
{imageToDisplay && (
|
||||
<Image
|
||||
src={imageToDisplay.url}
|
||||
width={imageToDisplay.width}
|
||||
height={imageToDisplay.height}
|
||||
width={isIntermediate ? imageToDisplay.width : undefined}
|
||||
height={isIntermediate ? imageToDisplay.height : undefined}
|
||||
/>
|
||||
)}
|
||||
{!shouldShowImageDetails && (
|
||||
|
||||
2968
frontend/yarn.lock
2968
frontend/yarn.lock
File diff suppressed because it is too large
Load Diff
BIN
installer/InvokeAI/WinLongPathsEnabled.reg
Normal file
BIN
installer/InvokeAI/WinLongPathsEnabled.reg
Normal file
Binary file not shown.
172
installer/InvokeAI/install.bat
Normal file
172
installer/InvokeAI/install.bat
Normal file
@@ -0,0 +1,172 @@
|
||||
@echo off
|
||||
|
||||
@rem This script will install git (if not found on the PATH variable)
|
||||
@rem using micromamba (an 8mb static-linked single-file binary, conda replacement).
|
||||
@rem For users who already have git, this step will be skipped.
|
||||
|
||||
@rem Next, it'll download the project's source code.
|
||||
@rem Then it will download a self-contained, standalone Python and unpack it.
|
||||
@rem Finally, it'll create the Python virtual environment and preload the models.
|
||||
|
||||
@rem This enables a user to install this project without manually installing git or Python
|
||||
|
||||
echo ***** Installing InvokeAI.. *****
|
||||
|
||||
set PATH=c:\windows\system32
|
||||
|
||||
@rem Config
|
||||
set INSTALL_ENV_DIR=%cd%\installer_files\env
|
||||
@rem https://mamba.readthedocs.io/en/latest/installation.html
|
||||
set MICROMAMBA_DOWNLOAD_URL=https://micro.mamba.pm/api/micromamba/win-64/latest
|
||||
set RELEASE_URL=https://github.com/tildebyte/InvokeAI
|
||||
set RELEASE_SOURCEBALL=/archive/feat-install-pip-compile.tar.gz
|
||||
set PYTHON_BUILD_STANDALONE_URL=https://github.com/indygreg/python-build-standalone/releases/download
|
||||
set PYTHON_BUILD_STANDALONE=20221002/cpython-3.10.7+20221002-x86_64-pc-windows-msvc-shared-install_only.tar.gz
|
||||
|
||||
set PACKAGES_TO_INSTALL=
|
||||
|
||||
call git --version >.tmp1 2>.tmp2
|
||||
if "%ERRORLEVEL%" NEQ "0" set PACKAGES_TO_INSTALL=%PACKAGES_TO_INSTALL% git
|
||||
|
||||
@rem Cleanup
|
||||
del /q .tmp1 .tmp2
|
||||
|
||||
@rem (if necessary) install git into a contained environment
|
||||
if "%PACKAGES_TO_INSTALL%" NEQ "" (
|
||||
@rem download micromamba
|
||||
echo ***** Downloading micromamba from %MICROMAMBA_DOWNLOAD_URL% to micromamba.exe *****
|
||||
|
||||
call curl -L "%MICROMAMBA_DOWNLOAD_URL%" > micromamba.tbz2
|
||||
|
||||
set err_msg=----- micromamba source unpack failed -----
|
||||
tar -jxf micromamba.tbz2
|
||||
if %errorlevel% neq 0 goto err_exit
|
||||
|
||||
move Library\bin\micromamba.exe micromamba.exe
|
||||
rd /s /q Library info
|
||||
del /q micromamba.tbz2
|
||||
|
||||
@rem test the mamba binary
|
||||
echo ***** Micromamba version: *****
|
||||
call micromamba.exe --version
|
||||
|
||||
@rem create the installer env
|
||||
if not exist "%INSTALL_ENV_DIR%" (
|
||||
call micromamba.exe create -y --prefix "%INSTALL_ENV_DIR%"
|
||||
)
|
||||
|
||||
echo ***** Packages to install:%PACKAGES_TO_INSTALL% *****
|
||||
|
||||
call micromamba.exe install -y --prefix "%INSTALL_ENV_DIR%" -c conda-forge %PACKAGES_TO_INSTALL%
|
||||
|
||||
if not exist "%INSTALL_ENV_DIR%" (
|
||||
echo ----- There was a problem while installing "%PACKAGES_TO_INSTALL%" using micromamba. Cannot continue. -----
|
||||
pause
|
||||
exit /b
|
||||
)
|
||||
)
|
||||
|
||||
del /q micromamba.exe
|
||||
|
||||
@rem For 'git' only
|
||||
set PATH=%INSTALL_ENV_DIR%\Library\bin;%PATH%
|
||||
|
||||
@rem Download/unpack/clean up InvokeAI release sourceball
|
||||
set err_msg=----- InvokeAI source download failed -----
|
||||
curl -L %RELEASE_URL%/%RELEASE_SOURCEBALL% --output InvokeAI.tgz
|
||||
if %errorlevel% neq 0 goto err_exit
|
||||
|
||||
set err_msg=----- InvokeAI source unpack failed -----
|
||||
tar -zxf InvokeAI.tgz
|
||||
if %errorlevel% neq 0 goto err_exit
|
||||
|
||||
del /q InvokeAI.tgz
|
||||
|
||||
set err_msg=----- InvokeAI source copy failed -----
|
||||
cd InvokeAI-*
|
||||
xcopy . .. /e /h
|
||||
if %errorlevel% neq 0 goto err_exit
|
||||
cd ..
|
||||
|
||||
@rem cleanup
|
||||
for /f %%i in ('dir /b InvokeAI-*') do rd /s /q %%i
|
||||
rd /s /q .dev_scripts .github docker-build tests
|
||||
del /q requirements.in requirements-mkdocs.txt shell.nix
|
||||
|
||||
echo ***** Unpacked InvokeAI source *****
|
||||
|
||||
@rem Download/unpack/clean up python-build-standalone
|
||||
set err_msg=----- Python download failed -----
|
||||
curl -L %PYTHON_BUILD_STANDALONE_URL%/%PYTHON_BUILD_STANDALONE% --output python.tgz
|
||||
if %errorlevel% neq 0 goto err_exit
|
||||
|
||||
set err_msg=----- Python unpack failed -----
|
||||
tar -zxf python.tgz
|
||||
if %errorlevel% neq 0 goto err_exit
|
||||
|
||||
del /q python.tgz
|
||||
|
||||
echo ***** Unpacked python-build-standalone *****
|
||||
|
||||
@rem create venv
|
||||
set err_msg=----- problem creating venv -----
|
||||
.\python\python -E -s -m venv .venv
|
||||
@rem In reality, the following is ALL that 'activate.bat' does,
|
||||
@rem aside from setting the prompt, which we don't care about
|
||||
set PYTHONPATH=
|
||||
set PATH=.venv\Scripts;%PATH%
|
||||
if %errorlevel% neq 0 goto err_exit
|
||||
|
||||
echo ***** Created Python virtual environment *****
|
||||
|
||||
@rem Print venv's Python version
|
||||
set err_msg=----- problem calling venv's python -----
|
||||
echo We're running under
|
||||
.venv\Scripts\python --version
|
||||
if %errorlevel% neq 0 goto err_exit
|
||||
|
||||
set err_msg=----- pip update failed -----
|
||||
.venv\Scripts\python -m pip install --no-cache-dir --no-warn-script-location --upgrade pip
|
||||
if %errorlevel% neq 0 goto err_exit
|
||||
|
||||
echo ***** Updated pip *****
|
||||
|
||||
set err_msg=----- requirements file copy failed -----
|
||||
copy installer\py3.10-windows-x86_64-cuda-reqs.txt requirements.txt
|
||||
if %errorlevel% neq 0 goto err_exit
|
||||
|
||||
set err_msg=----- main pip install failed -----
|
||||
.venv\Scripts\python -m pip install --no-cache-dir --no-warn-script-location -r requirements.txt
|
||||
if %errorlevel% neq 0 goto err_exit
|
||||
|
||||
set err_msg=----- clipseg install failed -----
|
||||
.venv\Scripts\python -m pip install --no-cache-dir --no-warn-script-location -e git+https://github.com/invoke-ai/clipseg.git@models-rename#egg=clipseg
|
||||
if %errorlevel% neq 0 goto err_exit
|
||||
|
||||
set err_msg=----- InvokeAI setup failed -----
|
||||
.venv\Scripts\python -m pip install --no-cache-dir --no-warn-script-location -e .
|
||||
if %errorlevel% neq 0 goto err_exit
|
||||
|
||||
echo ***** Installed Python dependencies *****
|
||||
|
||||
@rem preload the models
|
||||
call .venv\Scripts\python scripts\preload_models.py
|
||||
set err_msg=----- model download clone failed -----
|
||||
if %errorlevel% neq 0 goto err_exit
|
||||
|
||||
echo ***** Finished downloading models *****
|
||||
|
||||
echo ***** Installing invoke.bat ******
|
||||
cp installer\invoke.bat .\invoke.bat
|
||||
|
||||
|
||||
@rem more cleanup
|
||||
rd /s /q installer installer_files
|
||||
|
||||
pause
|
||||
exit
|
||||
|
||||
:err_exit
|
||||
echo %err_msg%
|
||||
pause
|
||||
exit
|
||||
17
installer/InvokeAI/readme.txt
Normal file
17
installer/InvokeAI/readme.txt
Normal file
@@ -0,0 +1,17 @@
|
||||
InvokeAI
|
||||
|
||||
Project homepage: https://github.com/invoke-ai/InvokeAI
|
||||
|
||||
Installation on Windows:
|
||||
NOTE: You might need to enable Windows Long Paths. If you're not sure,
|
||||
then you almost certainly need to. Simply double-click the 'WinLongPathsEnabled.reg'
|
||||
file. Note that you will need to have admin privileges in order to
|
||||
do this.
|
||||
|
||||
Please double-click the 'install.bat' file (while keeping it inside the invokeAI folder).
|
||||
|
||||
Installation on Linux and Mac:
|
||||
Please open the terminal, and run './install.sh' (while keeping it inside the invokeAI folder).
|
||||
|
||||
After installation, please run the 'invoke.bat' file (on Windows) or 'invoke.sh'
|
||||
file (on Linux/Mac) to start InvokeAI.
|
||||
@@ -17,9 +17,9 @@ set PATH=c:\windows\system32
|
||||
@rem Config
|
||||
set INSTALL_ENV_DIR=%cd%\installer_files\env
|
||||
@rem https://mamba.readthedocs.io/en/latest/installation.html
|
||||
set MICROMAMBA_DOWNLOAD_URL=https://github.com/cmdr2/stable-diffusion-ui/releases/download/v1.1/micromamba.exe
|
||||
set MICROMAMBA_DOWNLOAD_URL=https://micro.mamba.pm/api/micromamba/win-64/latest
|
||||
set RELEASE_URL=https://github.com/invoke-ai/InvokeAI
|
||||
set RELEASE_SOURCEBALL=/archive/refs/heads/v2.1.3.tar.gz
|
||||
set RELEASE_SOURCEBALL=/archive/refs/tags/2.1.3-rc5.tar.gz
|
||||
set PYTHON_BUILD_STANDALONE_URL=https://github.com/indygreg/python-build-standalone/releases/download
|
||||
set PYTHON_BUILD_STANDALONE=20221002/cpython-3.10.7+20221002-x86_64-pc-windows-msvc-shared-install_only.tar.gz
|
||||
|
||||
@@ -36,7 +36,15 @@ if "%PACKAGES_TO_INSTALL%" NEQ "" (
|
||||
@rem download micromamba
|
||||
echo ***** Downloading micromamba from %MICROMAMBA_DOWNLOAD_URL% to micromamba.exe *****
|
||||
|
||||
call curl -L "%MICROMAMBA_DOWNLOAD_URL%" > micromamba.exe
|
||||
call curl -L "%MICROMAMBA_DOWNLOAD_URL%" > micromamba.tbz2
|
||||
|
||||
set err_msg=----- micromamba source unpack failed -----
|
||||
tar -jxf micromamba.tbz2
|
||||
if %errorlevel% neq 0 goto err_exit
|
||||
|
||||
move Library\bin\micromamba.exe micromamba.exe
|
||||
rd /s /q Library info
|
||||
del /q micromamba.tbz2
|
||||
|
||||
@rem test the mamba binary
|
||||
echo ***** Micromamba version: *****
|
||||
@@ -132,7 +140,7 @@ set err_msg=----- main pip install failed -----
|
||||
if %errorlevel% neq 0 goto err_exit
|
||||
|
||||
set err_msg=----- clipseg install failed -----
|
||||
.venv\Scripts\python -m pip install --no-cache-dir --no-warn-script-location git+https://github.com/invoke-ai/clipseg.git@relaxed-python-requirement#egg=clipseg
|
||||
.venv\Scripts\python -m pip install --no-cache-dir --no-warn-script-location -e git+https://github.com/invoke-ai/clipseg.git@relaxed-python-requirement#egg=clipseg
|
||||
if %errorlevel% neq 0 goto err_exit
|
||||
|
||||
set err_msg=----- InvokeAI setup failed -----
|
||||
@@ -149,8 +157,8 @@ if %errorlevel% neq 0 goto err_exit
|
||||
echo ***** Finished downloading models *****
|
||||
|
||||
echo ***** Installing invoke.bat ******
|
||||
copy installer\invoke.bat .\invoke.bat
|
||||
echo All done! Execute the file invoke.bat in this directory to start InvokeAI
|
||||
cp installer\invoke.bat .\invoke.bat
|
||||
|
||||
|
||||
@rem more cleanup
|
||||
rd /s /q installer installer_files
|
||||
|
||||
@@ -74,7 +74,7 @@ fi
|
||||
INSTALL_ENV_DIR="$(pwd)/installer_files/env"
|
||||
MICROMAMBA_DOWNLOAD_URL="https://micro.mamba.pm/api/micromamba/${MAMBA_OS_NAME}-${MAMBA_ARCH}/latest"
|
||||
RELEASE_URL=https://github.com/invoke-ai/InvokeAI
|
||||
RELEASE_SOURCEBALL=/archive/refs/heads/v2.1.3.tar.gz
|
||||
RELEASE_SOURCEBALL=/archive/refs/tags/2.1.3-rc5.tar.gz
|
||||
PYTHON_BUILD_STANDALONE_URL=https://github.com/indygreg/python-build-standalone/releases/download
|
||||
if [ "$OS_NAME" == "darwin" ]; then
|
||||
PYTHON_BUILD_STANDALONE=20221002/cpython-3.10.7+20221002-${PY_ARCH}-apple-darwin-install_only.tar.gz
|
||||
@@ -184,7 +184,7 @@ _err_msg="\n----- main pip install failed -----\n"
|
||||
_err_exit $? _err_msg
|
||||
|
||||
_err_msg="\n----- clipseg install failed -----\n"
|
||||
.venv/bin/python3 -m pip install --no-cache-dir --no-warn-script-location git+https://github.com/invoke-ai/clipseg.git@relaxed-python-requirement#egg=clipseg
|
||||
.venv/bin/python3 -m pip install --no-cache-dir --no-warn-script-location -e git+https://github.com/invoke-ai/clipseg.git@relaxed-python-requirement#egg=clipseg
|
||||
_err_exit $? _err_msg
|
||||
|
||||
_err_msg="\n----- InvokeAI setup failed -----\n"
|
||||
@@ -206,6 +206,5 @@ cp installer/invoke.sh .
|
||||
# more cleanup
|
||||
rm -rf installer/ installer_files/
|
||||
|
||||
echo "All done! Run the command './invoke.sh' to start InvokeAI."
|
||||
read -p "Press any key to exit..."
|
||||
exit
|
||||
|
||||
@@ -16,9 +16,7 @@ IF /I "%restore%" == "1" (
|
||||
.venv\Scripts\python scripts\invoke.py --web
|
||||
) ELSE IF /I "%restore%" == "3" (
|
||||
echo Developer Console
|
||||
call where python
|
||||
call python --version
|
||||
|
||||
.venv\Scripts\python
|
||||
cmd /k
|
||||
) ELSE (
|
||||
echo Invalid selection
|
||||
|
||||
@@ -561,15 +561,17 @@ class Generate:
|
||||
):
|
||||
# retrieve the seed from the image;
|
||||
seed = None
|
||||
image_metadata = None
|
||||
prompt = None
|
||||
|
||||
args = metadata_from_png(image_path)
|
||||
seed = opt.seed or args.seed
|
||||
if seed is None or seed < 0:
|
||||
seed = random.randrange(0, np.iinfo(np.uint32).max)
|
||||
|
||||
prompt = opt.prompt or args.prompt or ''
|
||||
print(f'>> using seed {seed} and prompt "{prompt}" for {image_path}')
|
||||
args = metadata_from_png(image_path)
|
||||
seed = args.seed
|
||||
prompt = args.prompt
|
||||
print(f'>> retrieved seed {seed} and prompt "{prompt}" from {image_path}')
|
||||
|
||||
if not seed:
|
||||
print('* Could not recover seed for image. Replacing with 42. This will not affect image quality')
|
||||
seed = 42
|
||||
|
||||
# try to reuse the same filename prefix as the original file.
|
||||
# we take everything up to the first period
|
||||
@@ -616,11 +618,7 @@ class Generate:
|
||||
extend_instructions[direction]=int(pixels)
|
||||
except ValueError:
|
||||
print(f'** invalid extension instruction. Use <directions> <pixels>..., as in "top 64 left 128 right 64 bottom 64"')
|
||||
|
||||
opt.seed = seed
|
||||
opt.prompt = prompt
|
||||
|
||||
if len(extend_instructions) > 0:
|
||||
if len(extend_instructions)>0:
|
||||
restorer = Outcrop(image,self,)
|
||||
return restorer.process (
|
||||
extend_instructions,
|
||||
@@ -1035,9 +1033,7 @@ class Generate:
|
||||
return True
|
||||
return False
|
||||
|
||||
def _check_for_erasure(self, image:Image.Image)->bool:
|
||||
if image.mode not in ('RGBA','RGB'):
|
||||
return False
|
||||
def _check_for_erasure(self, image):
|
||||
width, height = image.size
|
||||
pixdata = image.load()
|
||||
colored = 0
|
||||
|
||||
@@ -247,6 +247,8 @@ class Args(object):
|
||||
switches.append('--seamless')
|
||||
if a['hires_fix']:
|
||||
switches.append('--hires_fix')
|
||||
if a['strength'] and a['strength']>0:
|
||||
switches.append(f'-f {a["strength"]}')
|
||||
|
||||
# img2img generations have parameters relevant only to them and have special handling
|
||||
if a['init_img'] and len(a['init_img'])>0:
|
||||
@@ -552,8 +554,14 @@ class Args(object):
|
||||
postprocessing_group.add_argument(
|
||||
'--gfpgan_model_path',
|
||||
type=str,
|
||||
default='./models/gfpgan/GFPGANv1.4.pth',
|
||||
help='Indicates the path to the GFPGAN model',
|
||||
default='./GFPGANv1.4.pth',
|
||||
help='Indicates the path to the GFPGAN model, relative to --gfpgan_dir.',
|
||||
)
|
||||
postprocessing_group.add_argument(
|
||||
'--gfpgan_dir',
|
||||
type=str,
|
||||
default='./models/gfpgan',
|
||||
help='Indicates the directory containing the GFPGAN code.',
|
||||
)
|
||||
web_server_group.add_argument(
|
||||
'--web',
|
||||
@@ -858,11 +866,6 @@ class Args(object):
|
||||
default=32,
|
||||
help='When outpainting, the tile size to use for filling outpaint areas',
|
||||
)
|
||||
postprocessing_group.add_argument(
|
||||
'--new_prompt',
|
||||
type=str,
|
||||
help='Change the text prompt applied during postprocessing (default, use original generation prompt)',
|
||||
)
|
||||
postprocessing_group.add_argument(
|
||||
'-ft',
|
||||
'--facetool',
|
||||
|
||||
@@ -63,7 +63,7 @@ class Generator():
|
||||
**kwargs
|
||||
)
|
||||
results = []
|
||||
seed = seed if seed is not None and seed >= 0 else self.new_seed()
|
||||
seed = seed if seed is not None else self.new_seed()
|
||||
first_seed = seed
|
||||
seed, initial_noise = self.generate_initial_noise(seed, width, height)
|
||||
|
||||
|
||||
@@ -169,8 +169,7 @@ class Inpaint(Img2Img):
|
||||
# Fill missing areas of original image
|
||||
init_filled = self.tile_fill_missing(
|
||||
self.pil_image.copy(),
|
||||
seed = self.seed if (self.seed is not None
|
||||
and self.seed >= 0) else self.new_seed(),
|
||||
seed = self.seed,
|
||||
tile_size = tile_size
|
||||
)
|
||||
init_filled.paste(init_image, (0,0), init_image.split()[-1])
|
||||
|
||||
@@ -10,6 +10,8 @@ from ldm.models.diffusion.ddim import DDIMSampler
|
||||
from ldm.invoke.generator.omnibus import Omnibus
|
||||
from ldm.models.diffusion.shared_invokeai_diffusion import InvokeAIDiffuserComponent
|
||||
from PIL import Image
|
||||
from ldm.invoke.devices import choose_autocast
|
||||
from ldm.invoke.image_util import InitImageResizer
|
||||
|
||||
class Txt2Img2Img(Generator):
|
||||
def __init__(self, model, precision):
|
||||
@@ -44,16 +46,13 @@ class Txt2Img2Img(Generator):
|
||||
ddim_num_steps=steps, ddim_eta=ddim_eta, verbose=False
|
||||
)
|
||||
|
||||
#x = self.get_noise(init_width, init_height)
|
||||
x = x_T
|
||||
|
||||
if self.free_gpu_mem and self.model.model.device != self.model.device:
|
||||
self.model.model.to(self.model.device)
|
||||
|
||||
samples, _ = sampler.sample(
|
||||
batch_size = 1,
|
||||
S = steps,
|
||||
x_T = x,
|
||||
x_T = x_T,
|
||||
conditioning = c,
|
||||
shape = shape,
|
||||
verbose = False,
|
||||
@@ -69,11 +68,21 @@ class Txt2Img2Img(Generator):
|
||||
)
|
||||
|
||||
# resizing
|
||||
samples = torch.nn.functional.interpolate(
|
||||
samples,
|
||||
size=(height // self.downsampling_factor, width // self.downsampling_factor),
|
||||
mode="bilinear"
|
||||
)
|
||||
|
||||
image = self.sample_to_image(samples)
|
||||
image = InitImageResizer(image).resize(width, height)
|
||||
|
||||
image = np.array(image).astype(np.float32) / 255.0
|
||||
image = image[None].transpose(0, 3, 1, 2)
|
||||
image = torch.from_numpy(image)
|
||||
image = 2.0 * image - 1.0
|
||||
image = image.to(self.model.device)
|
||||
|
||||
scope = choose_autocast(self.precision)
|
||||
with scope(self.model.device.type):
|
||||
samples = self.model.get_first_stage_encoding(
|
||||
self.model.encode_first_stage(image)
|
||||
) # move back to latent space
|
||||
|
||||
t_enc = int(strength * steps)
|
||||
ddim_sampler = DDIMSampler(self.model, device=self.model.device)
|
||||
|
||||
@@ -109,13 +109,10 @@ class ModelCache(object):
|
||||
Set the default model. The change will not take
|
||||
effect until you call model_cache.commit()
|
||||
'''
|
||||
print(f'DEBUG: before set_default_model()\n{OmegaConf.to_yaml(self.config)}')
|
||||
assert model_name in self.models,f"unknown model '{model_name}'"
|
||||
config = self.config
|
||||
for model in config:
|
||||
config[model].pop('default',None)
|
||||
config[model_name]['default'] = True
|
||||
print(f'DEBUG: after set_default_model():\n{OmegaConf.to_yaml(self.config)}')
|
||||
for model in self.models:
|
||||
self.models[model].pop('default',None)
|
||||
self.models[model_name]['default'] = True
|
||||
|
||||
def list_models(self) -> dict:
|
||||
'''
|
||||
|
||||
@@ -636,7 +636,7 @@ def split_weighted_subprompts(text, skip_normalize=False)->list:
|
||||
weight_sum = sum(map(lambda x: x[1], parsed_prompts))
|
||||
if weight_sum == 0:
|
||||
print(
|
||||
"* Warning: Subprompt weights add up to zero. Discarding and using even weights instead.")
|
||||
"Warning: Subprompt weights add up to zero. Discarding and using even weights instead.")
|
||||
equal_weight = 1 / max(len(parsed_prompts), 1)
|
||||
return [(x[0], equal_weight) for x in parsed_prompts]
|
||||
return [(x[0], x[1] / weight_sum) for x in parsed_prompts]
|
||||
|
||||
@@ -284,7 +284,6 @@ class Completer(object):
|
||||
switch,partial_path = match.groups()
|
||||
partial_path = partial_path.lstrip()
|
||||
|
||||
|
||||
matches = list()
|
||||
path = os.path.expanduser(partial_path)
|
||||
|
||||
@@ -322,7 +321,6 @@ class Completer(object):
|
||||
matches.append(
|
||||
switch+os.path.join(os.path.dirname(full_path), node)
|
||||
)
|
||||
|
||||
return matches
|
||||
|
||||
class DummyCompleter(Completer):
|
||||
|
||||
@@ -2,9 +2,9 @@ class Restoration():
|
||||
def __init__(self) -> None:
|
||||
pass
|
||||
|
||||
def load_face_restore_models(self, gfpgan_model_path='./models/gfpgan/GFPGANv1.4.pth'):
|
||||
def load_face_restore_models(self, gfpgan_dir='./src/gfpgan', gfpgan_model_path='experiments/pretrained_models/GFPGANv1.4.pth'):
|
||||
# Load GFPGAN
|
||||
gfpgan = self.load_gfpgan(gfpgan_model_path)
|
||||
gfpgan = self.load_gfpgan(gfpgan_dir, gfpgan_model_path)
|
||||
if gfpgan.gfpgan_model_exists:
|
||||
print('>> GFPGAN Initialized')
|
||||
else:
|
||||
@@ -22,9 +22,9 @@ class Restoration():
|
||||
return gfpgan, codeformer
|
||||
|
||||
# Face Restore Models
|
||||
def load_gfpgan(self, gfpgan_model_path):
|
||||
def load_gfpgan(self, gfpgan_dir, gfpgan_model_path):
|
||||
from ldm.invoke.restoration.gfpgan import GFPGAN
|
||||
return GFPGAN(gfpgan_model_path)
|
||||
return GFPGAN(gfpgan_dir, gfpgan_model_path)
|
||||
|
||||
def load_codeformer(self):
|
||||
from ldm.invoke.restoration.codeformer import CodeFormerRestoration
|
||||
|
||||
@@ -10,14 +10,17 @@ from PIL import Image
|
||||
class GFPGAN():
|
||||
def __init__(
|
||||
self,
|
||||
gfpgan_model_path='./models/gfpgan/GFPGANv1.4.pth') -> None:
|
||||
gfpgan_dir='models/gfpgan',
|
||||
gfpgan_model_path='GFPGANv1.4.pth'
|
||||
) -> None:
|
||||
|
||||
self.model_path = os.path.join(gfpgan_model_path)
|
||||
self.model_path = os.path.join(gfpgan_dir, gfpgan_model_path)
|
||||
self.gfpgan_model_exists = os.path.isfile(self.model_path)
|
||||
|
||||
if not self.gfpgan_model_exists:
|
||||
print('## NOT FOUND: GFPGAN model not found at ' + self.model_path)
|
||||
return None
|
||||
sys.path.append(os.path.abspath(gfpgan_dir))
|
||||
|
||||
def model_exists(self):
|
||||
return os.path.isfile(self.model_path)
|
||||
@@ -48,7 +51,7 @@ class GFPGAN():
|
||||
f'>> WARNING: GFPGAN not initialized.'
|
||||
)
|
||||
print(
|
||||
f'>> Download https://github.com/TencentARC/GFPGAN/releases/download/v1.3.0/GFPGANv1.4.pth to {self.model_path}'
|
||||
f'>> Download https://github.com/TencentARC/GFPGAN/releases/download/v1.3.0/GFPGANv1.4.pth to {self.model_path}, \nor change GFPGAN directory with --gfpgan_dir.'
|
||||
)
|
||||
|
||||
image = image.convert('RGB')
|
||||
|
||||
@@ -28,12 +28,11 @@ class Outcrop(object):
|
||||
self.generate._set_sampler()
|
||||
|
||||
def wrapped_callback(img,seed,**kwargs):
|
||||
preferred_seed = orig_opt.seed if orig_opt.seed >= 0 else seed
|
||||
image_callback(img,preferred_seed,use_prefix=prefix,**kwargs)
|
||||
image_callback(img,orig_opt.seed,use_prefix=prefix,**kwargs)
|
||||
|
||||
result= self.generate.prompt2image(
|
||||
opt.prompt,
|
||||
seed = opt.seed or orig_opt.seed,
|
||||
orig_opt.prompt,
|
||||
seed = orig_opt.seed, # uncomment to make it deterministic
|
||||
sampler = self.generate.sampler,
|
||||
steps = opt.steps,
|
||||
cfg_scale = opt.cfg_scale,
|
||||
|
||||
@@ -282,6 +282,7 @@ class CrossAttention(nn.Module):
|
||||
|
||||
def get_attention_mem_efficient(self, q, k, v):
|
||||
if q.device.type == 'cuda':
|
||||
torch.cuda.empty_cache()
|
||||
#print("in get_attention_mem_efficient with q shape", q.shape, ", k shape", k.shape, ", free memory is", get_mem_free_total(q.device))
|
||||
return self.einsum_op_cuda(q, k, v)
|
||||
|
||||
|
||||
@@ -29,7 +29,6 @@ infile = None
|
||||
def main():
|
||||
"""Initialize command-line parsers and the diffusion model"""
|
||||
global infile
|
||||
print('* Initializing, be patient...')
|
||||
|
||||
opt = Args()
|
||||
args = opt.parse_args()
|
||||
@@ -47,6 +46,7 @@ def main():
|
||||
print('--max_loaded_models must be >= 1; using 1')
|
||||
args.max_loaded_models = 1
|
||||
|
||||
print('* Initializing, be patient...')
|
||||
from ldm.generate import Generate
|
||||
|
||||
# these two lines prevent a horrible warning message from appearing
|
||||
@@ -90,12 +90,7 @@ def main():
|
||||
safety_checker=opt.safety_checker,
|
||||
max_loaded_models=opt.max_loaded_models,
|
||||
)
|
||||
except FileNotFoundError:
|
||||
print('** You appear to be missing configs/models.yaml')
|
||||
print('** You can either exit this script and run scripts/preload_models.py, or fix the problem now.')
|
||||
emergency_model_create(opt)
|
||||
sys.exit(-1)
|
||||
except (IOError, KeyError) as e:
|
||||
except (FileNotFoundError, IOError, KeyError) as e:
|
||||
print(f'{e}. Aborting.')
|
||||
sys.exit(-1)
|
||||
|
||||
@@ -213,10 +208,7 @@ def main_loop(gen, opt):
|
||||
setattr(opt,attr,path)
|
||||
|
||||
# retrieve previous value of seed if requested
|
||||
# Exception: for postprocess operations negative seed values
|
||||
# mean "discard the original seed and generate a new one"
|
||||
# (this is a non-obvious hack and needs to be reworked)
|
||||
if opt.seed is not None and opt.seed < 0 and operation != 'postprocess':
|
||||
if opt.seed is not None and opt.seed < 0:
|
||||
try:
|
||||
opt.seed = last_results[opt.seed][1]
|
||||
print(f'>> Reusing previous seed {opt.seed}')
|
||||
@@ -285,7 +277,7 @@ def main_loop(gen, opt):
|
||||
filename = f'{prefix}.{use_prefix}.{seed}.png'
|
||||
tm = opt.text_mask[0]
|
||||
th = opt.text_mask[1] if len(opt.text_mask)>1 else 0.5
|
||||
formatted_dream_prompt = f'!mask {opt.input_file_path} -tm {tm} {th}'
|
||||
formatted_dream_prompt = f'!mask {opt.prompt} -tm {tm} {th}'
|
||||
path = file_writer.save_image_and_prompt_to_png(
|
||||
image = image,
|
||||
dream_prompt = formatted_dream_prompt,
|
||||
@@ -325,7 +317,7 @@ def main_loop(gen, opt):
|
||||
tool = re.match('postprocess:(\w+)',opt.last_operation).groups()[0]
|
||||
add_postprocessing_to_metadata(
|
||||
opt,
|
||||
opt.input_file_path,
|
||||
opt.prompt,
|
||||
filename,
|
||||
tool,
|
||||
formatted_dream_prompt,
|
||||
@@ -490,7 +482,6 @@ def do_command(command:str, gen, opt:Args, completer) -> tuple:
|
||||
command = '-h'
|
||||
return command, operation
|
||||
|
||||
|
||||
def add_weights_to_config(model_path:str, gen, opt, completer):
|
||||
print(f'>> Model import in process. Please enter the values needed to configure this model:')
|
||||
print()
|
||||
@@ -587,7 +578,7 @@ def write_config_file(conf_path, gen, model_name, new_config, clobber=False, mak
|
||||
|
||||
try:
|
||||
print('>> Verifying that new model loads...')
|
||||
gen.model_cache.add_model(model_name, new_config, clobber)
|
||||
yaml_str = gen.model_cache.add_model(model_name, new_config, clobber)
|
||||
assert gen.set_model(model_name) is not None, 'model failed to load'
|
||||
except AssertionError as e:
|
||||
print(f'** aborting **')
|
||||
@@ -613,7 +604,6 @@ def do_textmask(gen, opt, callback):
|
||||
image_path = os.path.join(opt.outdir,image_path)
|
||||
assert os.path.exists(image_path), '** "{opt.prompt}" not found. Please enter the name of an existing image file to mask **'
|
||||
assert opt.text_mask is not None and len(opt.text_mask) >= 1, '** Please provide a text mask with -tm **'
|
||||
opt.input_file_path = image_path
|
||||
tm = opt.text_mask[0]
|
||||
threshold = float(opt.text_mask[1]) if len(opt.text_mask) > 1 else 0.5
|
||||
gen.apply_textmask(
|
||||
@@ -624,17 +614,10 @@ def do_textmask(gen, opt, callback):
|
||||
)
|
||||
|
||||
def do_postprocess (gen, opt, callback):
|
||||
file_path = opt.prompt # treat the prompt as the file pathname
|
||||
if opt.new_prompt is not None:
|
||||
opt.prompt = opt.new_prompt
|
||||
else:
|
||||
opt.prompt = None
|
||||
|
||||
file_path = opt.prompt # treat the prompt as the file pathname
|
||||
if os.path.dirname(file_path) == '': #basename given
|
||||
file_path = os.path.join(opt.outdir,file_path)
|
||||
|
||||
opt.input_file_path = file_path
|
||||
|
||||
tool=None
|
||||
if opt.facetool_strength > 0:
|
||||
tool = opt.facetool
|
||||
@@ -673,10 +656,7 @@ def do_postprocess (gen, opt, callback):
|
||||
def add_postprocessing_to_metadata(opt,original_file,new_file,tool,command):
|
||||
original_file = original_file if os.path.exists(original_file) else os.path.join(opt.outdir,original_file)
|
||||
new_file = new_file if os.path.exists(new_file) else os.path.join(opt.outdir,new_file)
|
||||
try:
|
||||
meta = retrieve_metadata(original_file)['sd-metadata']
|
||||
except AttributeError:
|
||||
meta = retrieve_metadata(new_file)['sd-metadata']
|
||||
meta = retrieve_metadata(original_file)['sd-metadata']
|
||||
if 'image' not in meta:
|
||||
meta = metadata_dumps(opt,seeds=[opt.seed])['image']
|
||||
meta['image'] = {}
|
||||
@@ -724,7 +704,7 @@ def prepare_image_metadata(
|
||||
elif len(prior_variations) > 0:
|
||||
formatted_dream_prompt = opt.dream_prompt_str(seed=first_seed)
|
||||
elif operation == 'postprocess':
|
||||
formatted_dream_prompt = '!fix '+opt.dream_prompt_str(seed=seed,prompt=opt.input_file_path)
|
||||
formatted_dream_prompt = '!fix '+opt.dream_prompt_str(seed=seed)
|
||||
else:
|
||||
formatted_dream_prompt = opt.dream_prompt_str(seed=seed)
|
||||
return filename,formatted_dream_prompt
|
||||
@@ -809,7 +789,7 @@ def load_face_restoration(opt):
|
||||
from ldm.invoke.restoration import Restoration
|
||||
restoration = Restoration()
|
||||
if opt.restore:
|
||||
gfpgan, codeformer = restoration.load_face_restore_models(opt.gfpgan_model_path)
|
||||
gfpgan, codeformer = restoration.load_face_restore_models(opt.gfpgan_dir, opt.gfpgan_model_path)
|
||||
else:
|
||||
print('>> Face restoration disabled')
|
||||
if opt.esrgan:
|
||||
@@ -898,36 +878,6 @@ def write_commands(opt, file_path:str, outfilepath:str):
|
||||
f.write('\n'.join(commands))
|
||||
print(f'>> File {outfilepath} with commands created')
|
||||
|
||||
def emergency_model_create(opt:Args):
|
||||
completer = get_completer(opt)
|
||||
completer.complete_extensions(('.yaml','.yml','.ckpt','.vae.pt'))
|
||||
completer.set_default_dir('.')
|
||||
valid_path = False
|
||||
while not valid_path:
|
||||
weights_file = input('Enter the path to a downloaded models file, or ^C to exit: ')
|
||||
valid_path = os.path.exists(weights_file)
|
||||
dir,basename = os.path.split(weights_file)
|
||||
|
||||
valid_name = False
|
||||
while not valid_name:
|
||||
name = input('Enter a short name for this model (no spaces): ')
|
||||
name = 'unnamed model' if len(name)==0 else name
|
||||
valid_name = ' ' not in name
|
||||
|
||||
description = input('Enter a description for this model: ')
|
||||
description = 'no description' if len(description)==0 else description
|
||||
|
||||
with open(opt.conf, 'w', encoding='utf-8') as f:
|
||||
f.write(f'{name}:\n')
|
||||
f.write(f' description: {description}\n')
|
||||
f.write(f' weights: {weights_file}\n')
|
||||
f.write(f' config: ./configs/stable-diffusion/v1-inference.yaml\n')
|
||||
f.write(f' width: 512\n')
|
||||
f.write(f' height: 512\n')
|
||||
f.write(f' default: true\n')
|
||||
print(f'Config file {opt.conf} is created. This script will now exit.')
|
||||
print(f'After restarting you may examine the entry with !models and edit it with !edit.')
|
||||
|
||||
######################################
|
||||
|
||||
if __name__ == '__main__':
|
||||
|
||||
@@ -487,8 +487,14 @@ def create_argv_parser():
|
||||
parser.add_argument(
|
||||
'--gfpgan_model_path',
|
||||
type=str,
|
||||
default='./models/gfpgan/GFPGANv1.4.pth',
|
||||
help='Indicates the path to the GFPGAN model.',
|
||||
default='experiments/pretrained_models/GFPGANv1.3.pth',
|
||||
help='Indicates the path to the GFPGAN model, relative to --gfpgan_dir.',
|
||||
)
|
||||
parser.add_argument(
|
||||
'--gfpgan_dir',
|
||||
type=str,
|
||||
default='./src/gfpgan',
|
||||
help='Indicates the directory containing the GFPGAN code.',
|
||||
)
|
||||
parser.add_argument(
|
||||
'--web',
|
||||
|
||||
@@ -104,15 +104,13 @@ def postscript():
|
||||
print(
|
||||
'''\n** Model Installation Successful **\nYou're all set! You may now launch InvokeAI using one of these two commands:
|
||||
Web version:
|
||||
|
||||
python scripts/invoke.py --web (connect to http://localhost:9090)
|
||||
|
||||
Command-line version:
|
||||
|
||||
python scripts/invoke.py
|
||||
|
||||
Remember to activate that 'invokeai' environment before running invoke.py.
|
||||
|
||||
Or, if you used one of the automated installers, execute "invoke.sh" (Linux/Mac)
|
||||
or "invoke.bat" (Windows) to start the script.
|
||||
|
||||
Have fun!
|
||||
'''
|
||||
)
|
||||
@@ -448,15 +446,15 @@ def download_gfpgan():
|
||||
for model in (
|
||||
[
|
||||
'https://github.com/TencentARC/GFPGAN/releases/download/v1.3.0/GFPGANv1.4.pth',
|
||||
'./models/gfpgan/GFPGANv1.4.pth'
|
||||
'models/gfpgan/GFPGANv1.4.pth'
|
||||
],
|
||||
[
|
||||
'https://github.com/xinntao/facexlib/releases/download/v0.1.0/detection_Resnet50_Final.pth',
|
||||
'./models/gfpgan/weights/detection_Resnet50_Final.pth'
|
||||
'models/gfpgan/weights/detection_Resnet50_Final.pth'
|
||||
],
|
||||
[
|
||||
'https://github.com/xinntao/facexlib/releases/download/v0.2.2/parsing_parsenet.pth',
|
||||
'./models/gfpgan/weights/parsing_parsenet.pth'
|
||||
'models/gfpgan/weights/parsing_parsenet.pth'
|
||||
],
|
||||
):
|
||||
model_url,model_dest = model
|
||||
|
||||
@@ -16,7 +16,6 @@ rm -rf invokeAI
|
||||
mkdir -p invokeAI
|
||||
cp install.bat invokeAI
|
||||
cp readme.txt invokeAI
|
||||
cp WinLongPathsEnabled.reg invokeAI
|
||||
|
||||
zip -r invokeAI-src-installer-windows.zip invokeAI
|
||||
|
||||
|
||||
@@ -72,7 +72,7 @@ if not exist ".git" (
|
||||
call git config --local init.defaultBranch main
|
||||
call git remote add origin %REPO_URL%
|
||||
call git fetch
|
||||
call git checkout origin/main -ft
|
||||
call git checkout origin/release-candidate-2-1-3 -ft
|
||||
)
|
||||
|
||||
@rem activate the base env
|
||||
@@ -80,7 +80,7 @@ call conda activate
|
||||
|
||||
@rem create the environment
|
||||
call conda env remove -n invokeai
|
||||
copy environments-and-requirements\environment-win-cuda.yml environment.yml
|
||||
cp environments-and-requirements\environment-win-cuda.yml environment.yml
|
||||
call conda env create
|
||||
if "%ERRORLEVEL%" NEQ "0" (
|
||||
echo ""
|
||||
@@ -92,8 +92,8 @@ if "%ERRORLEVEL%" NEQ "0" (
|
||||
exit /b
|
||||
)
|
||||
|
||||
copy source_installer\invoke.bat invoke.bat
|
||||
copy source_installer\update.bat update.bat
|
||||
cp source_installer/install.bat install.bat
|
||||
cp source_installer/update.bat update.bat
|
||||
|
||||
call conda activate invokeai
|
||||
@rem preload the models
|
||||
|
||||
@@ -86,7 +86,7 @@ if [ ! -e ".git" ]; then
|
||||
git config --local init.defaultBranch main
|
||||
git remote add origin "$REPO_URL"
|
||||
git fetch
|
||||
git checkout origin/main -ft
|
||||
git checkout origin/release-candidate-2-1-3 -ft
|
||||
fi
|
||||
|
||||
# create the environment
|
||||
@@ -116,9 +116,8 @@ then
|
||||
echo "Please visit https://invoke-ai.github.io/InvokeAI/#installation for alternative"
|
||||
echo "installation methods"
|
||||
else
|
||||
ln -sf ./source_installer/invoke.sh .
|
||||
ln -sf ./source_installer/update.sh .
|
||||
|
||||
ln -sf source_installer/install.sh .
|
||||
ln -sf source_installer/update.sh .
|
||||
conda activate invokeai
|
||||
# preload the models
|
||||
echo "Calling the preload_models.py script"
|
||||
|
||||
@@ -3,14 +3,9 @@ InvokeAI
|
||||
Project homepage: https://github.com/invoke-ai/InvokeAI
|
||||
|
||||
Installation on Windows:
|
||||
You may need to enable Windows Long Paths to install InvokeAI. If you're not
|
||||
sure what this is, you almost certainly need to do this. Simply double-click the
|
||||
"WinLongPathsEnabled.reg" file located in this directory, and approve the Windows
|
||||
warnings. Note that you will need to have admin privileges in order to do this.
|
||||
|
||||
Then double-click the 'install.bat' file (while keeping it inside the invokeAI folder).
|
||||
Please double-click the 'install.bat' file (while keeping it inside the invokeAI folder).
|
||||
|
||||
Installation on Linux and Mac:
|
||||
Please open the terminal, and run './install.sh' (while keeping it inside the invokeAI folder).
|
||||
|
||||
After installation, please run the 'invoke.bat' file (on Windows) or 'invoke.sh' file (on Linux/Mac) to start InvokeAI.
|
||||
After installation, please run the 'invoke.bat' file (on Windows) or 'invoke.sh' file (on Linux/Mac) to start InvokeAI.
|
||||
Reference in New Issue
Block a user